Turn on the kiosk and set your check-in windows
Go to Settings and open Check-In Kiosk.
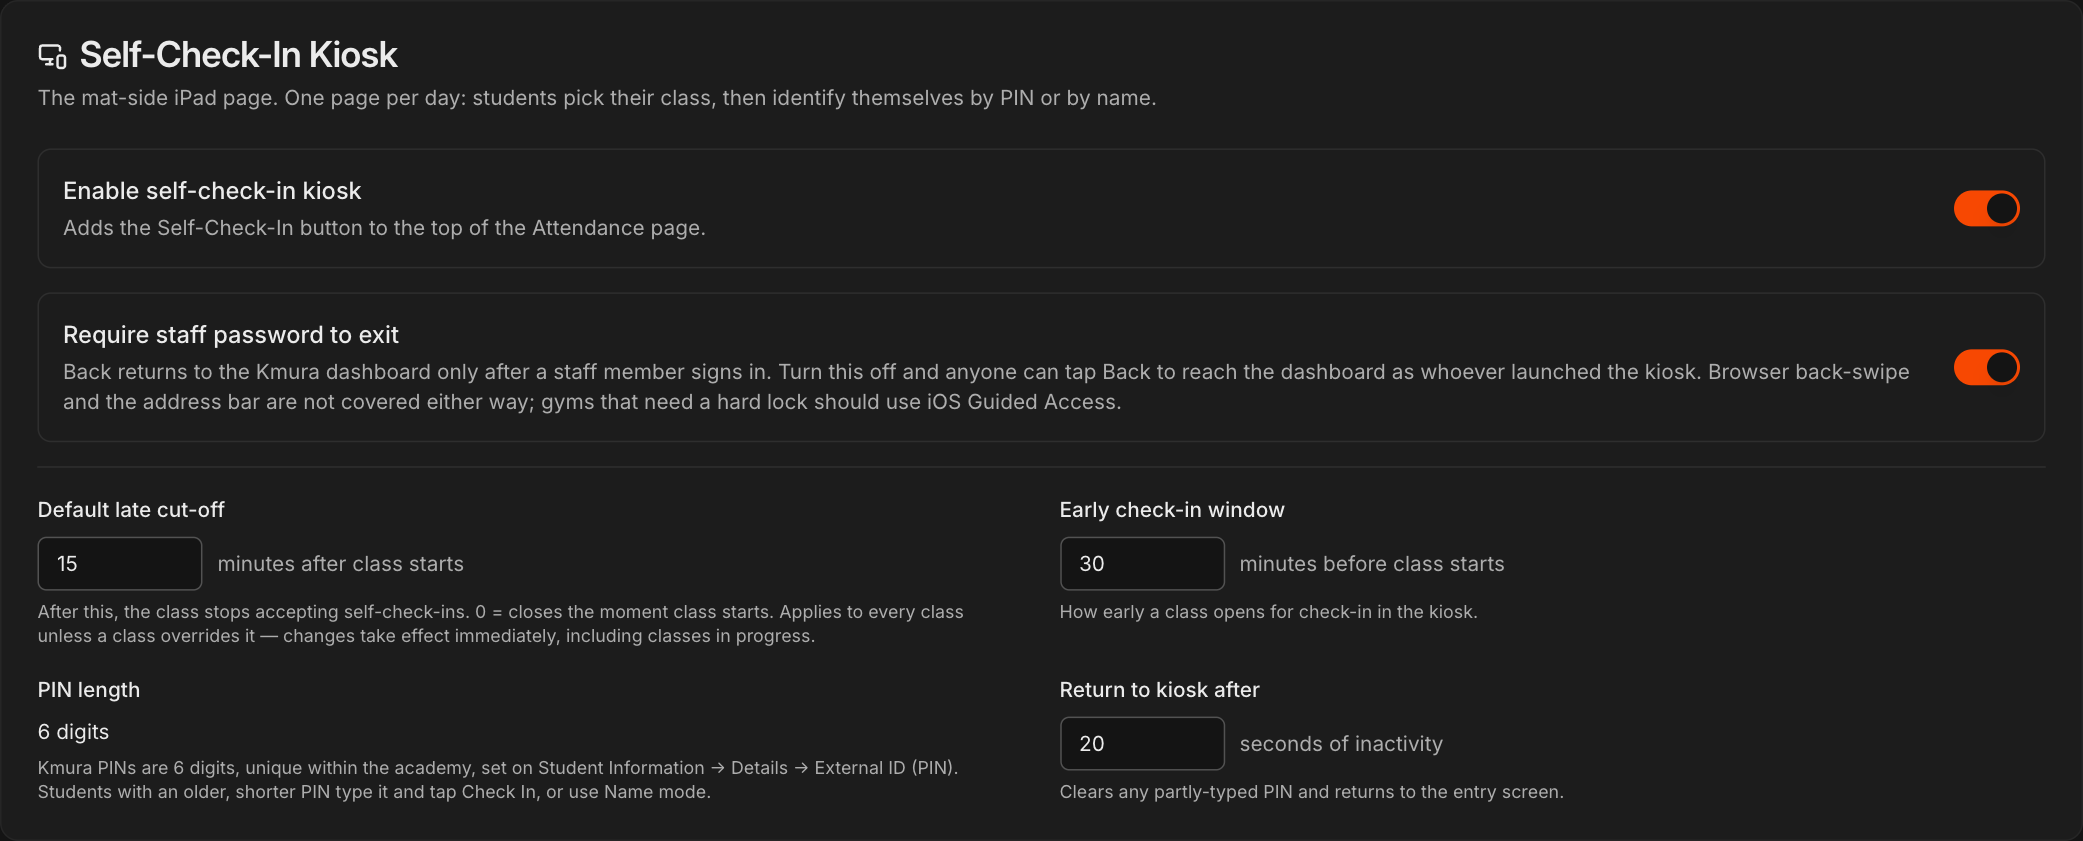
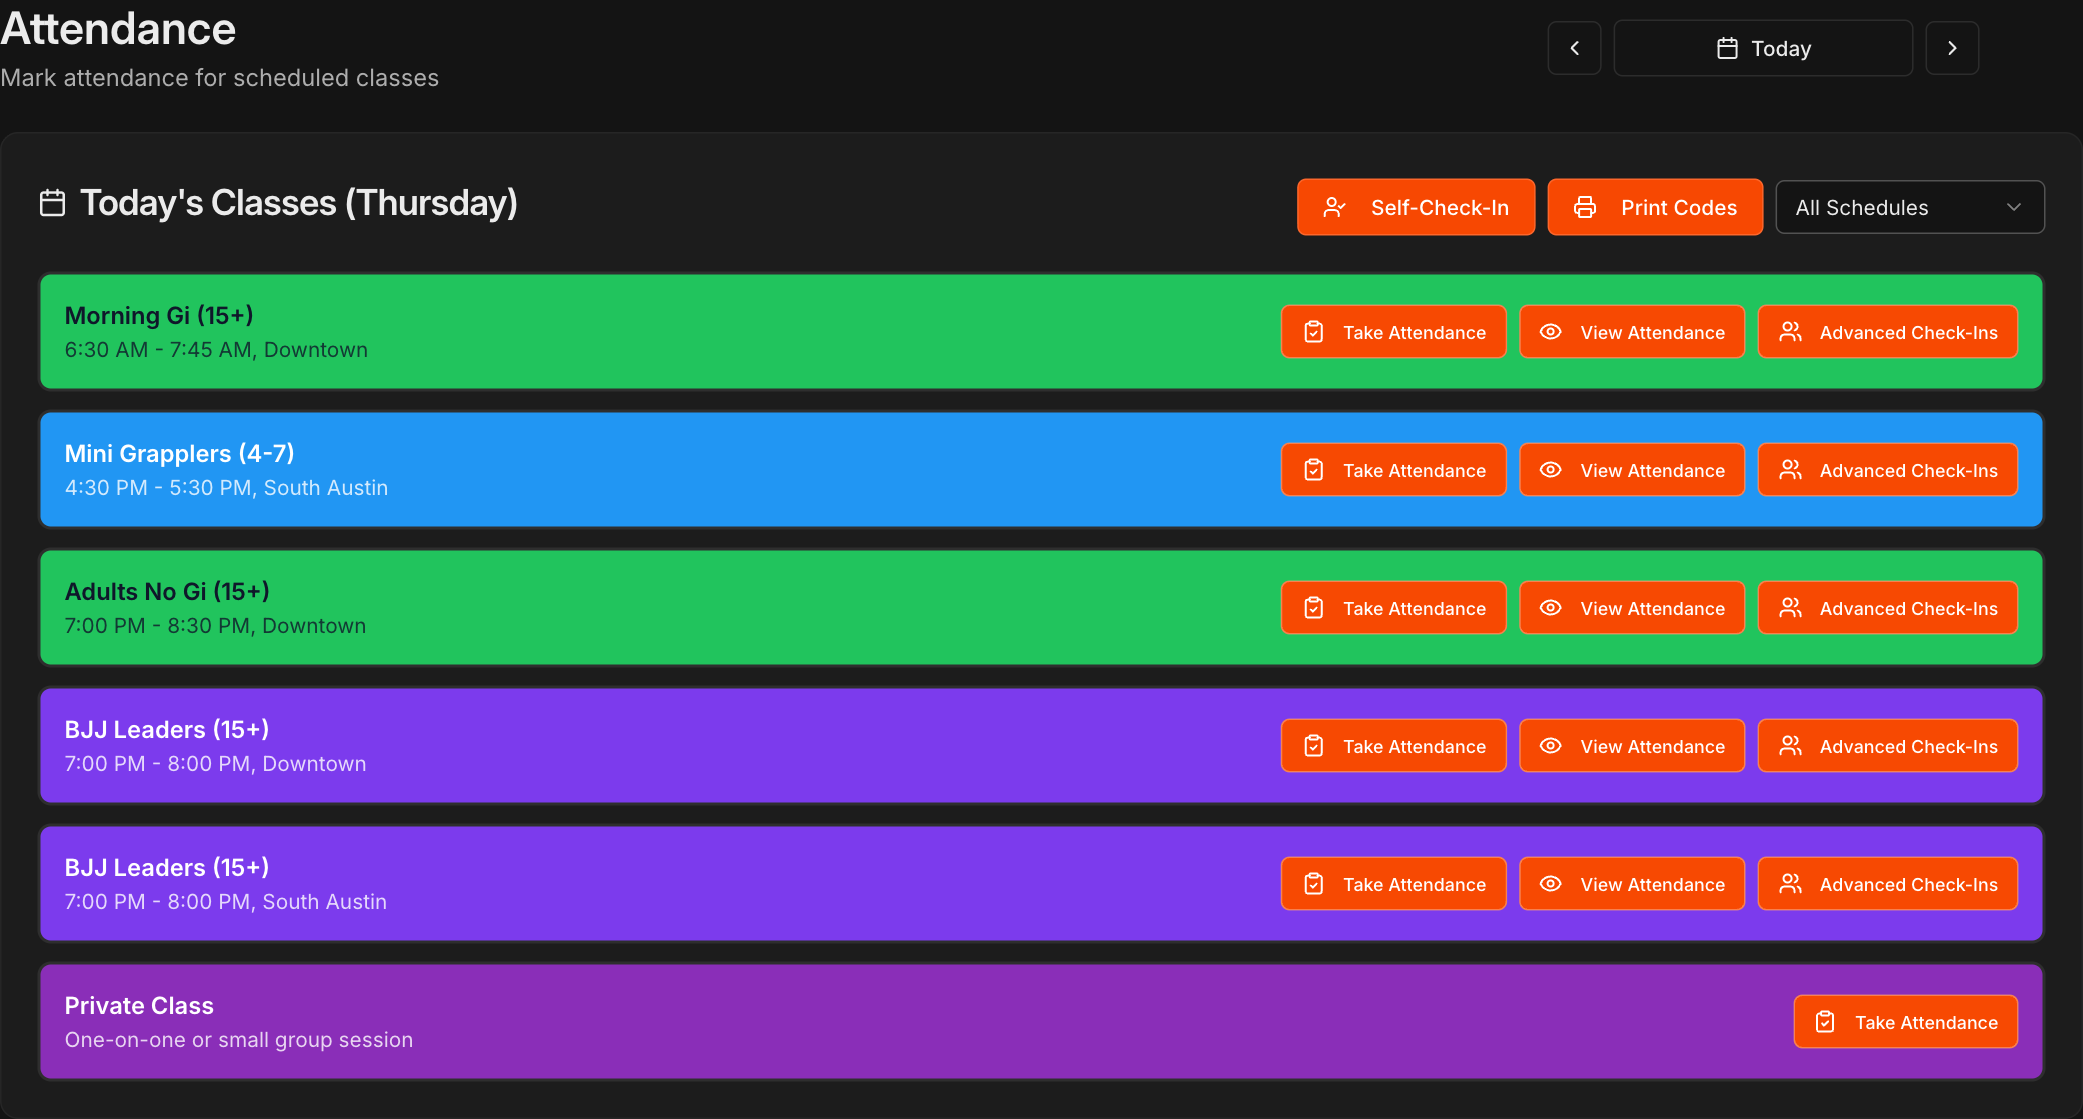
Switch on Enable self-check-in kiosk, which adds the Self-Check-In button to the top of the Attendance page.
Set Early check-in window to how many minutes before a class starts the kiosk should open it.
Set Default late cut-off to how many minutes after a class starts the kiosk should stop accepting check-ins.
Set Return to kiosk after to how many idle seconds clear a partly typed PIN. PIN length is always 6 digits.
Note
A **Default late cut-off** of 0 closes check-in the moment class starts. Changes take effect immediately, including for classes already in progress.
Decide how staff exit the kiosk
In the same Self-Check-In Kiosk section, switch Require staff password to exit on or off.
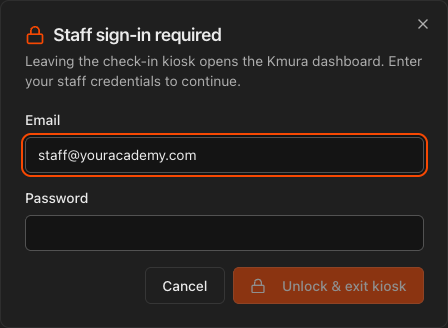
With it on, tapping Back opens a Staff sign-in required dialog and the kiosk returns to the dashboard only after a staff member signs in.
With it off, anyone can tap Back and land in your dashboard as whoever launched the kiosk.
Caution
This covers the **Back** button only. Browser back-swipe and the address bar stay open either way, so use iOS Guided Access on a shared iPad if you need a hard lock.
Give every student a PIN
Every Kmura PIN is 6 digits, numbers only, and unique within your academy. New and imported students get one automatically.
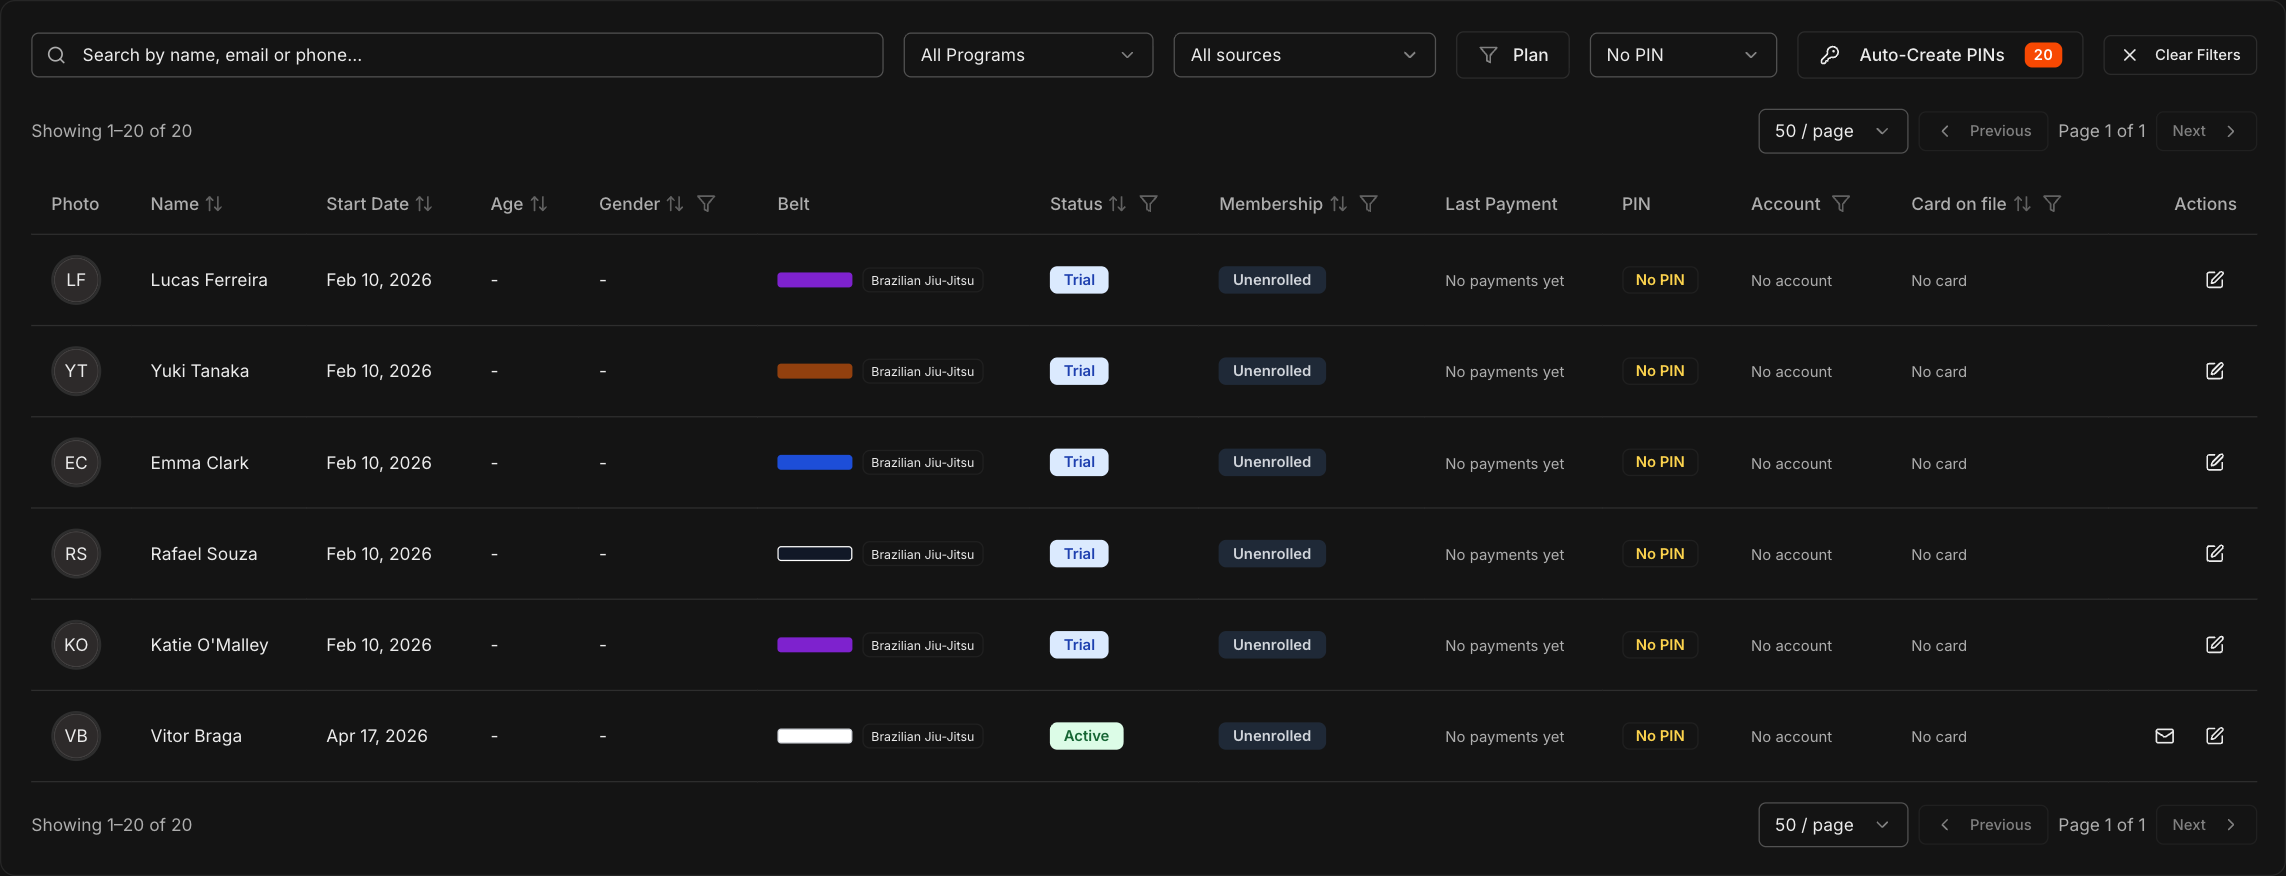
On the Students page, the PIN column shows each student's PIN. Set the All PINs filter to No PIN to find anyone without one.
Click Auto-Create PINs to give all of them a random 6-digit PIN at once. Students who already have a PIN keep it.
To set one by hand, open the student's Details tab and edit External ID (PIN). Kmura will not save a PIN that is the wrong length or already belongs to another student.
Note
Students with an older, shorter PIN keep it until you change it. At the kiosk they type it and tap **Check In**, or use **Name** mode.
Print check-in cards
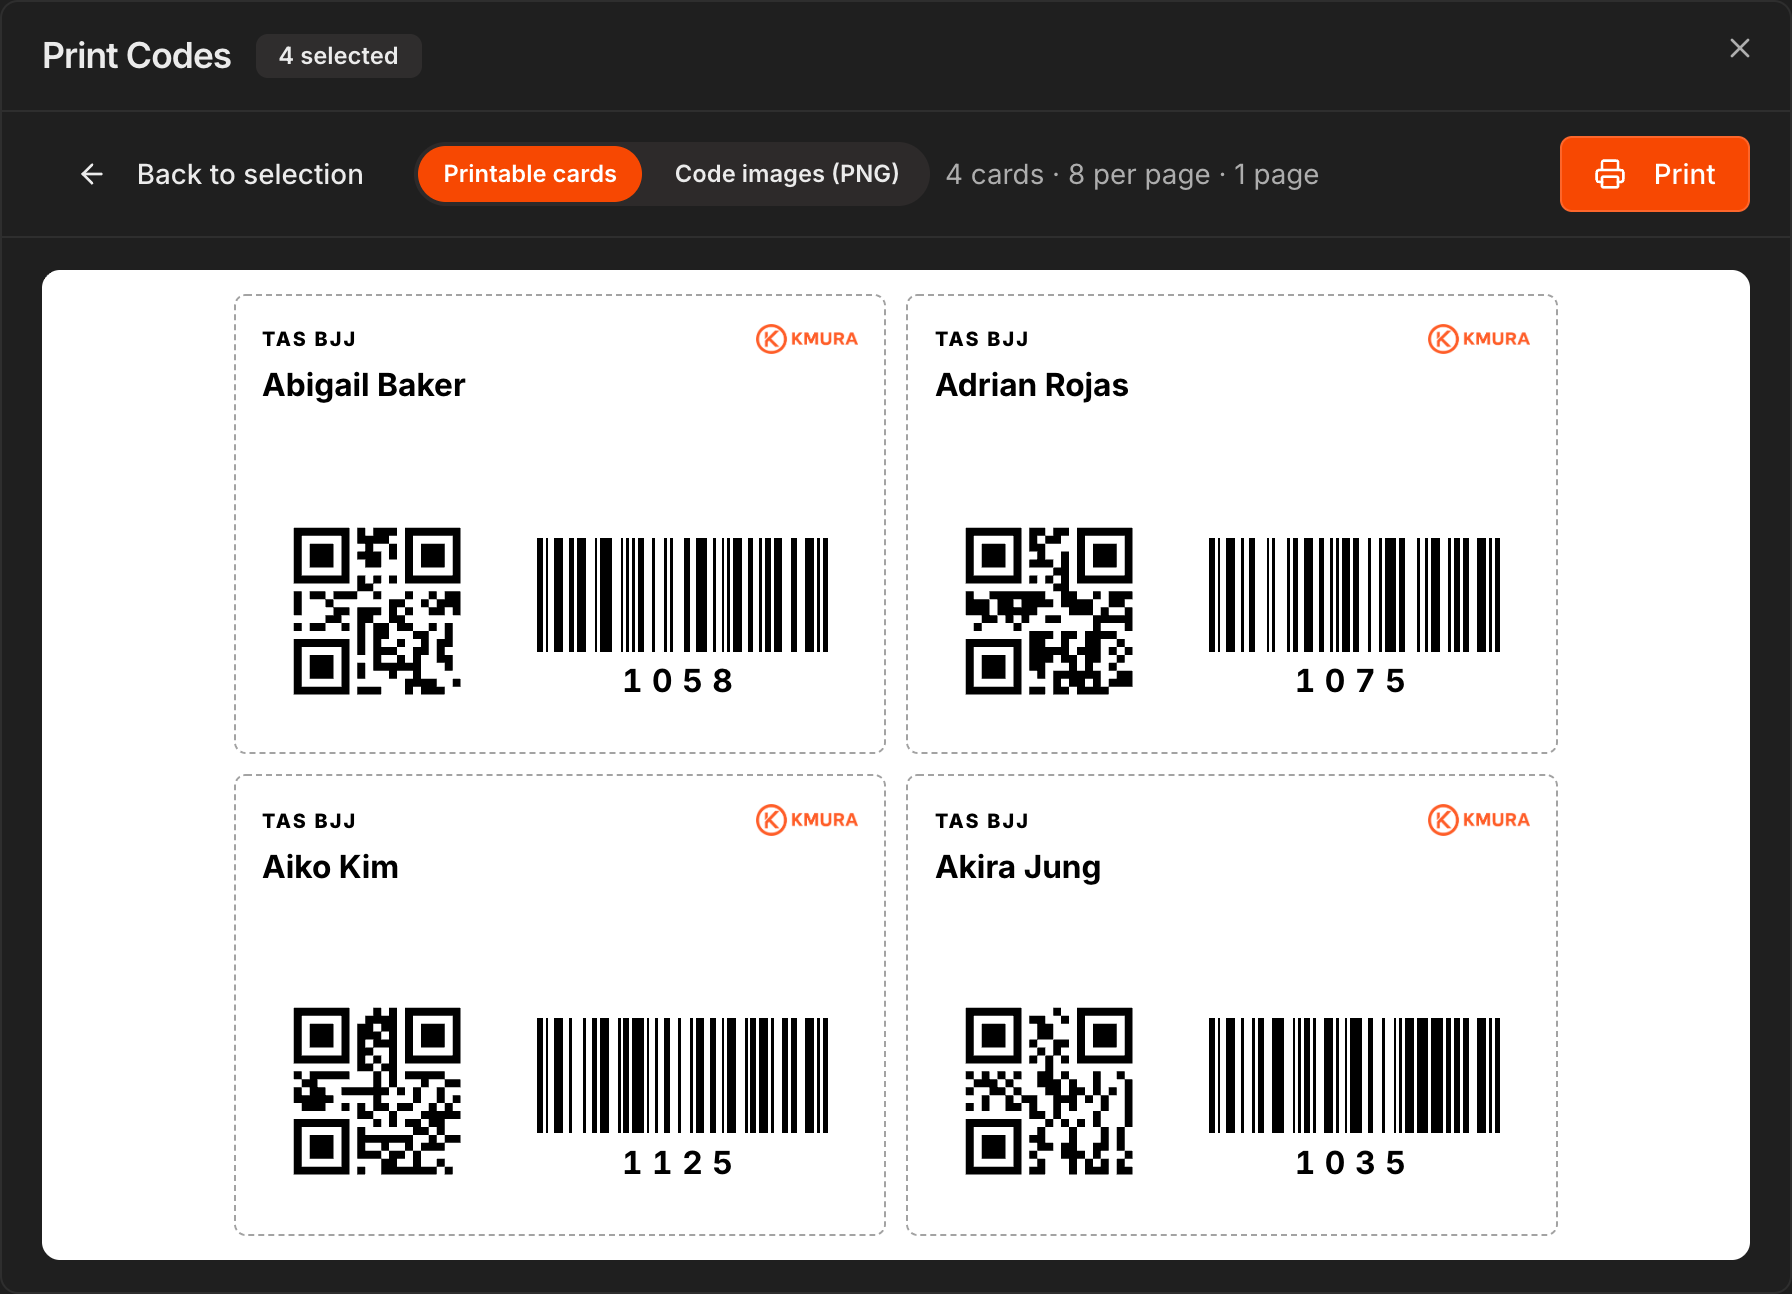
On the Attendance page, click Print Codes, tick the students you want (or Select all students), and click Preview cards.
Each card shows your school logo, the Kmura logo, the student's name, a QR code, a barcode, and the PIN in readable digits. Cards print 8 to a page.
Click Print, or switch to Code images (PNG) to download just the codes for your own card design.
To print one student's card, open their Details tab and click Print Card next to External ID (PIN). Download Codes saves their codes as images.
Note
The codes carry a scan code that Kmura assigns and nobody can edit, so changing a student's PIN never breaks a printed card. If a card is lost, click **Reissue code** on the **Details** tab and print a new one; the old card stops working.
Open the kiosk from the Attendance page
In the left menu, click Attendance.
Click Self-Check-In at the top of the classes list, beside Print Codes and the All Schedules filter.
Leave that page open on the iPad or computer at your front desk or mat entrance.
Note
The self-check-in button used to sit inside each class bubble. It now lives once at the top, and the page it opens covers every class on the selected day.
Pick the class, or let the kiosk pick it
The kiosk opens on the class happening now, or the one closest to the current time.
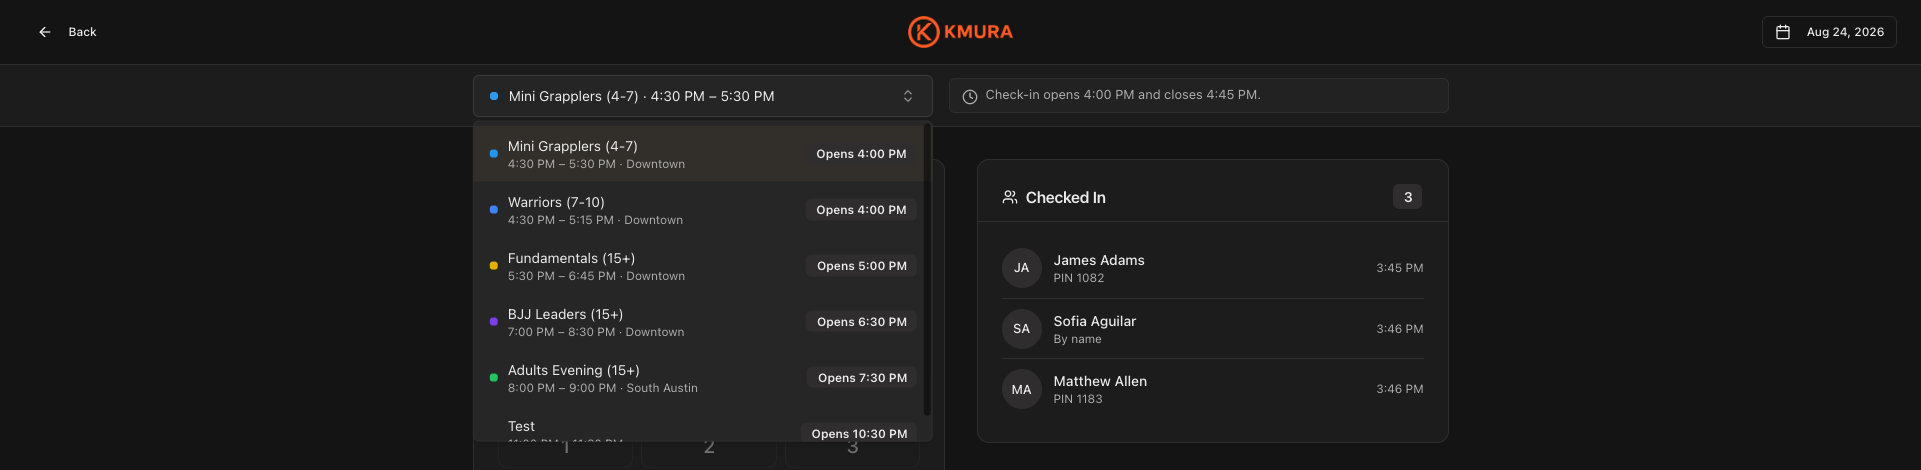
To change it, open the class dropdown at the top left and choose any other class that day.
Each entry in the list shows its time, its schedule, and the time its check-in window opens.
The banner beside the dropdown shows when check-in opens and closes for the selected class.
Note
The kiosk enforces your waiver required for attendance. A student who has not signed it is asked to sign before the check-in completes.
Students check in by PIN or by name
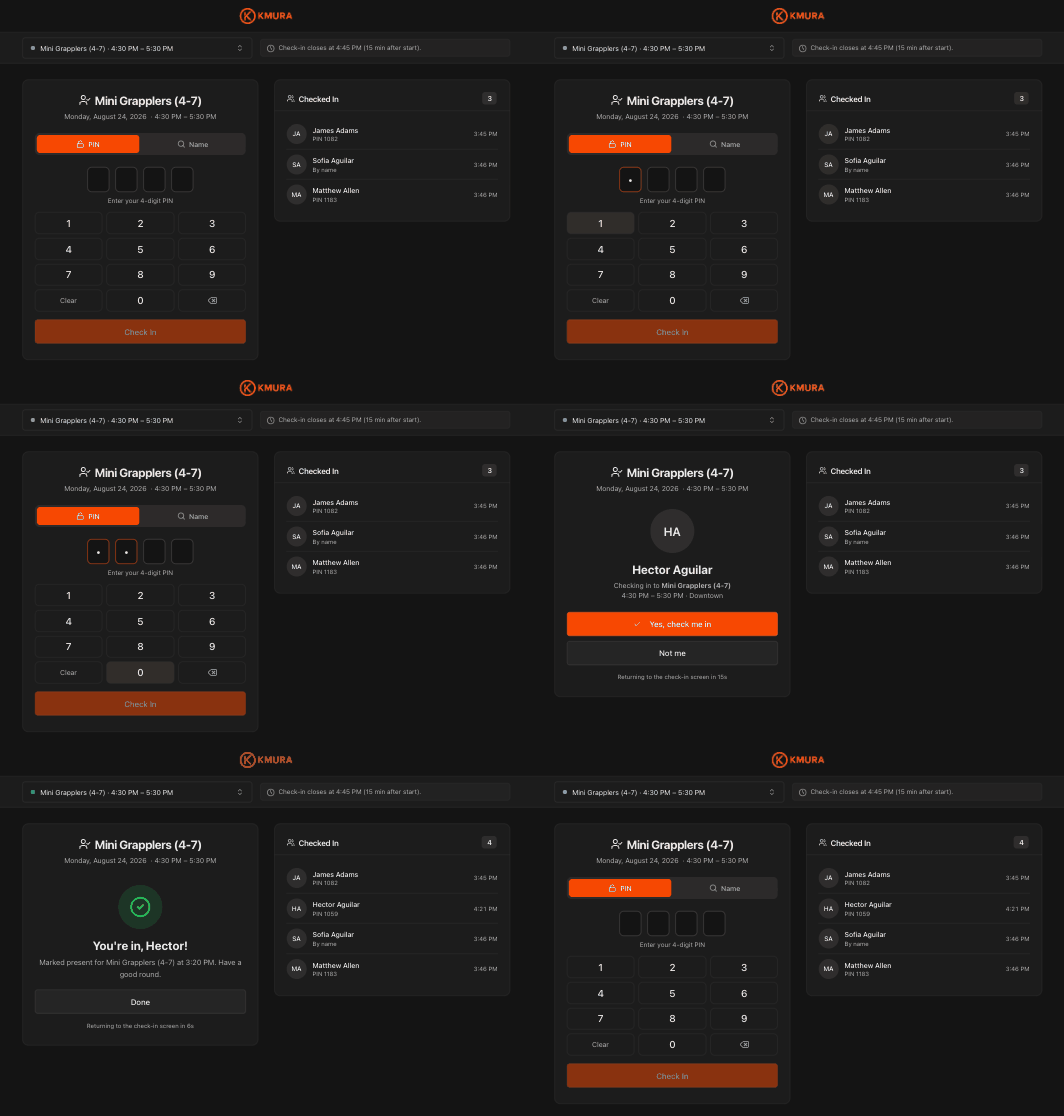
On the PIN tab, a student taps their 6-digit PIN on the keypad and the kiosk advances as soon as the last digit lands. A student with a shorter PIN taps Check In.
On the Name tab, a student opens Select student..., types part of their name, and picks themselves from the list.
Either route shows a confirmation card with their name and class, where they tap Yes, check me in or Not me.
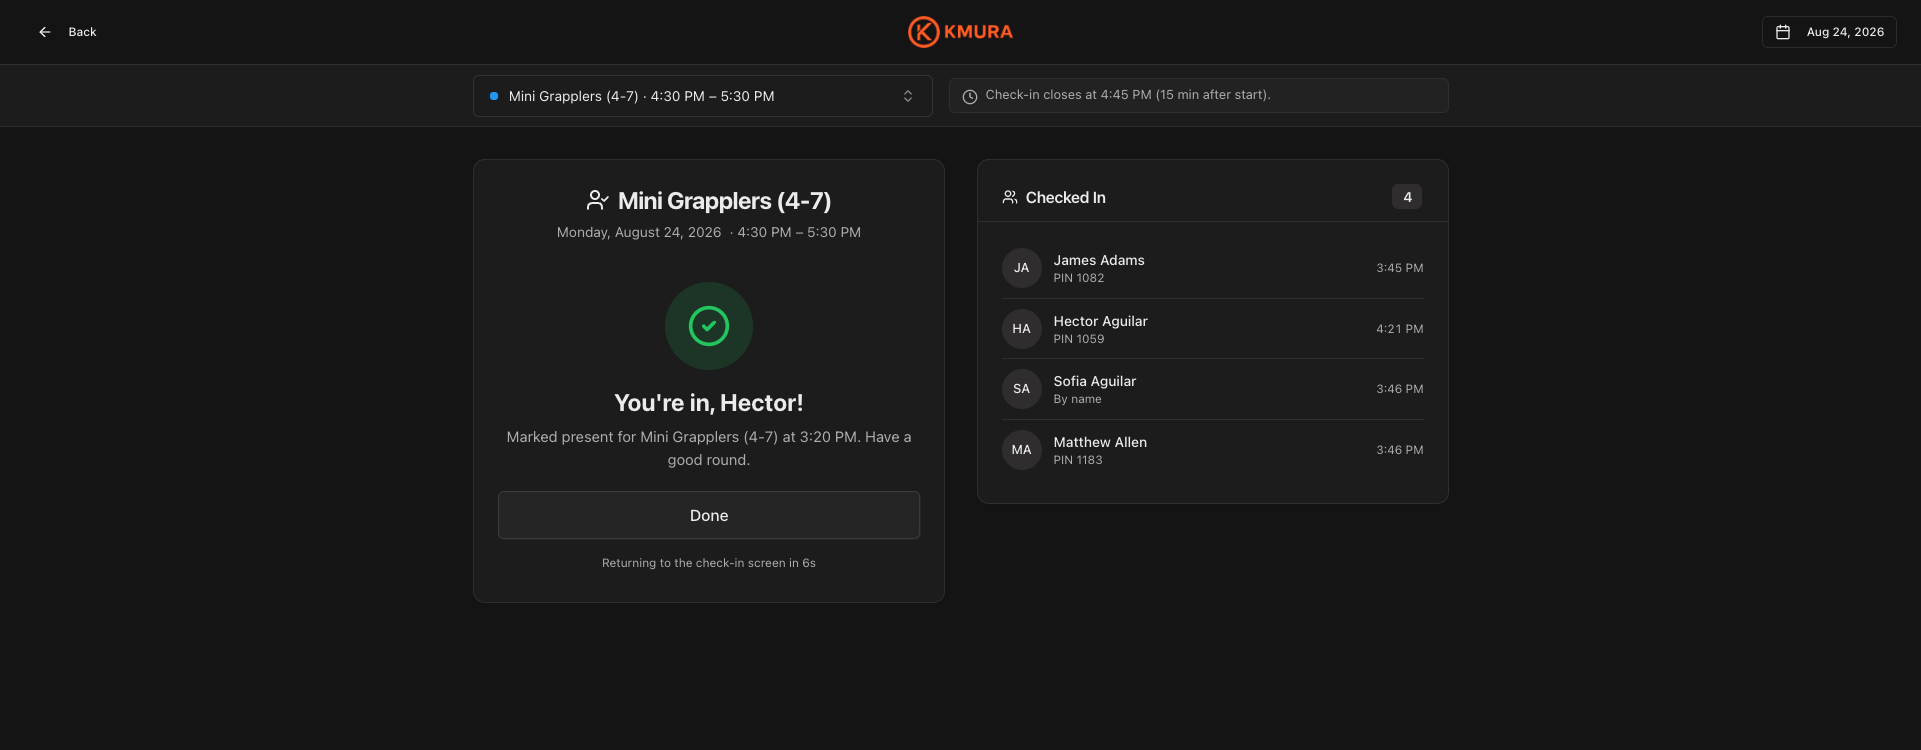
A green You're in screen confirms the check-in, then the kiosk resets for the next student.
The Checked In panel lists everyone who has checked in, whether they used a PIN or their name, and when. It refreshes about every 10 seconds.
Tip
Outside the check-in window the button reads **Not open yet** and the keypad is disabled, so nobody checks in early or late by accident.
Students check in by scanning their card
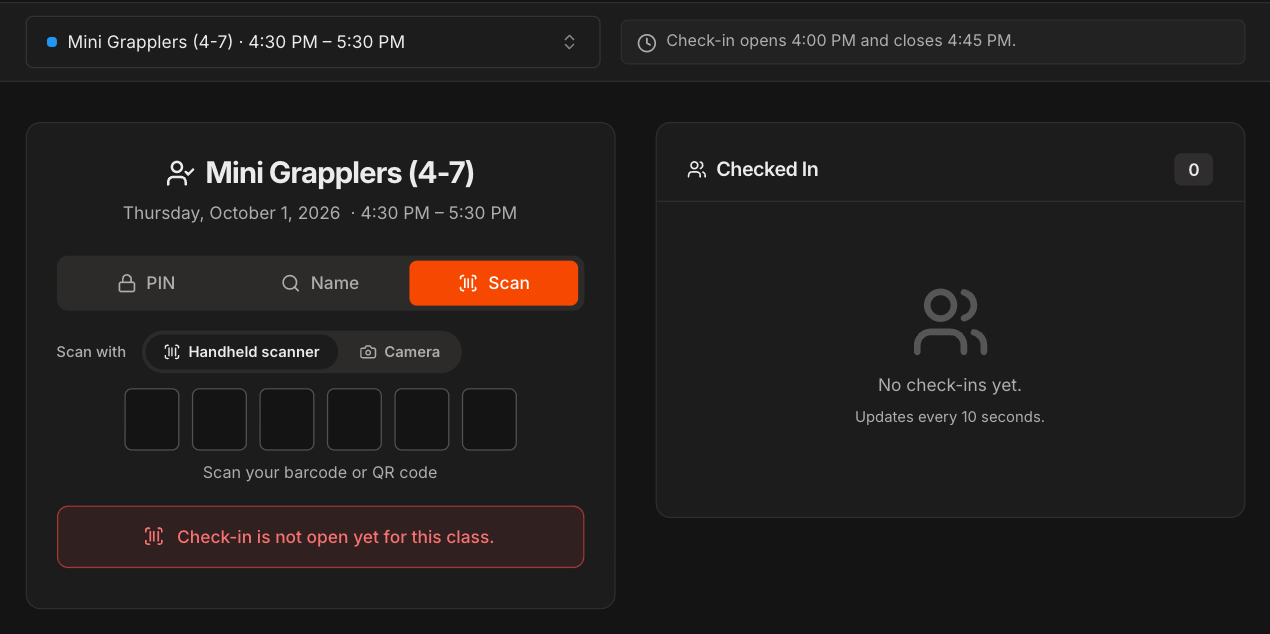
On the Scan tab, a student scans the barcode or QR code on their card. Choose Handheld scanner for a USB scanner, or Camera to read QR codes with the device's own camera.
The PIN boxes fill, the student's name appears, and the kiosk checks them in and resets in about two seconds. No tap is needed, because the card is the confirmation.
Note
Outside the check-in window, the **Scan** tab reads **Check-in is not open yet for this class.**
Tip
A plain USB barcode scanner works with no drivers or setup. Plug it into the device running the kiosk.
Override the cut-off for a single class
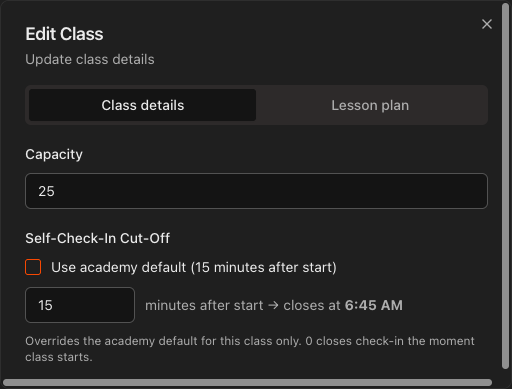
Open Schedule, click the class, then click Edit Class.
Under Self-Check-In Cut-Off, clear Use academy default.
Enter the minutes after start time that this class should stop accepting check-ins.
Kmura shows the exact closing time as you type.
Tip
Use this for classes that run on a different rhythm, like an open mat where late arrivals are fine.