Find your way around Settings
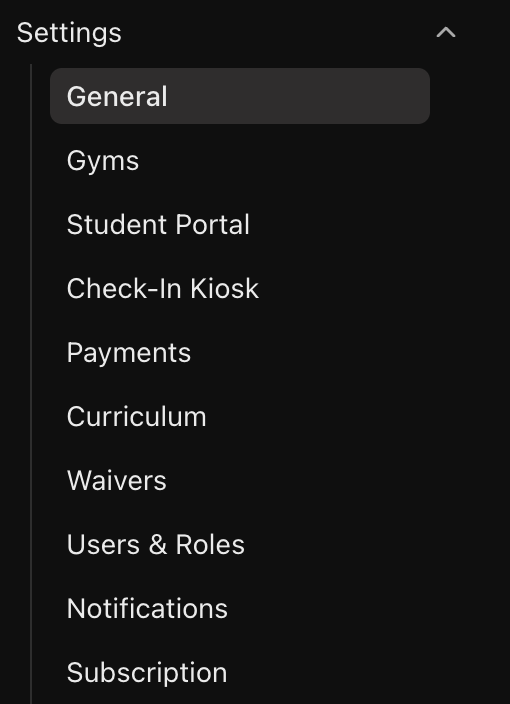
Click Settings in the left menu to expand it. Each area has its own page: General, Gyms, Student Portal, Check-In Kiosk, Payments, Curriculum, Waivers, Users & Roles, Notifications and Subscription.
This guide walks the pages in the order a new academy needs them.
Set your reply-to email, page URL and logo
Open Settings > General.
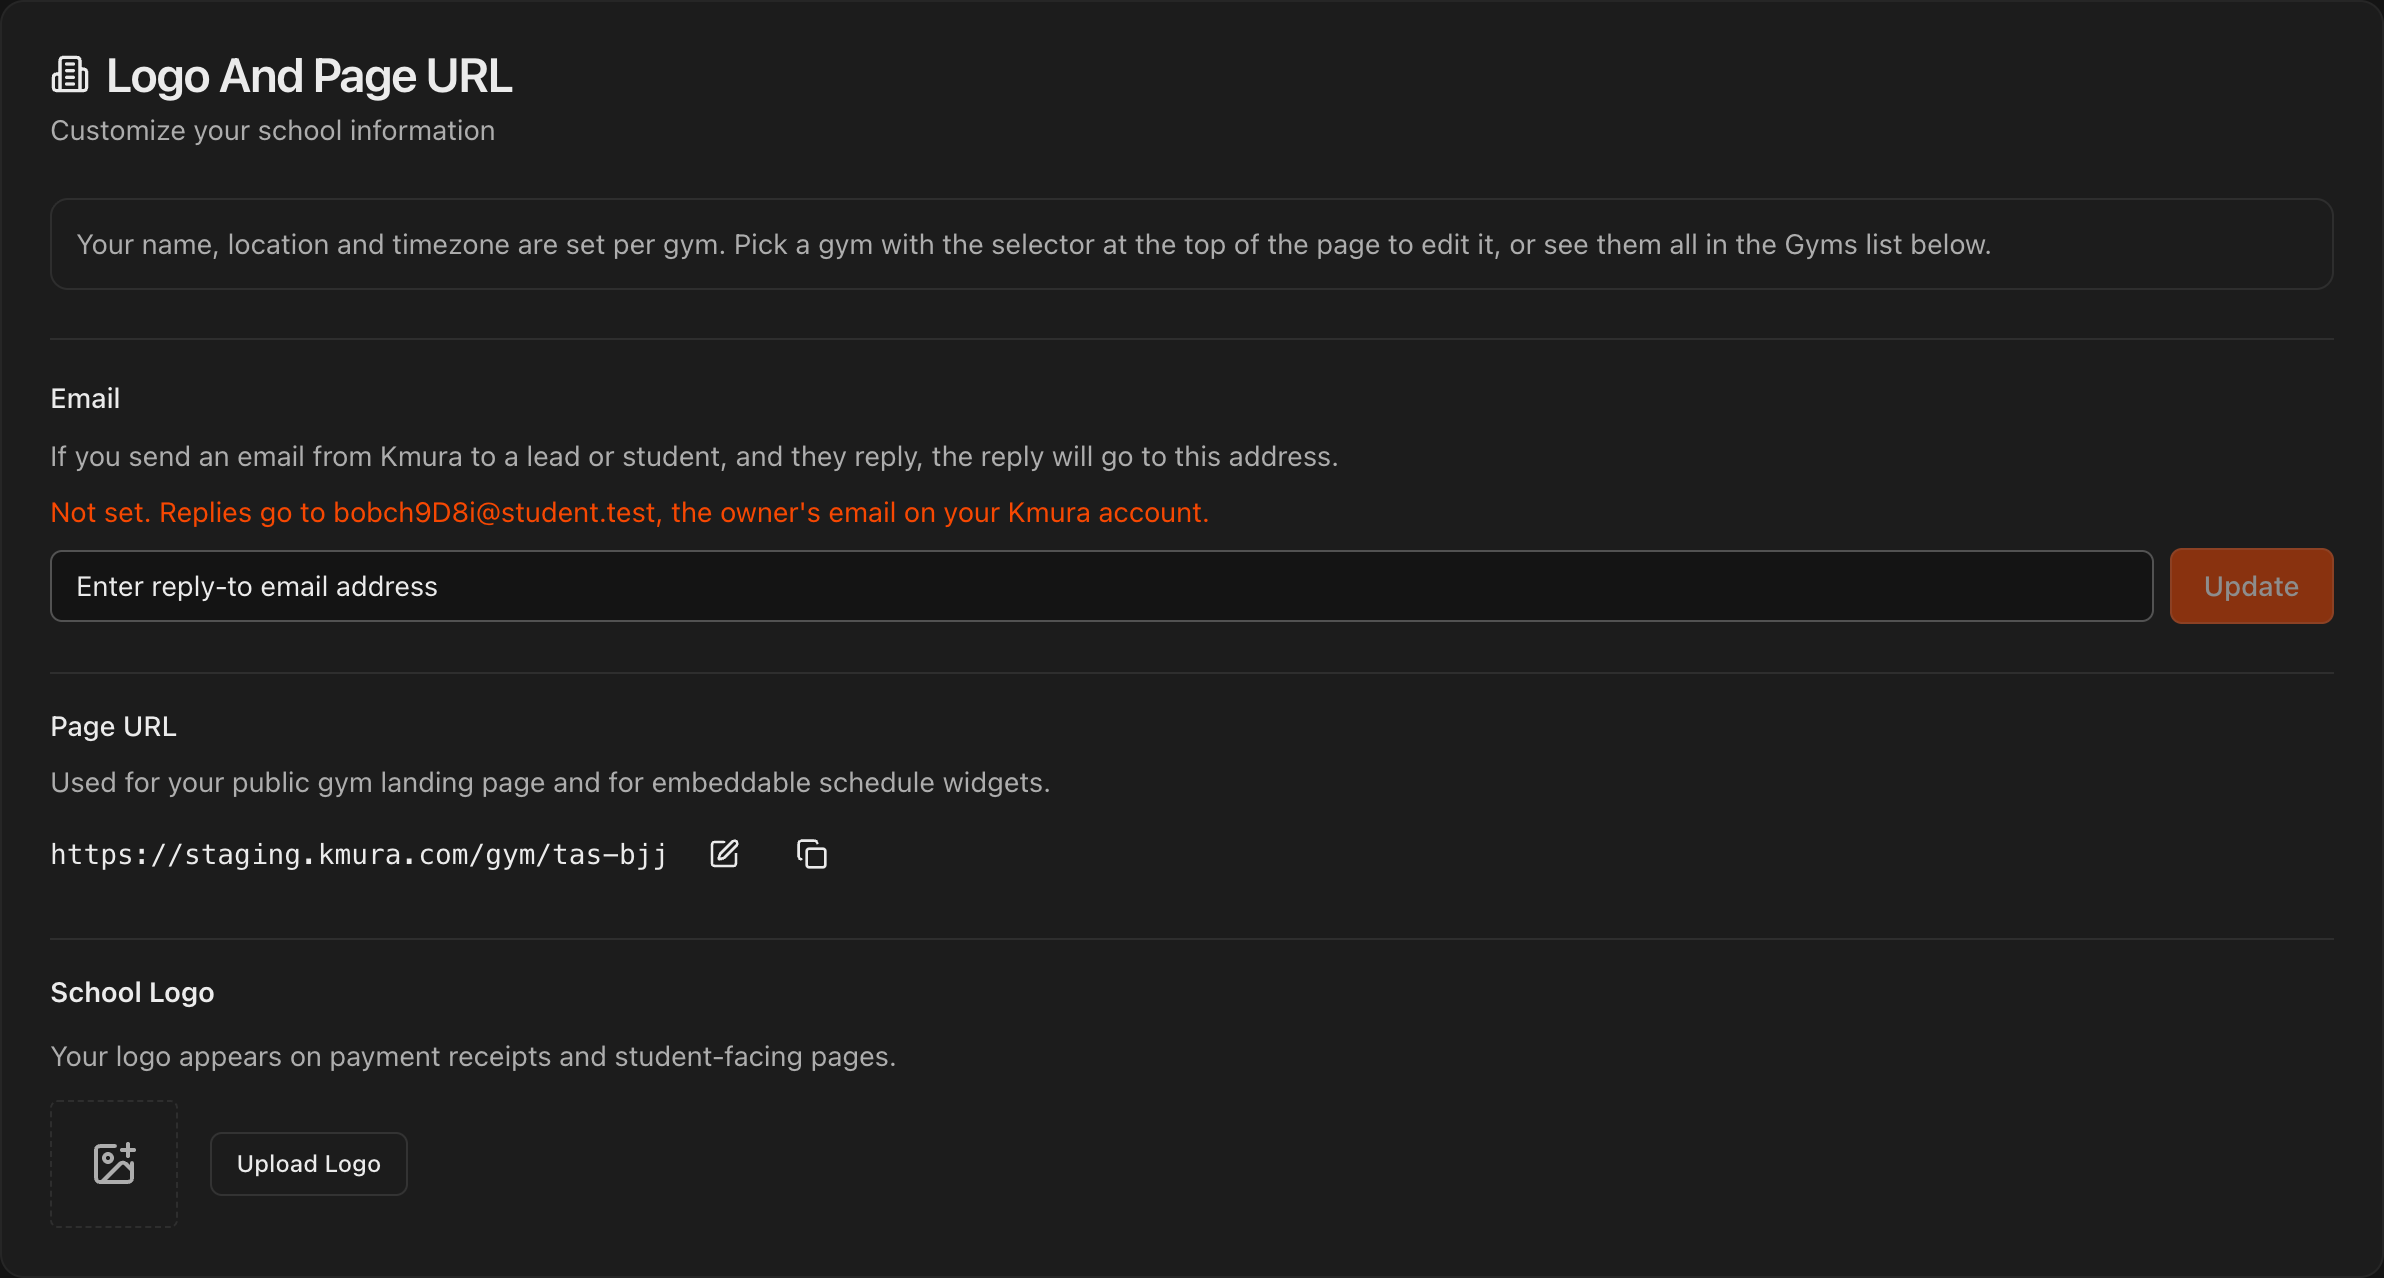
Under Email, enter the address that should receive replies when a lead or student answers an email sent from Kmura, and click Update.
Your Page URL powers your public landing page and embeddable schedule widgets. Use the pencil to change it.
Under School Logo, click Upload Logo and choose a PNG, JPEG, or WebP file. It appears on emails Kmura sends for you, on payment receipts, and on student-facing pages.
Tip
A square logo works best. It is displayed in a small square on emails and receipts, so avoid wide banner-style files.
Confirm your gym's name, location and timezone
Open Settings > Gyms and click Edit on your gym.
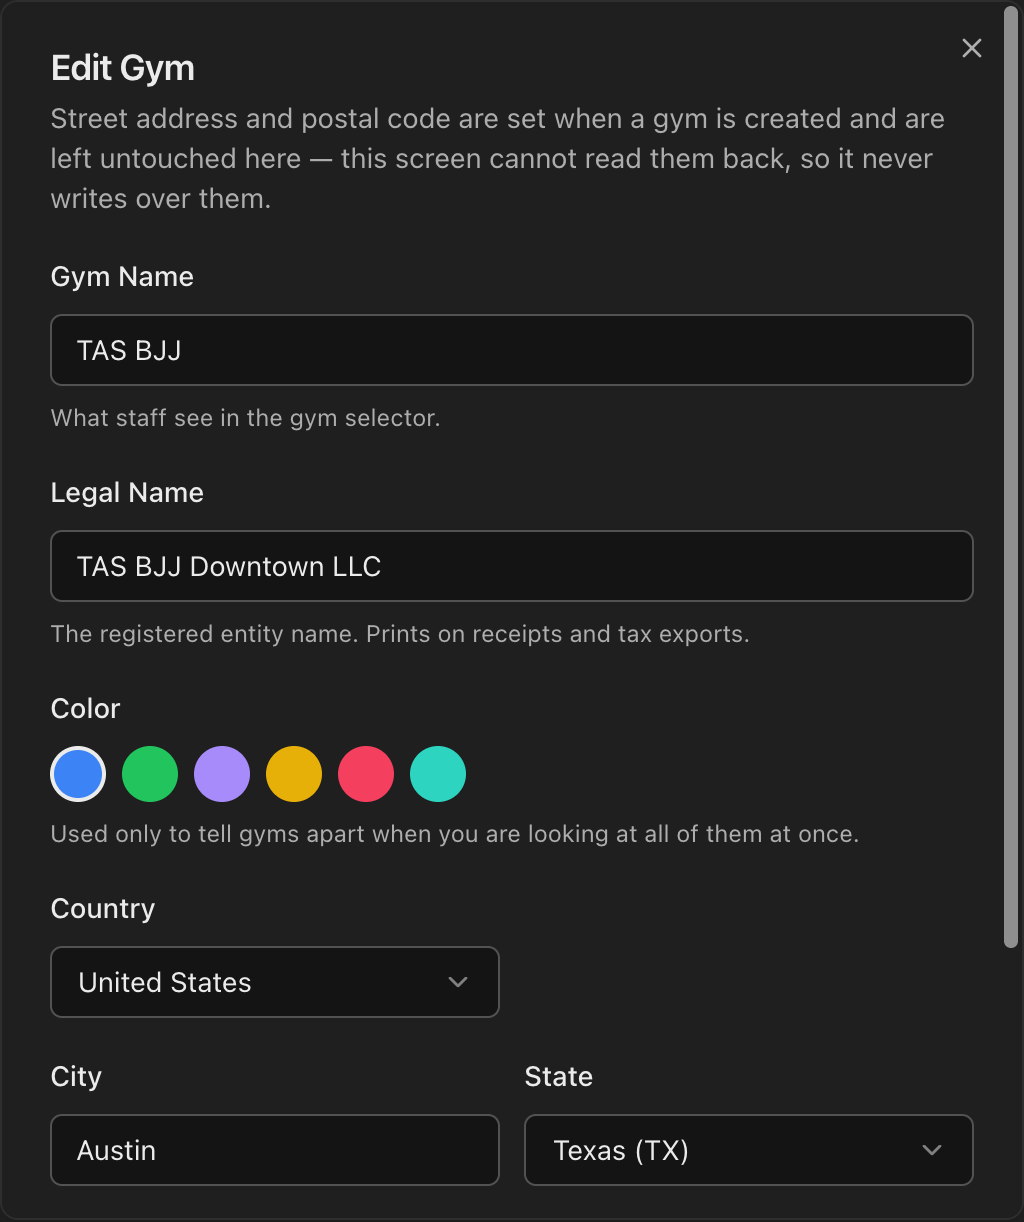
Set the Gym Name staff see in the gym selector, the Legal Name that prints on receipts, your Country, City and State, and the Timezone, which determines the calendar day memberships are charged on. Click Save.
Note
Running more than one location? Click **Add Gym** on this page. See Set Up Multiple Locations for the full flow.
Share your registration code and set student portal options
Open Settings > Student Portal.
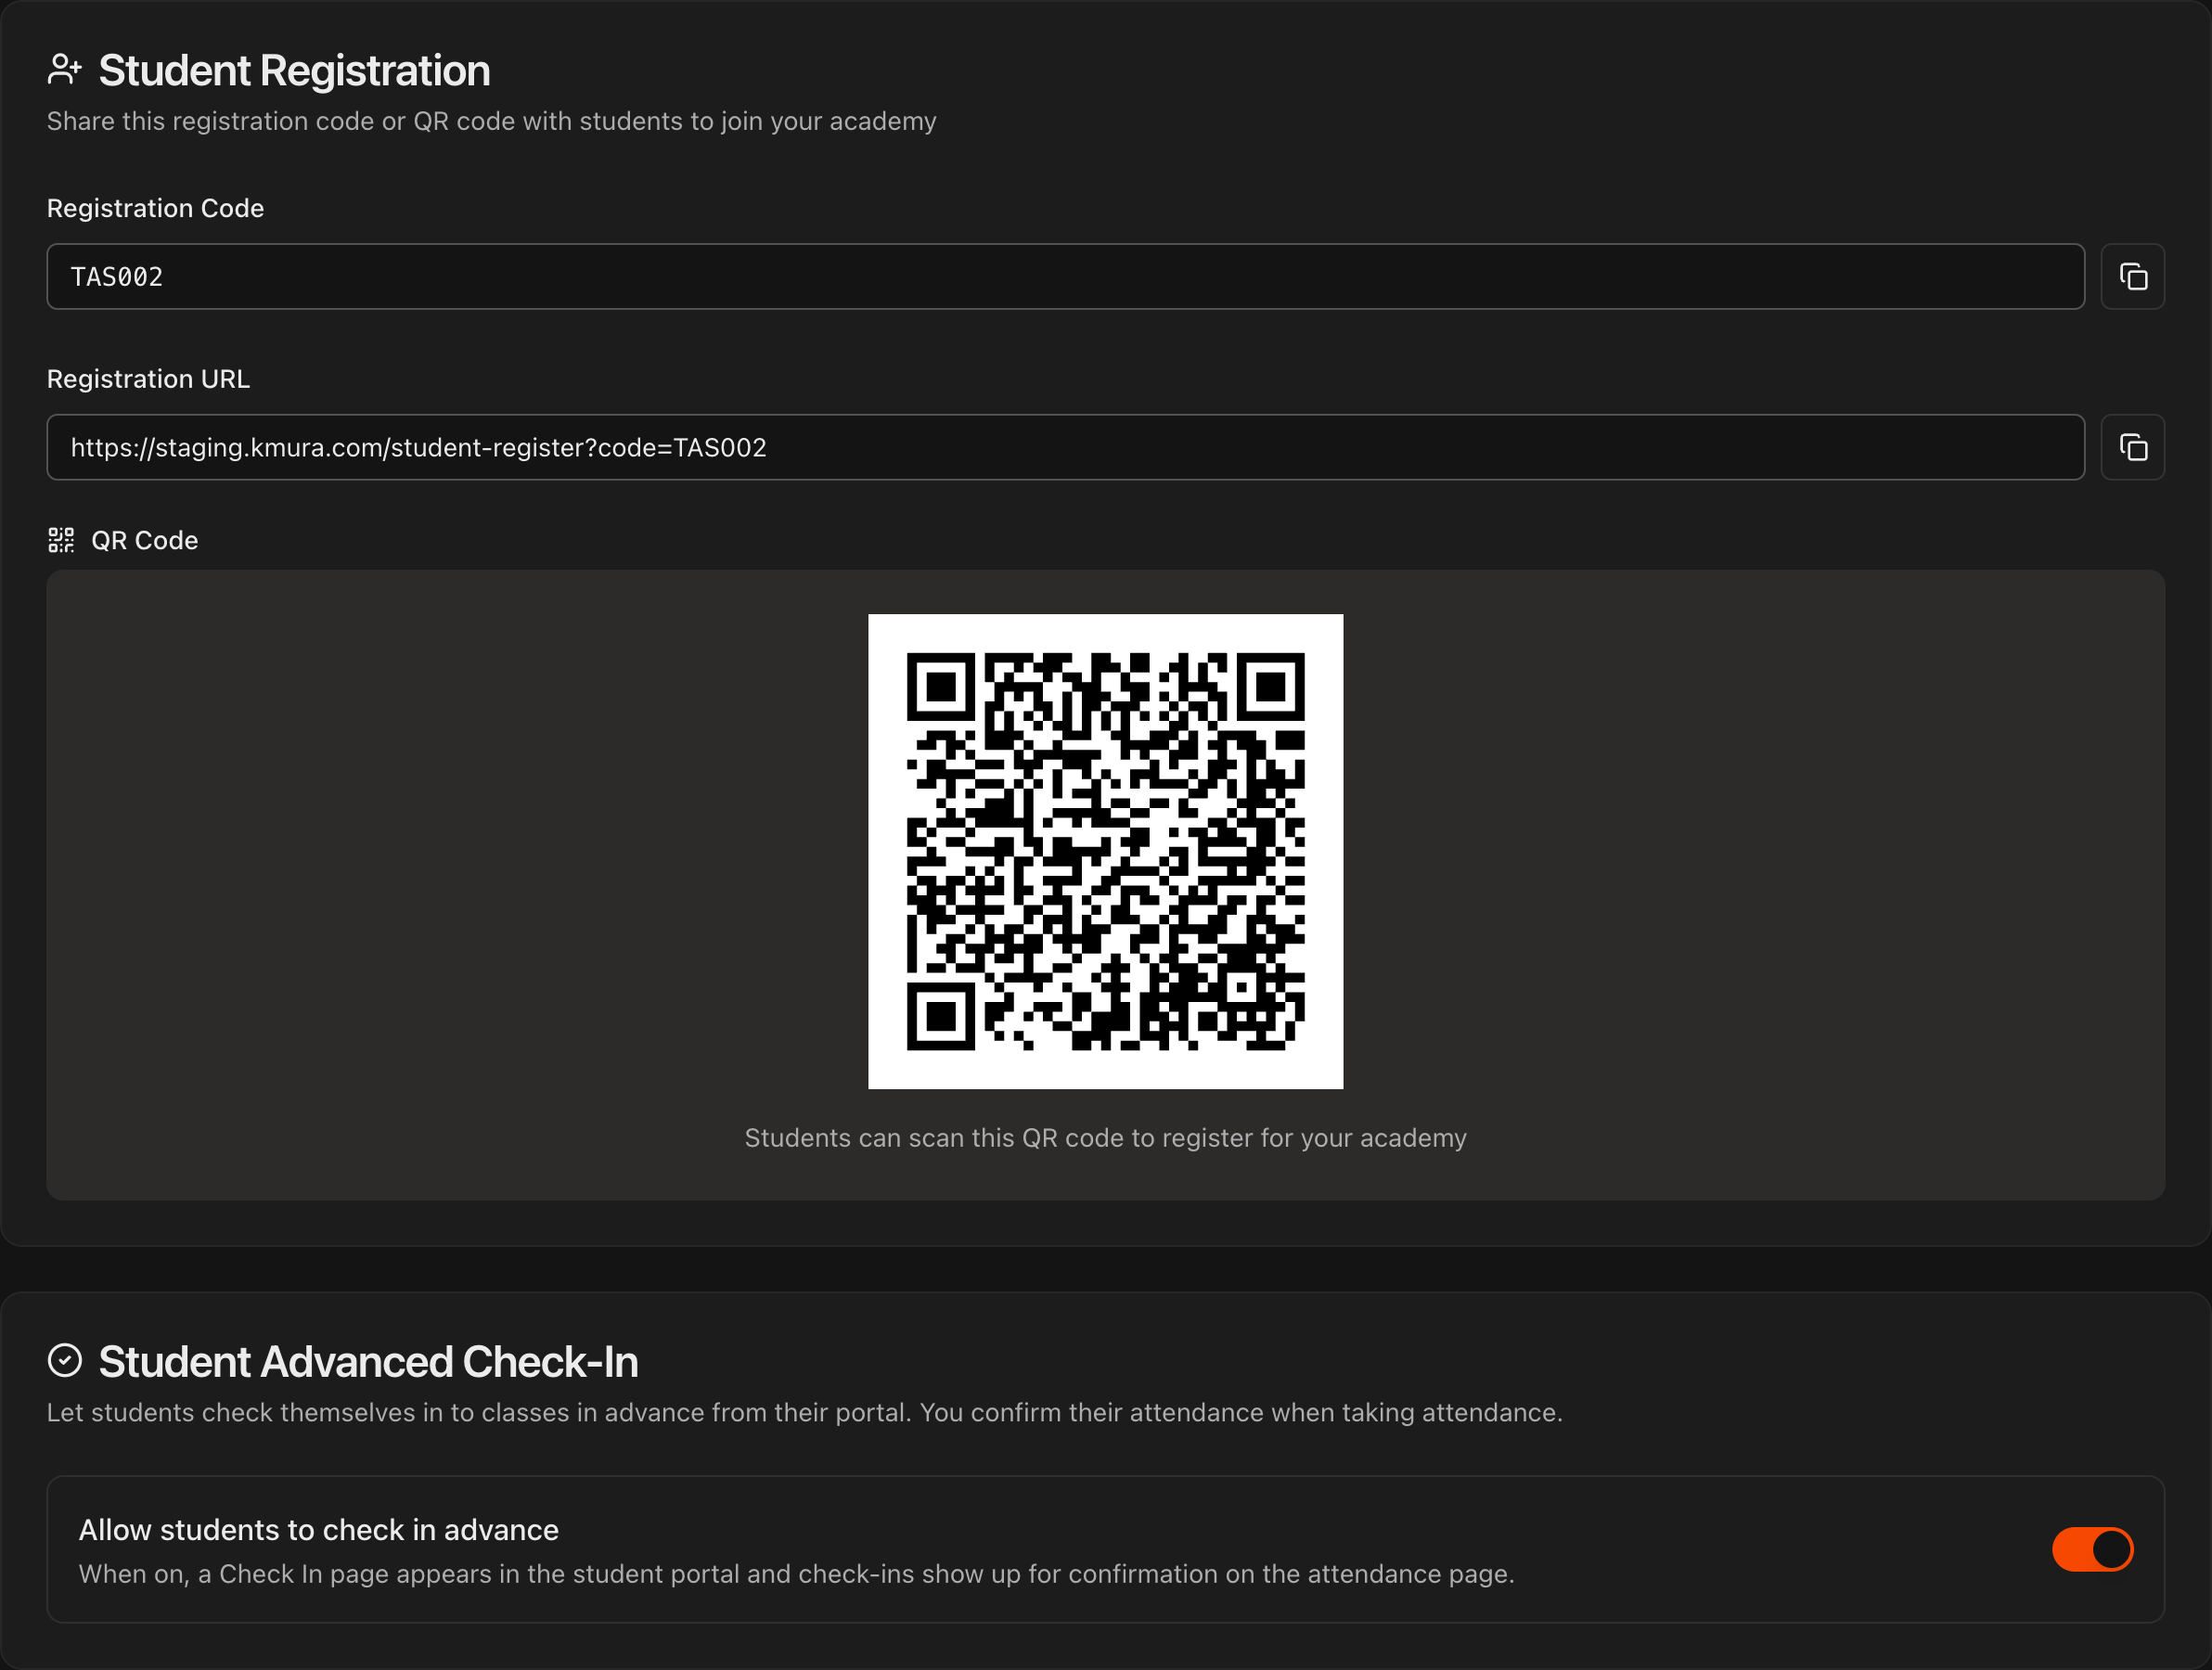
Under Student Registration, your Registration Code, Registration URL and QR Code are unique to your academy. Share any of them so students can create their own accounts.
Under Student Advanced Check-In, turn on Allow students to check in advance if students should be able to check in from their portal before class. Their check-ins appear for confirmation on your Attendance page.
Under Student Self-Service, choose whether students can cancel or pause their own membership from the portal.
Under Alumni Conversion, turn on Move students to Alumni when their membership ends if you want former students moved to the Alumni list automatically on the day their last plan ends. See Converting Students To Alumni.
Tip
Print the QR code and post it at the front desk so new students can register while they wait for class.
Note
If you are switching from another platform, the Kmura team imports your existing students for you. This code is for new students going forward.
Set up the self-check-in kiosk
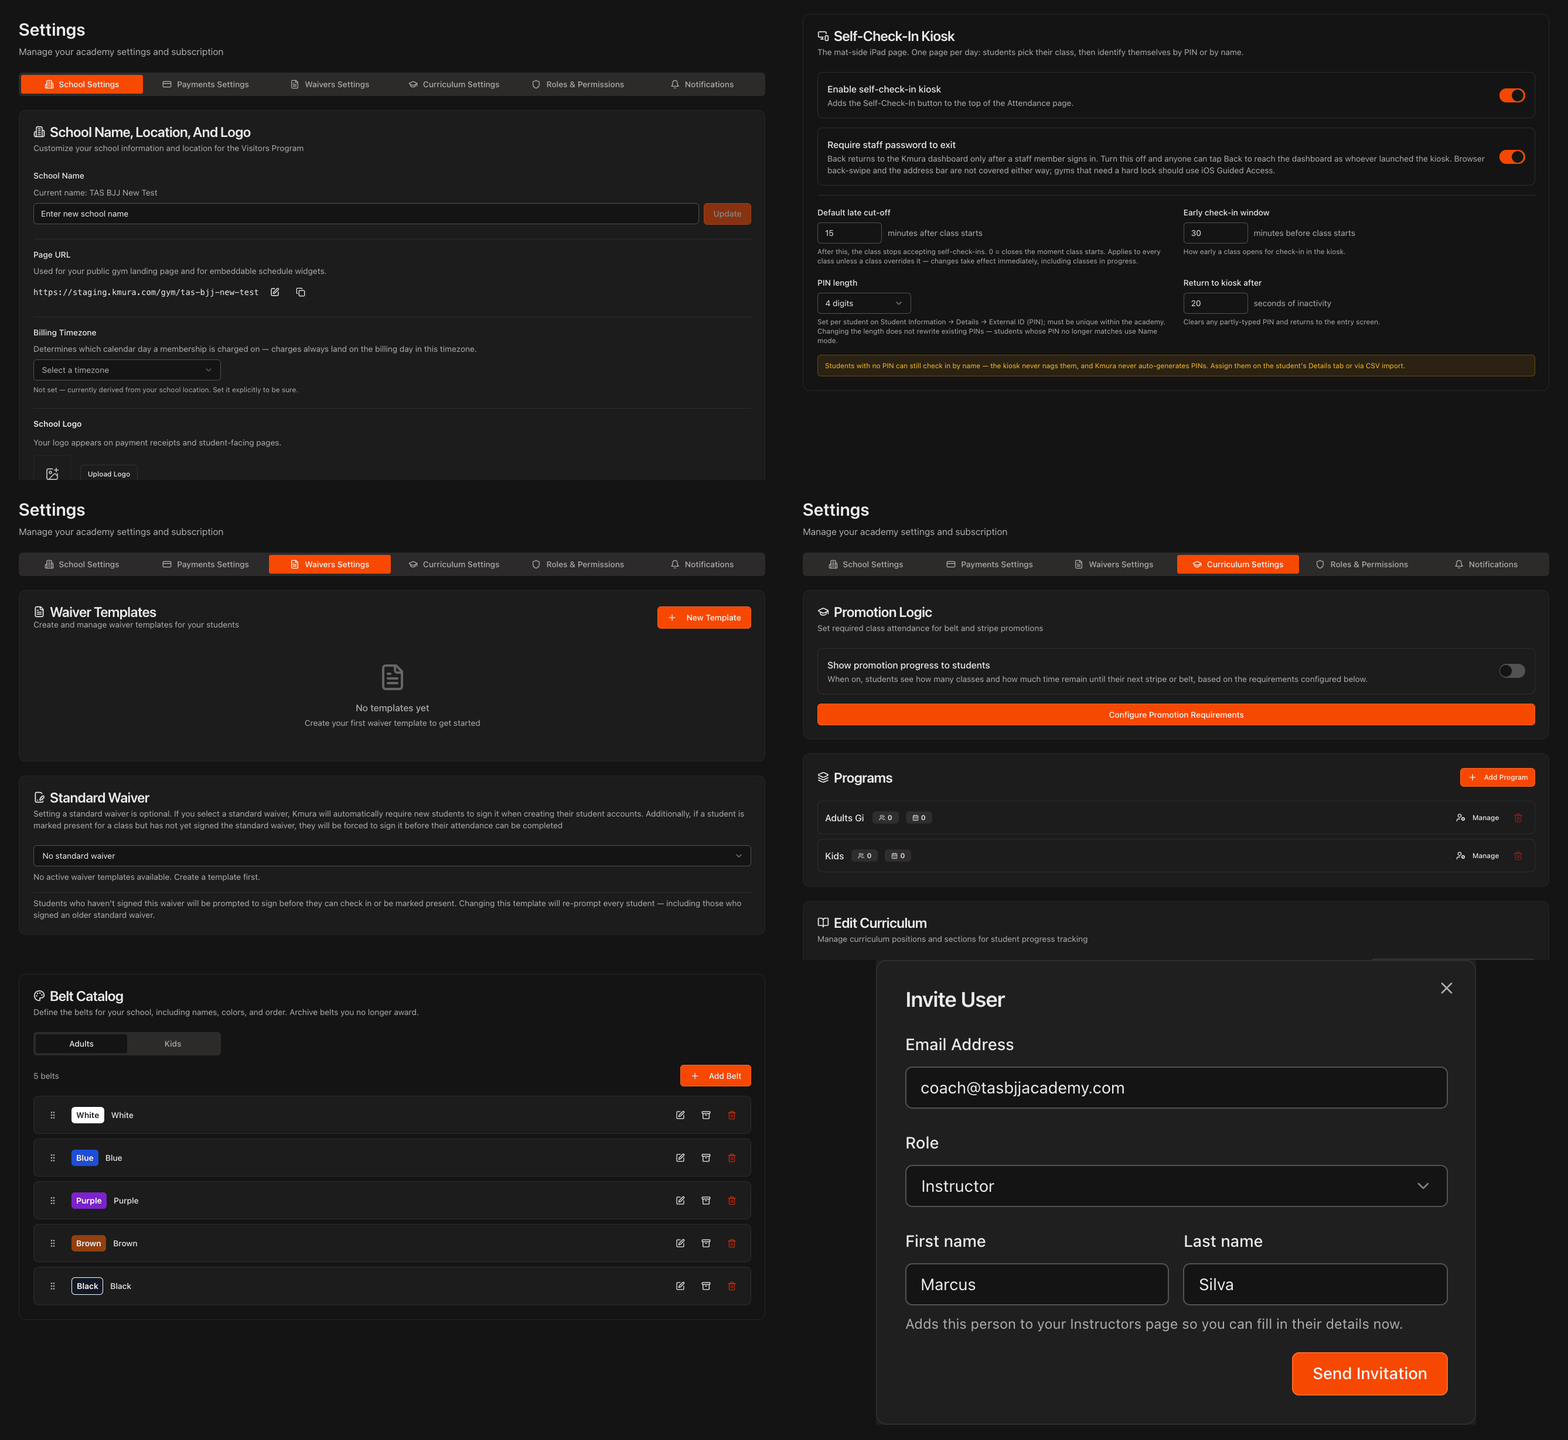
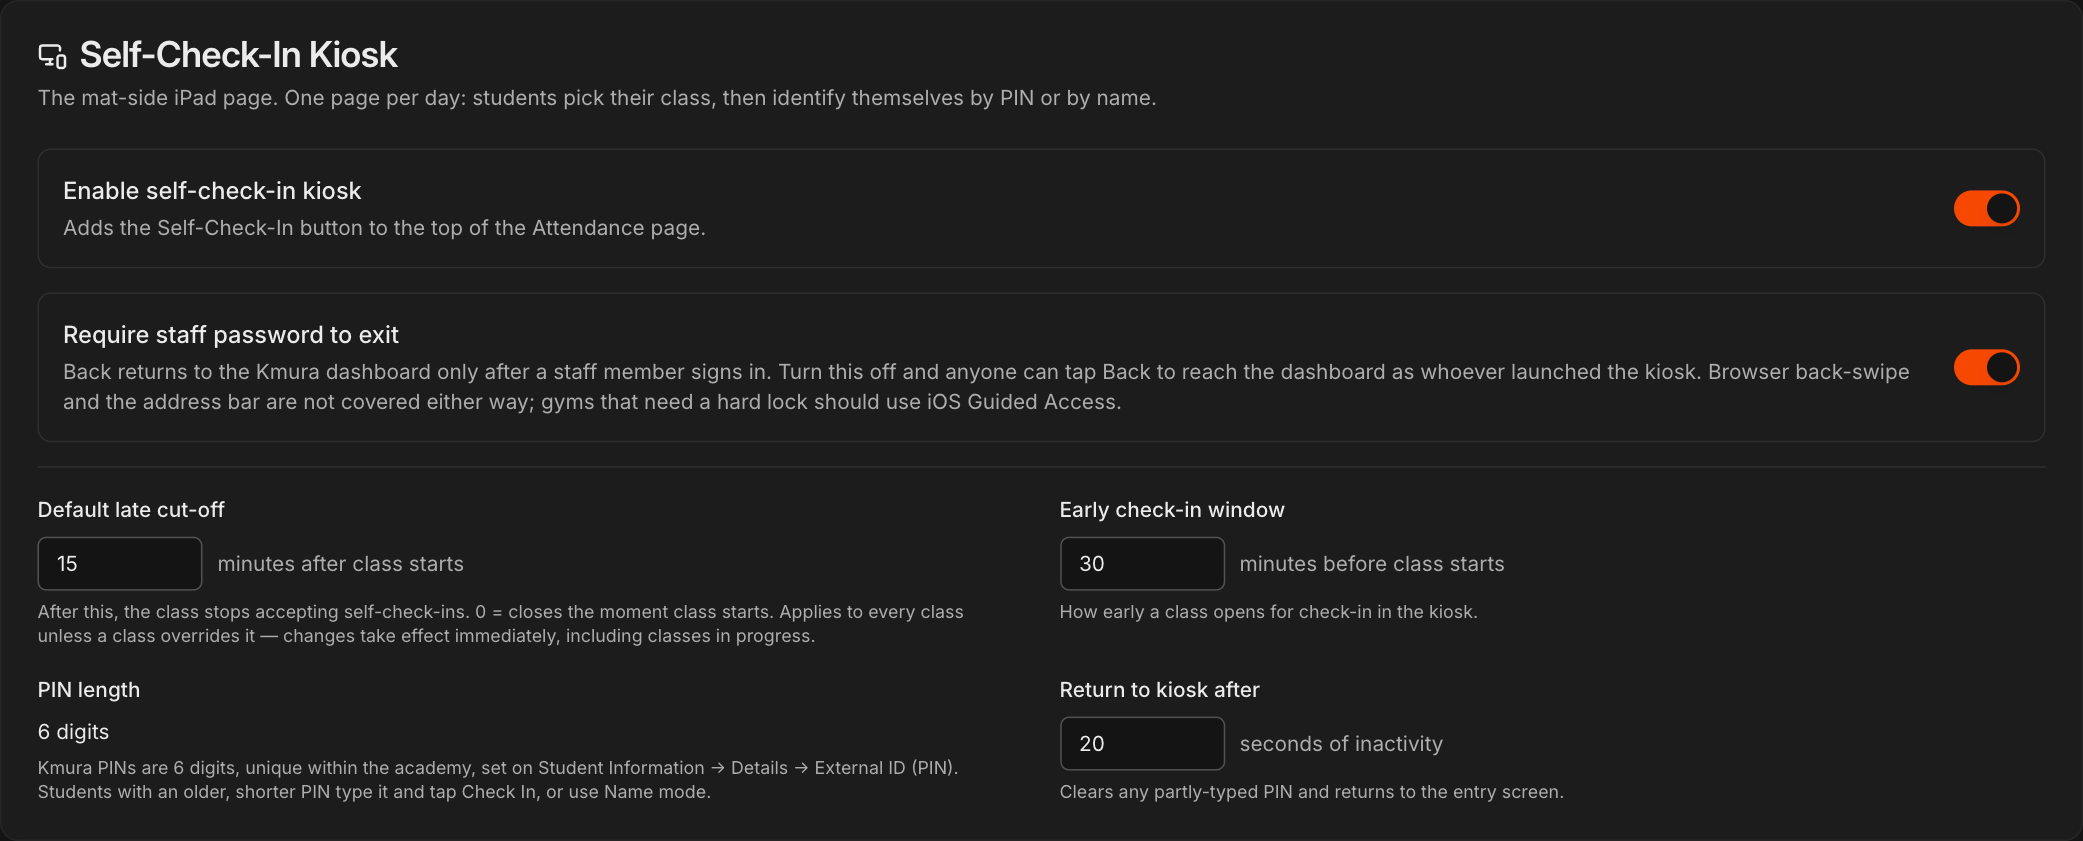
Open Settings > Check-In Kiosk and turn on Enable self-check-in kiosk to add a Self-Check-In button to the top of your Attendance page for a mat-side iPad.
Leave Require staff password to exit on so students cannot back out of the kiosk into your dashboard.
Set the Default late cut-off, Early check-in window, and Return to kiosk after values to match how your classes run. PINs are always 6 digits.
Note
Students identify themselves at the kiosk by PIN, by name, or by scanning a printed check-in card. Set PINs on the **Student Information** page under **Details**, or for everyone at once with **Auto-Create PINs** on the **Students** page. The guides **Student Self-Check-In** and **Student Remote Check-In** under Taking Attendance walk through both flows.
Build your waiver templates and choose your required waivers
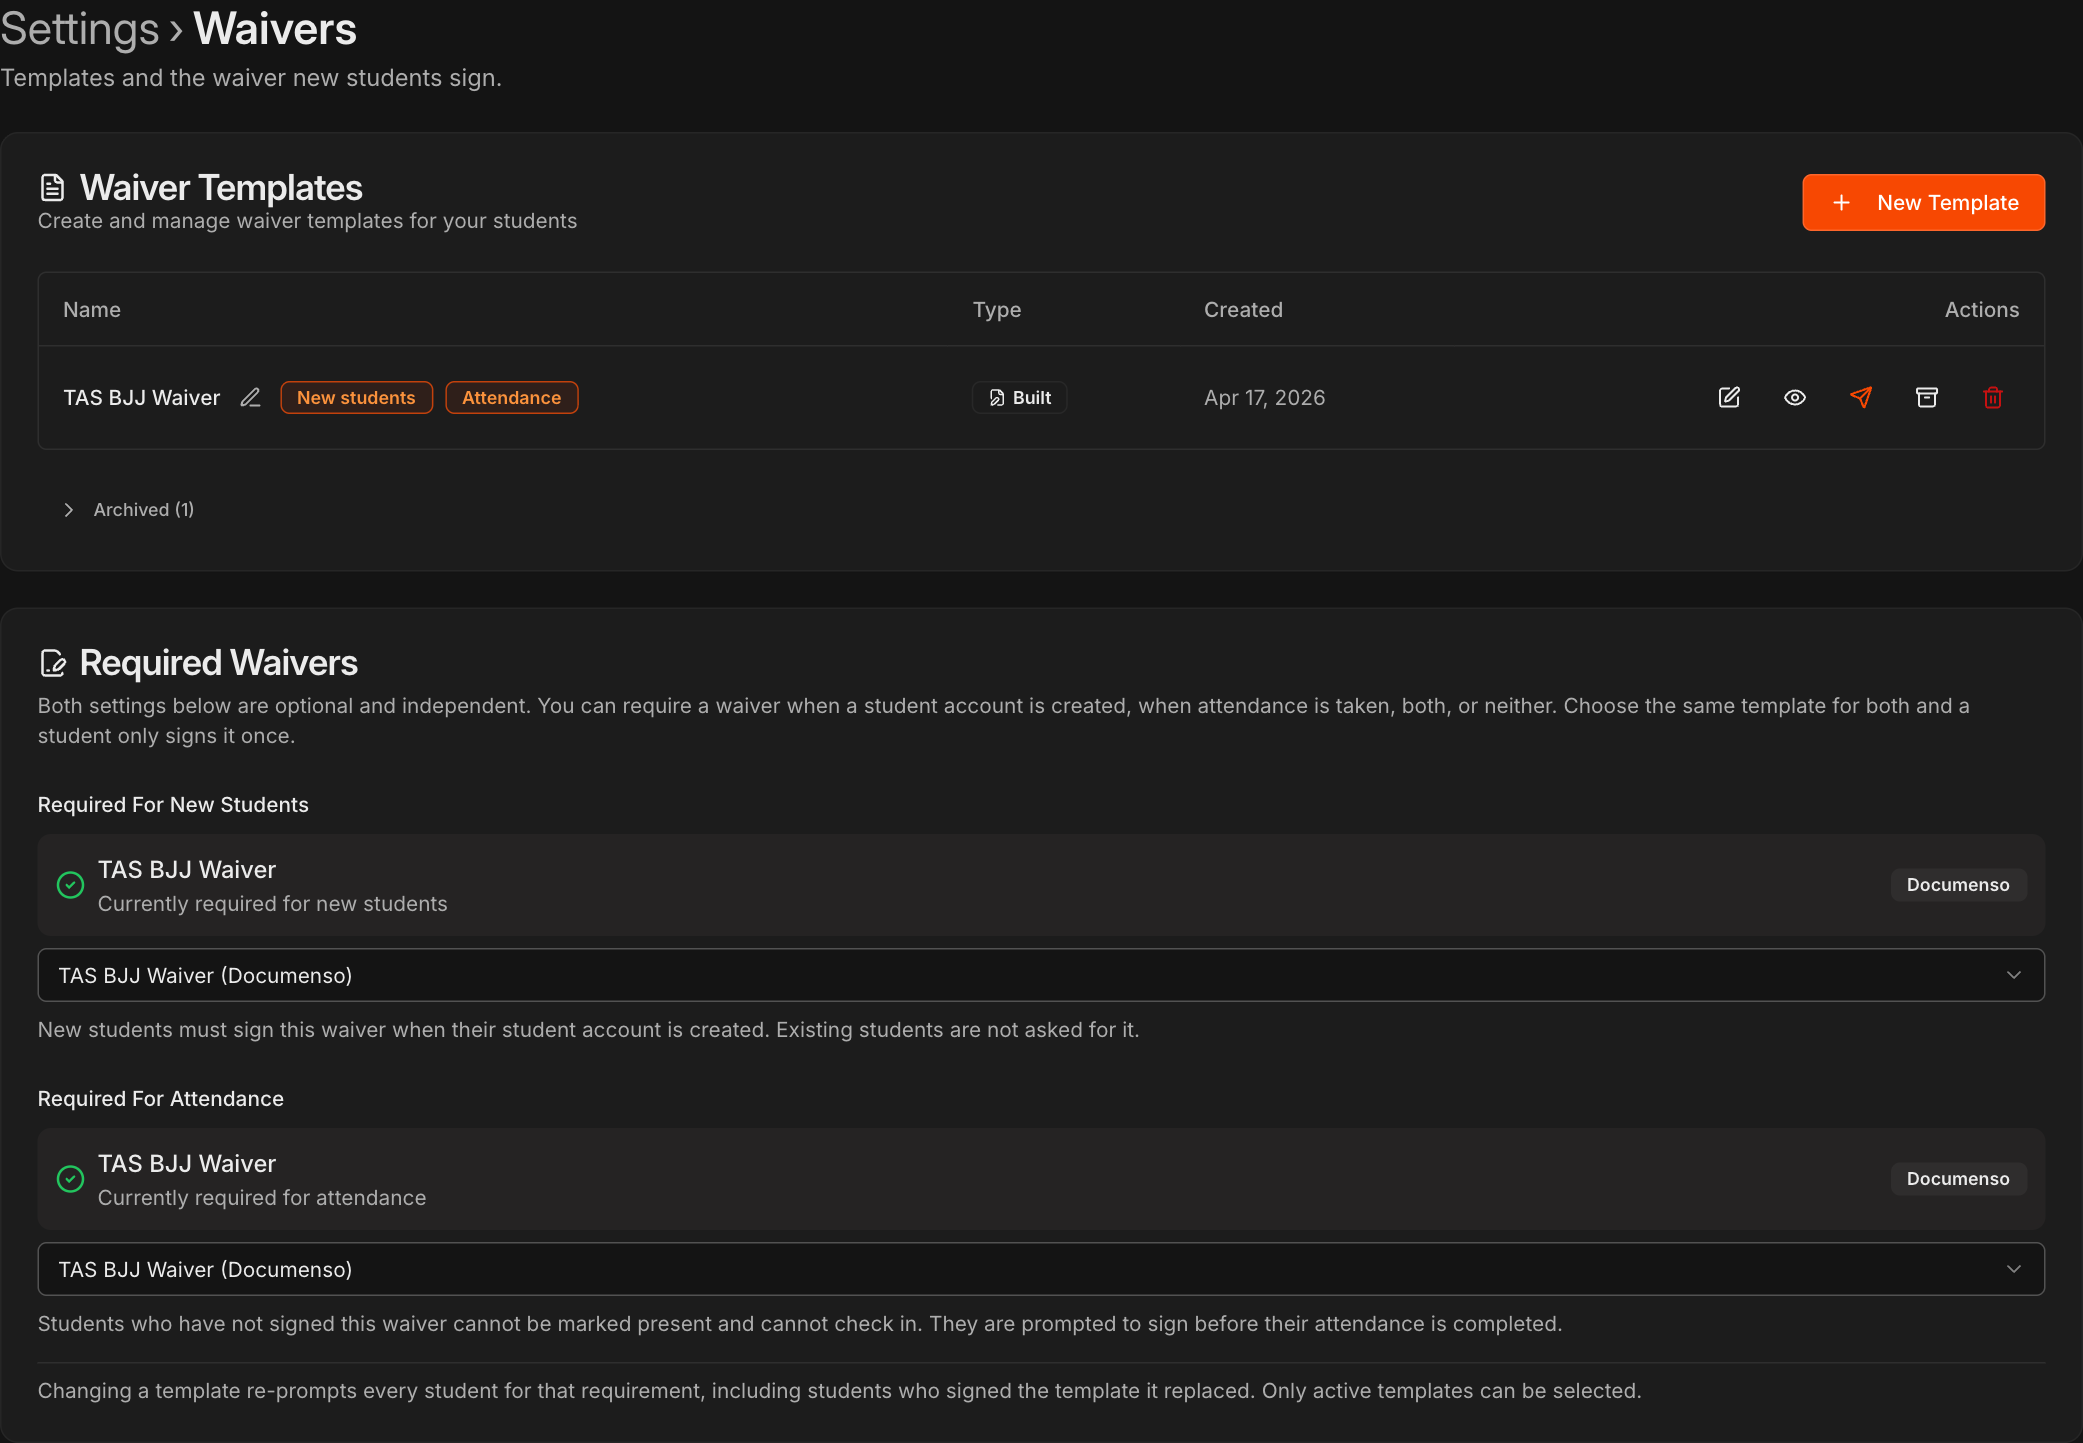
Open Settings > Waivers and click New Template. Choose Upload PDF to use an existing waiver PDF and add signature fields, or Build from Scratch to write one in the document editor, then save.
Under Required Waivers, optionally pick a template for Required For New Students (signed when a student account is created) and for Required For Attendance (signed before a student can be marked present or check in). Pick the same template for both and students sign it once.
With more than one gym, Standard waiver per gym lets each gym use its own.
Caution
Changing a template re-prompts every student for that requirement, including those who signed the template it replaced.
Note
The guides **Saving Waiver Templates**, **Have Students Sign Waivers**, and **Have Leads Sign Waivers** under Waivers cover this in full detail.
Set up your programs
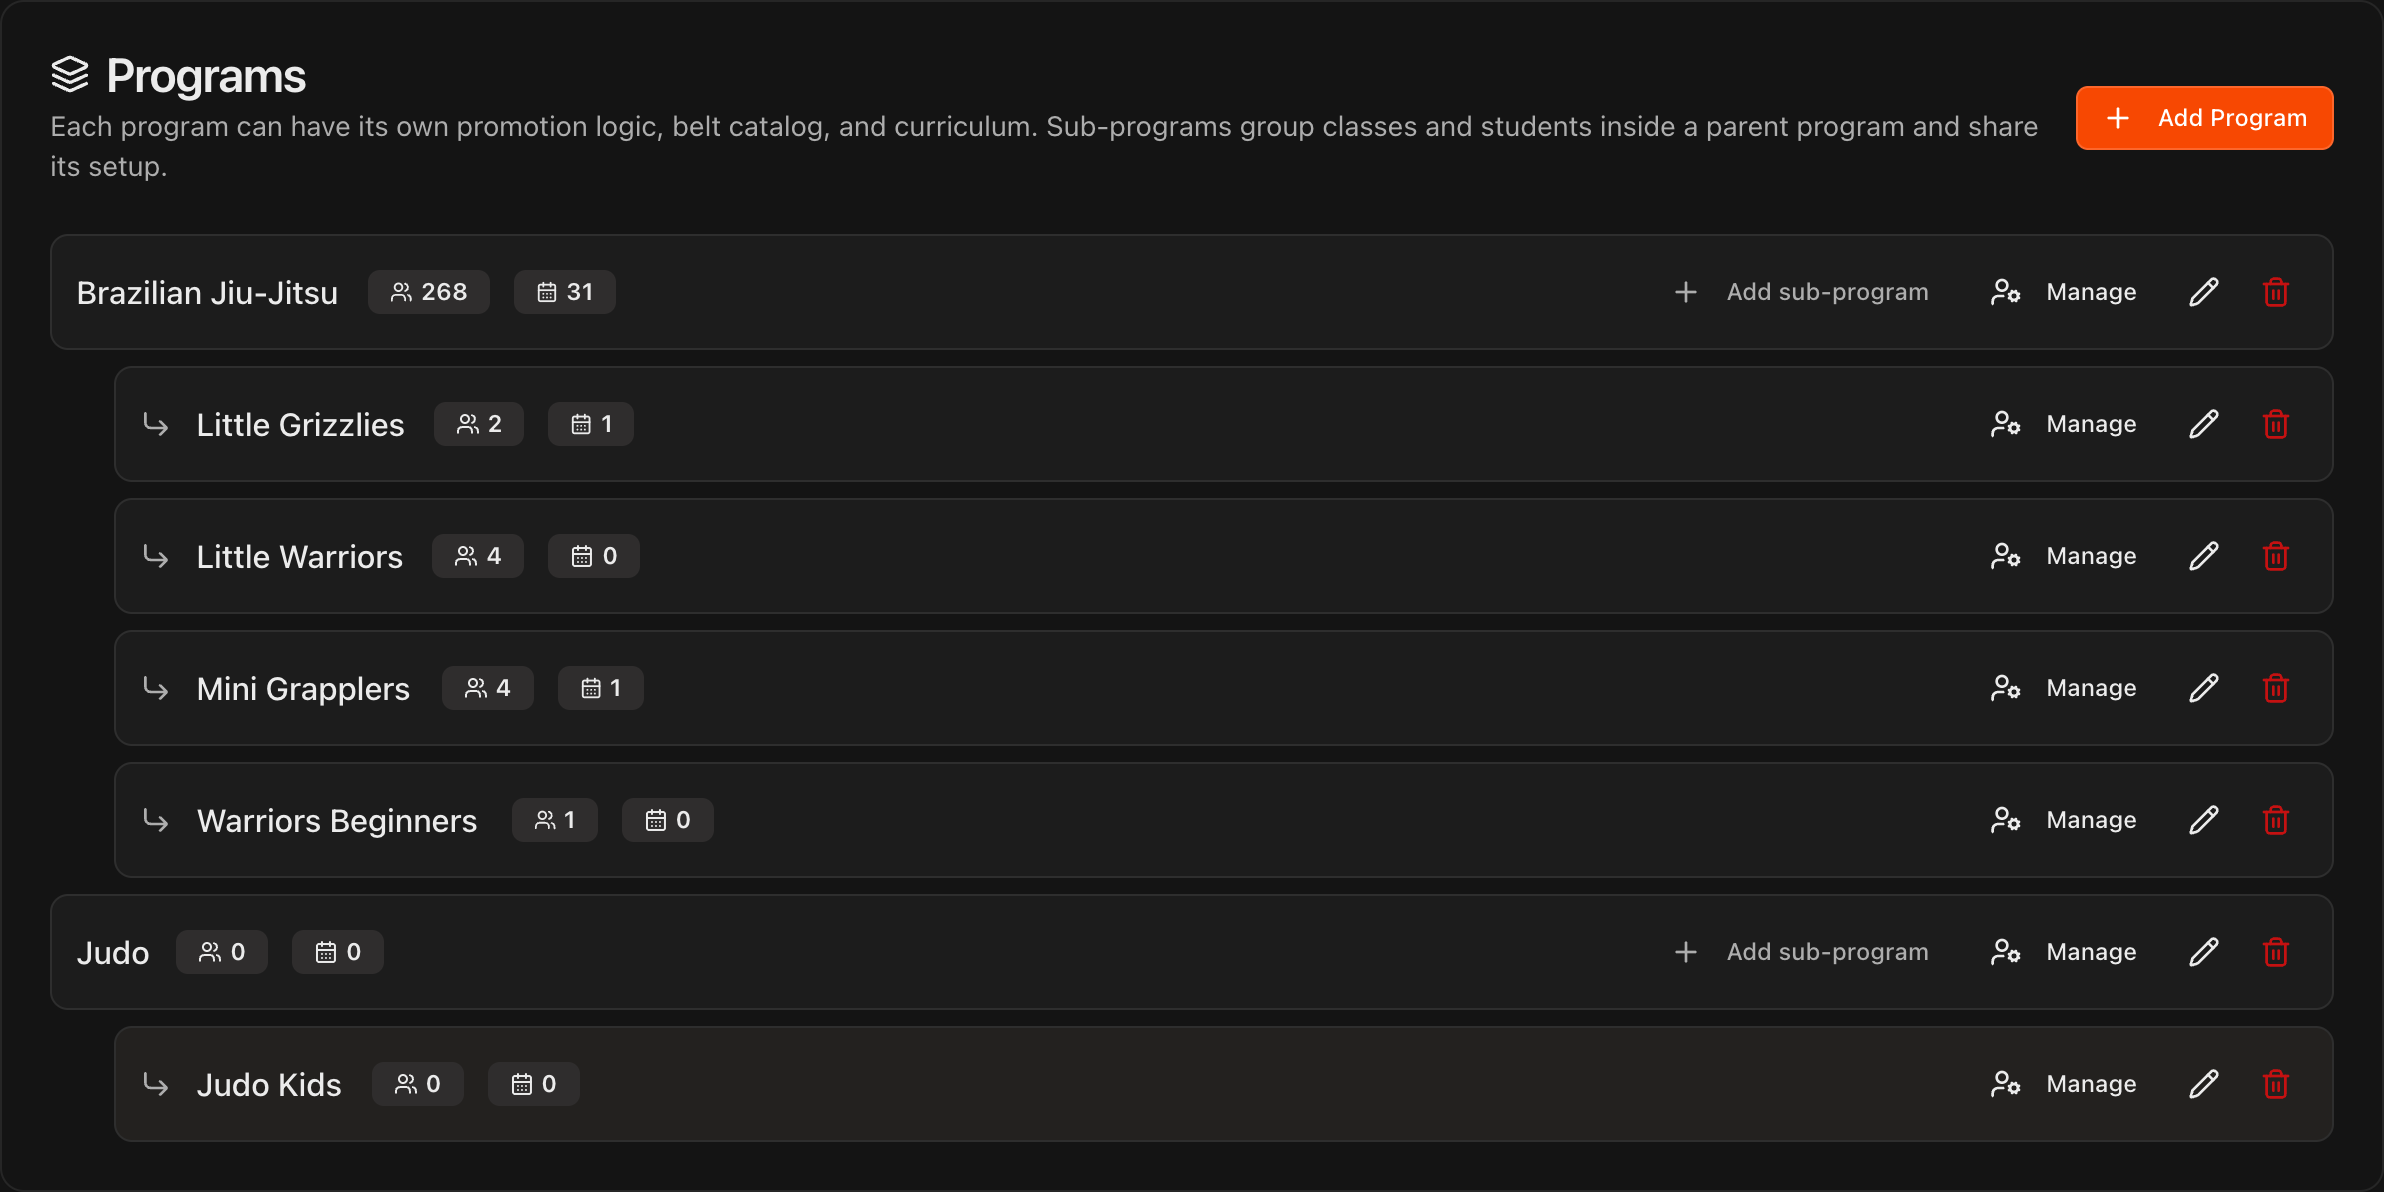
Open Settings > Curriculum. The Programs card lists each top-level program with its sub-programs indented underneath.
Click Add Program for each martial art you teach, and Add sub-program for groups like kids classes that share the parent's belts and curriculum.
Note
Each top-level program has its own belt catalog, curriculum, belt tests and promotion logic. The guide **Managing Programs & Sub-Programs** under Curriculum & Belt Tests covers this in full.
Set up each program's belt catalog and belt tests
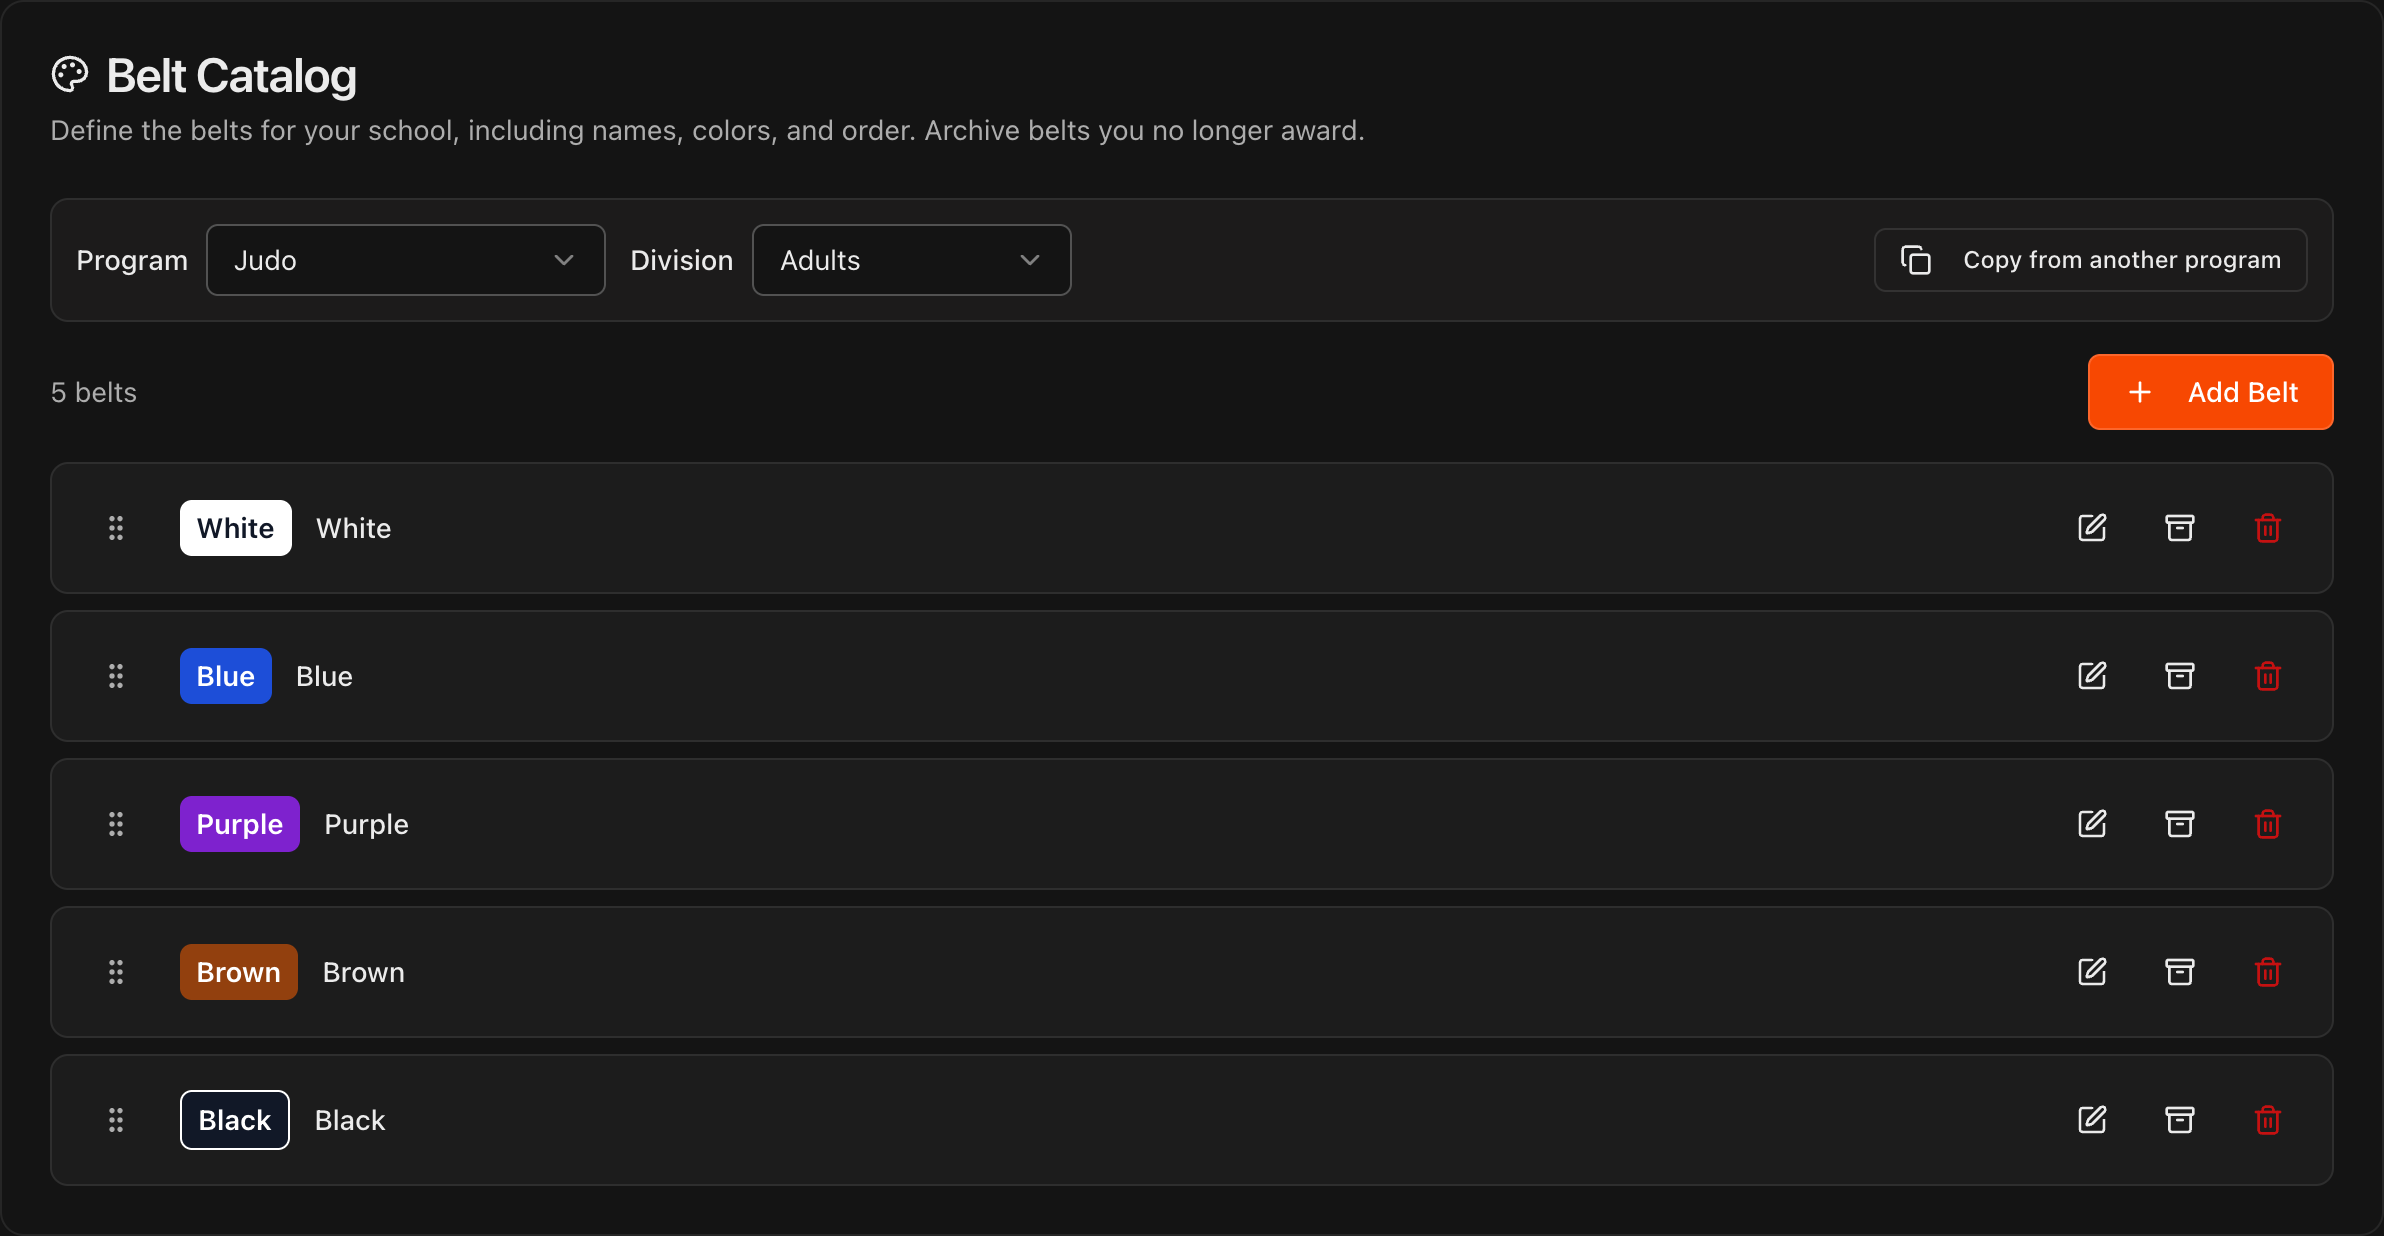
Still on Curriculum, scroll to Belt Catalog, choose the Program, and switch between Adults and Kids. Click Add Belt to add one, drag to reorder, or use the edit and archive icons to rename or retire a belt.
Scroll to Belt Test Requirements, choose the Program and Division, then click Set Up Requirements on any belt to define its test.
Tip
**Copy from another program** fills a new program from one you already configured.
Note
The guide **Manage Belts & Belt Tests** under Curriculum & Belt Tests shows how to edit your test logic and administer belt tests to students.
Set up curriculum and promotion logic
Under Edit Curriculum, choose the Program, then review the default Adult Curriculum and Children's Curriculum sections and edit, reorder, or add sections and positions to match what you actually teach.
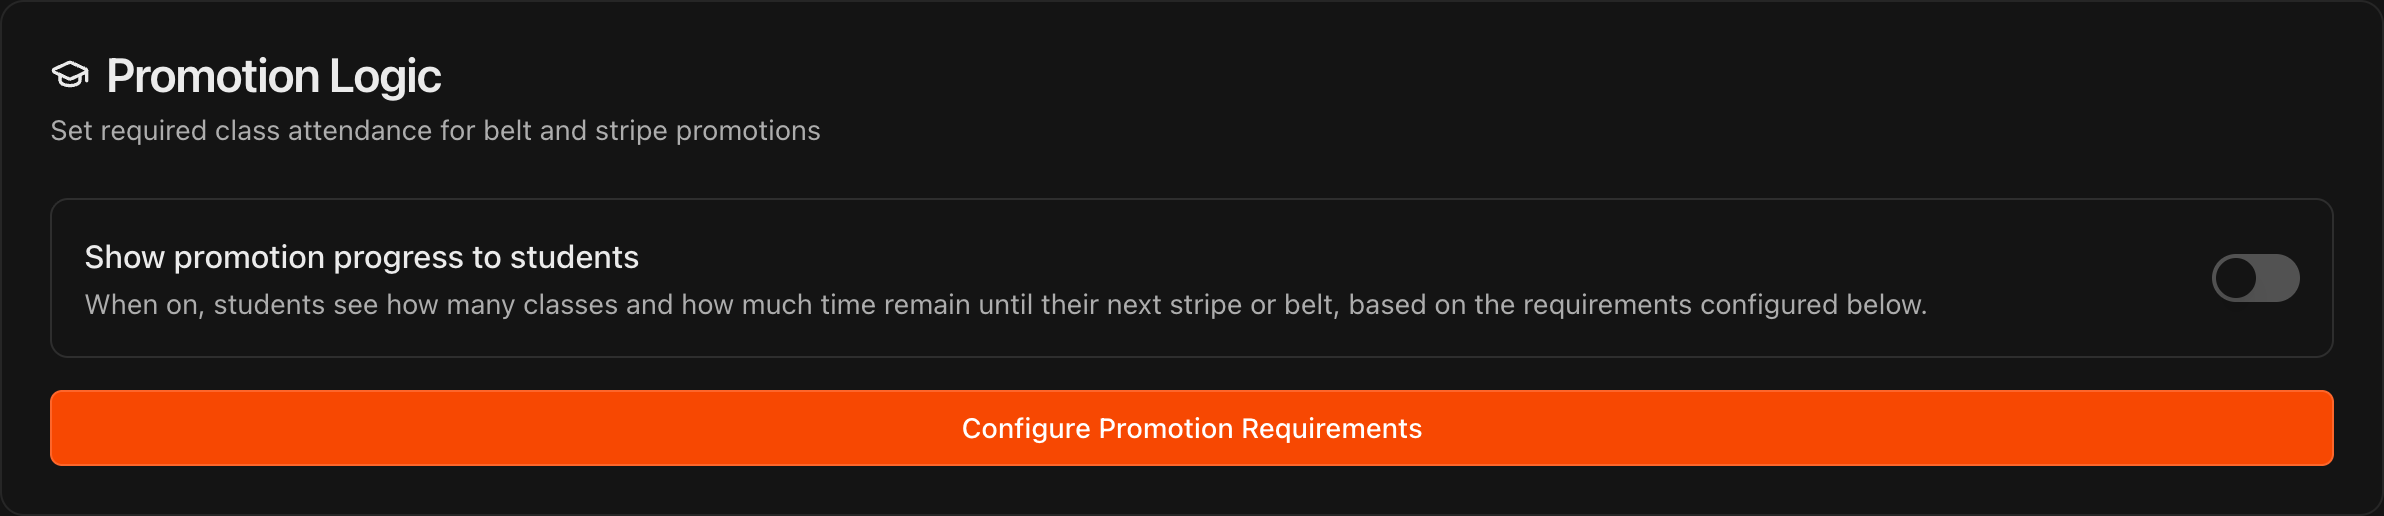
Under Promotion Logic, click Configure Promotion Requirements, choose the Program, and set the class attendance and time required for each stripe and belt.
Turn on Show promotion progress to students if you want students to see how close they are to their next promotion in their portal.
Note
Kmura's AI-powered Promotion Alerts depend on this logic. The guides **Manage Your General Curriculum** and **Edit Your Promotion Logic** under Curriculum & Belt Tests go deeper.
Create custom roles and invite your staff
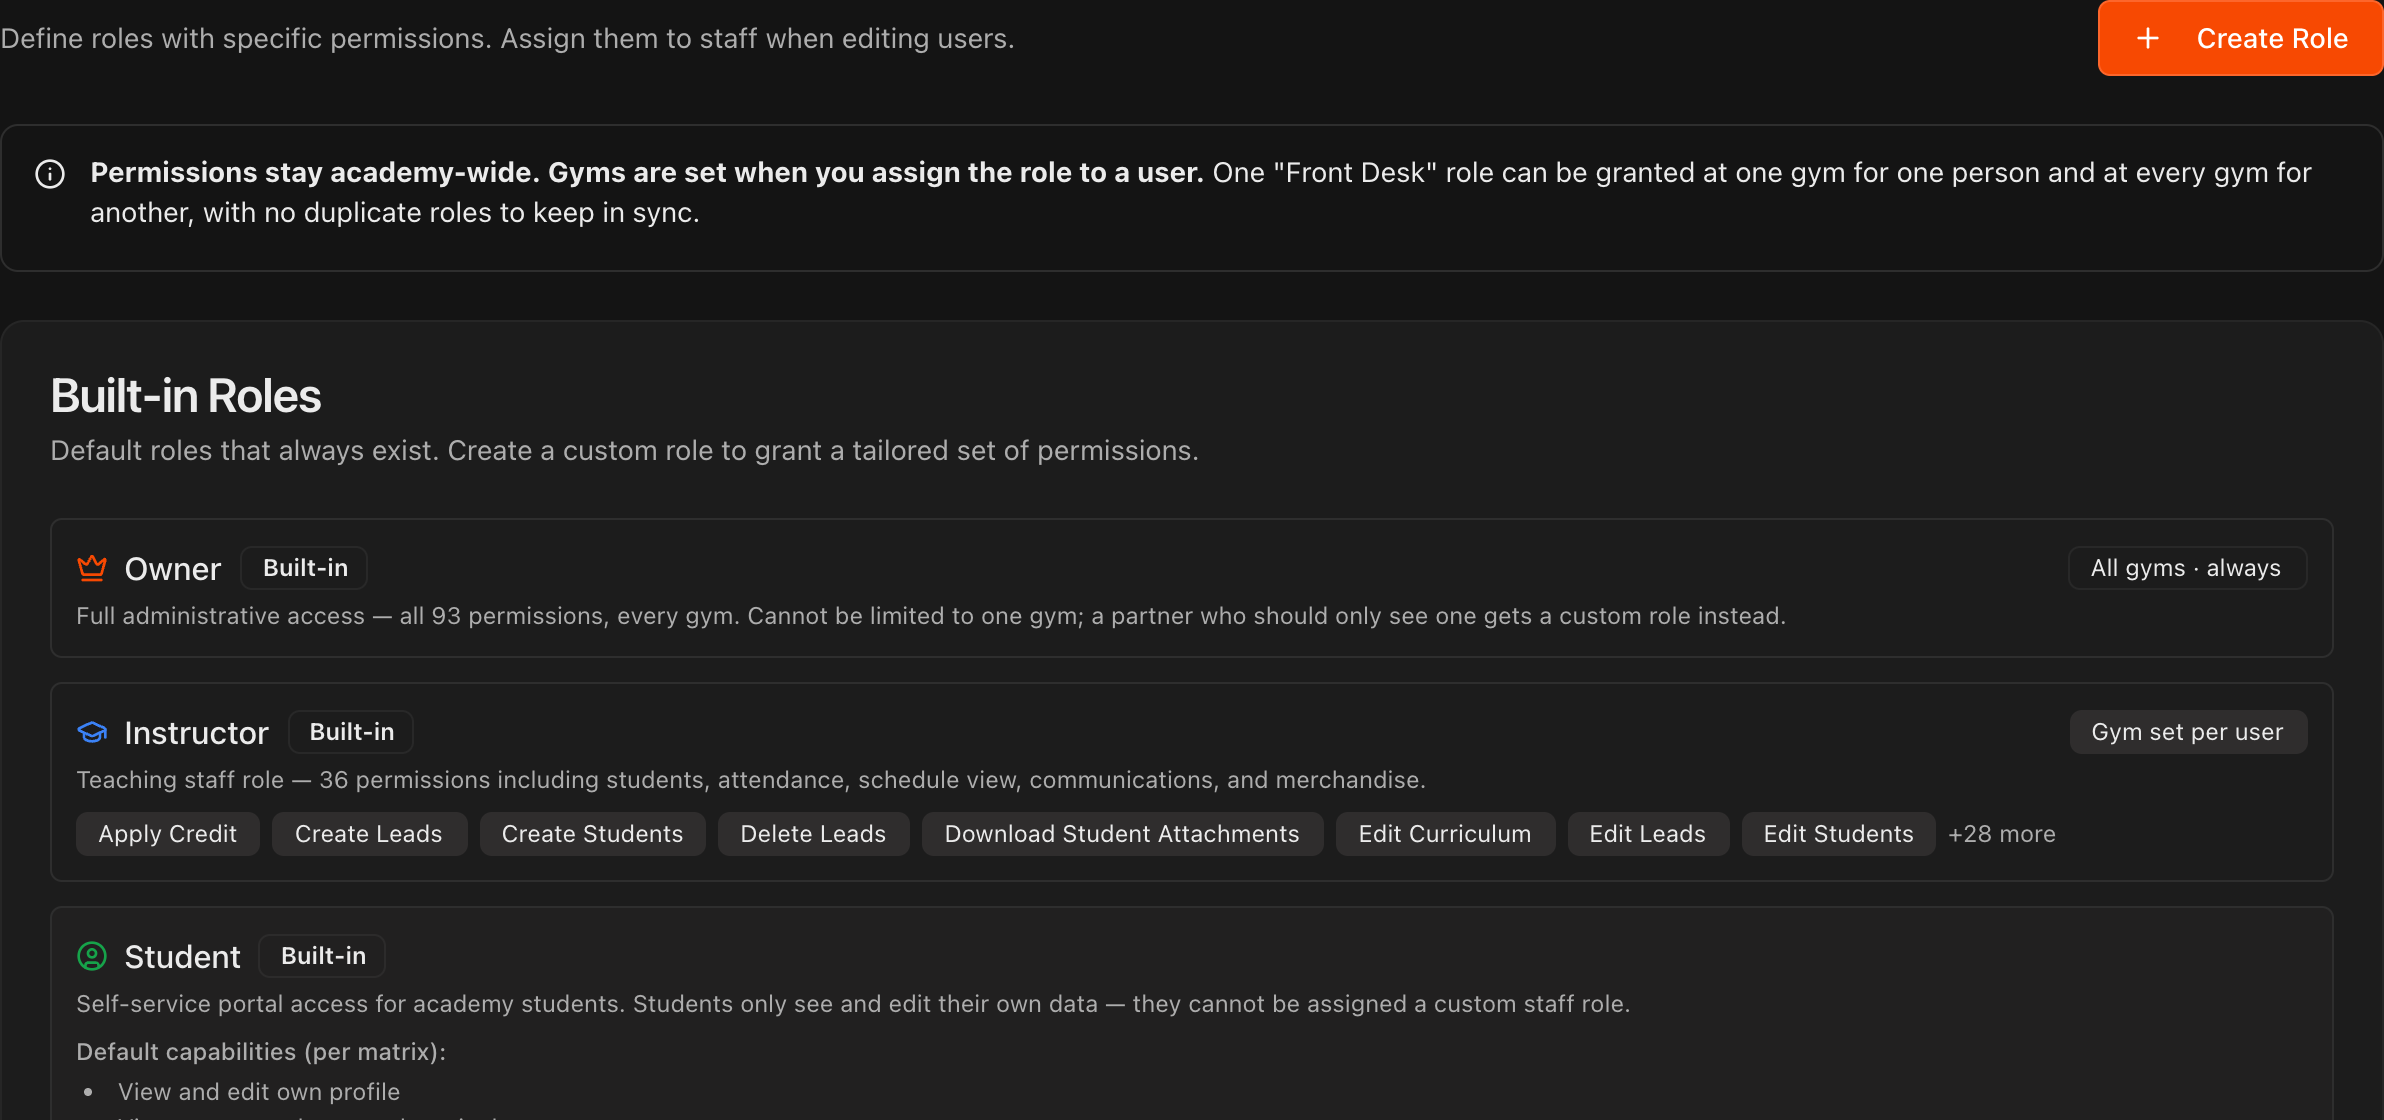
Open Settings > Users & Roles. The Built-in Roles (Owner, Instructor, and Student) always exist.
Click Create Role if you want a custom set of permissions, for example a front desk role that can take attendance and manage leads but cannot see revenue.
Scroll to Users and click Invite User. Enter the person's Email Address, choose a Role, optionally add their First name and Last name, and click Send Invitation.
The invitation appears under Pending Invitations until it is accepted, and instructors are added to your Instructors page.
Note
The guides **Inviting Staff** and **Managing Staff** under Managing Instructors & Staff cover roles, hours, and compensation in detail.
Note
Roles also control the **Financials** page. **View Financials** opens it and the **Financial Alerts** card, and the other **Financials** permissions choose which sections a role sees.