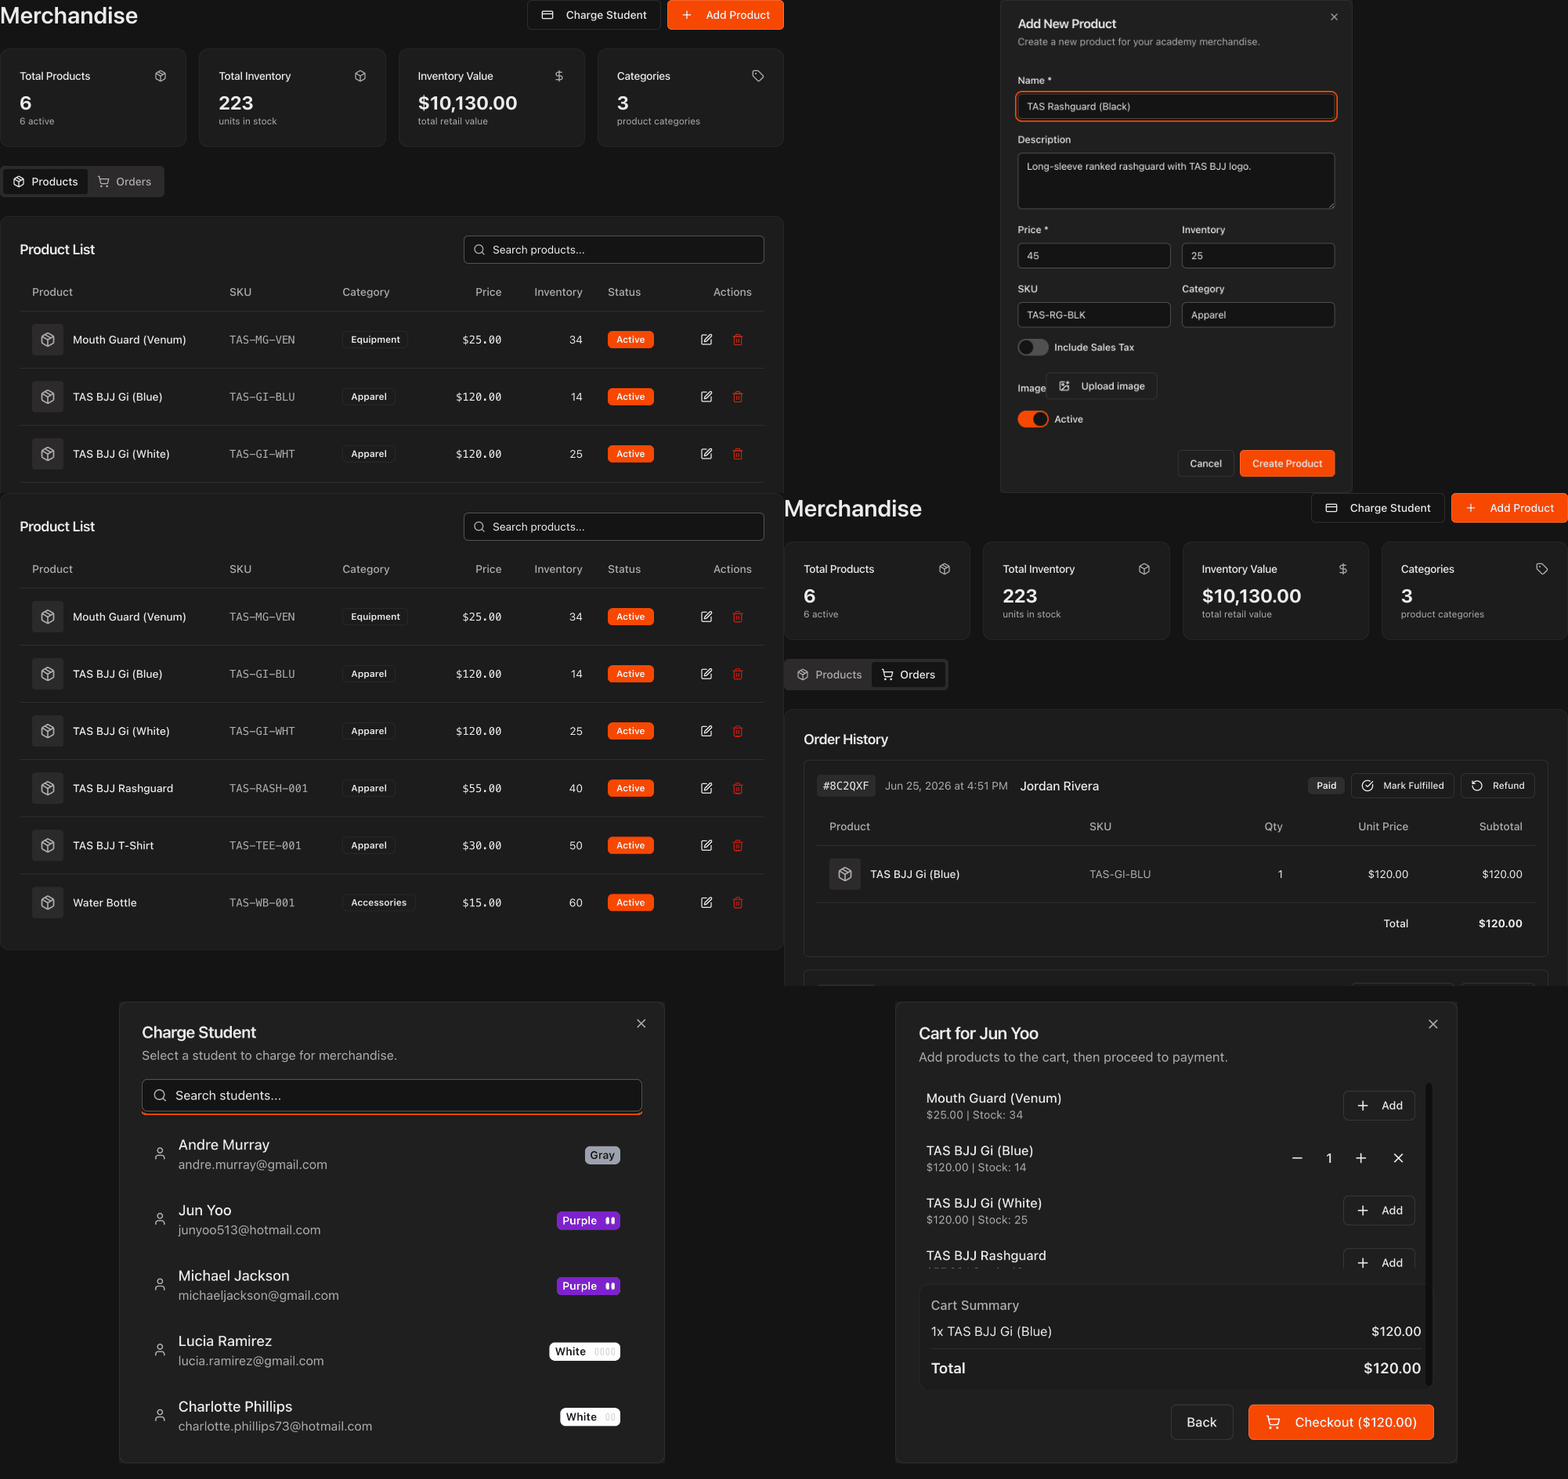
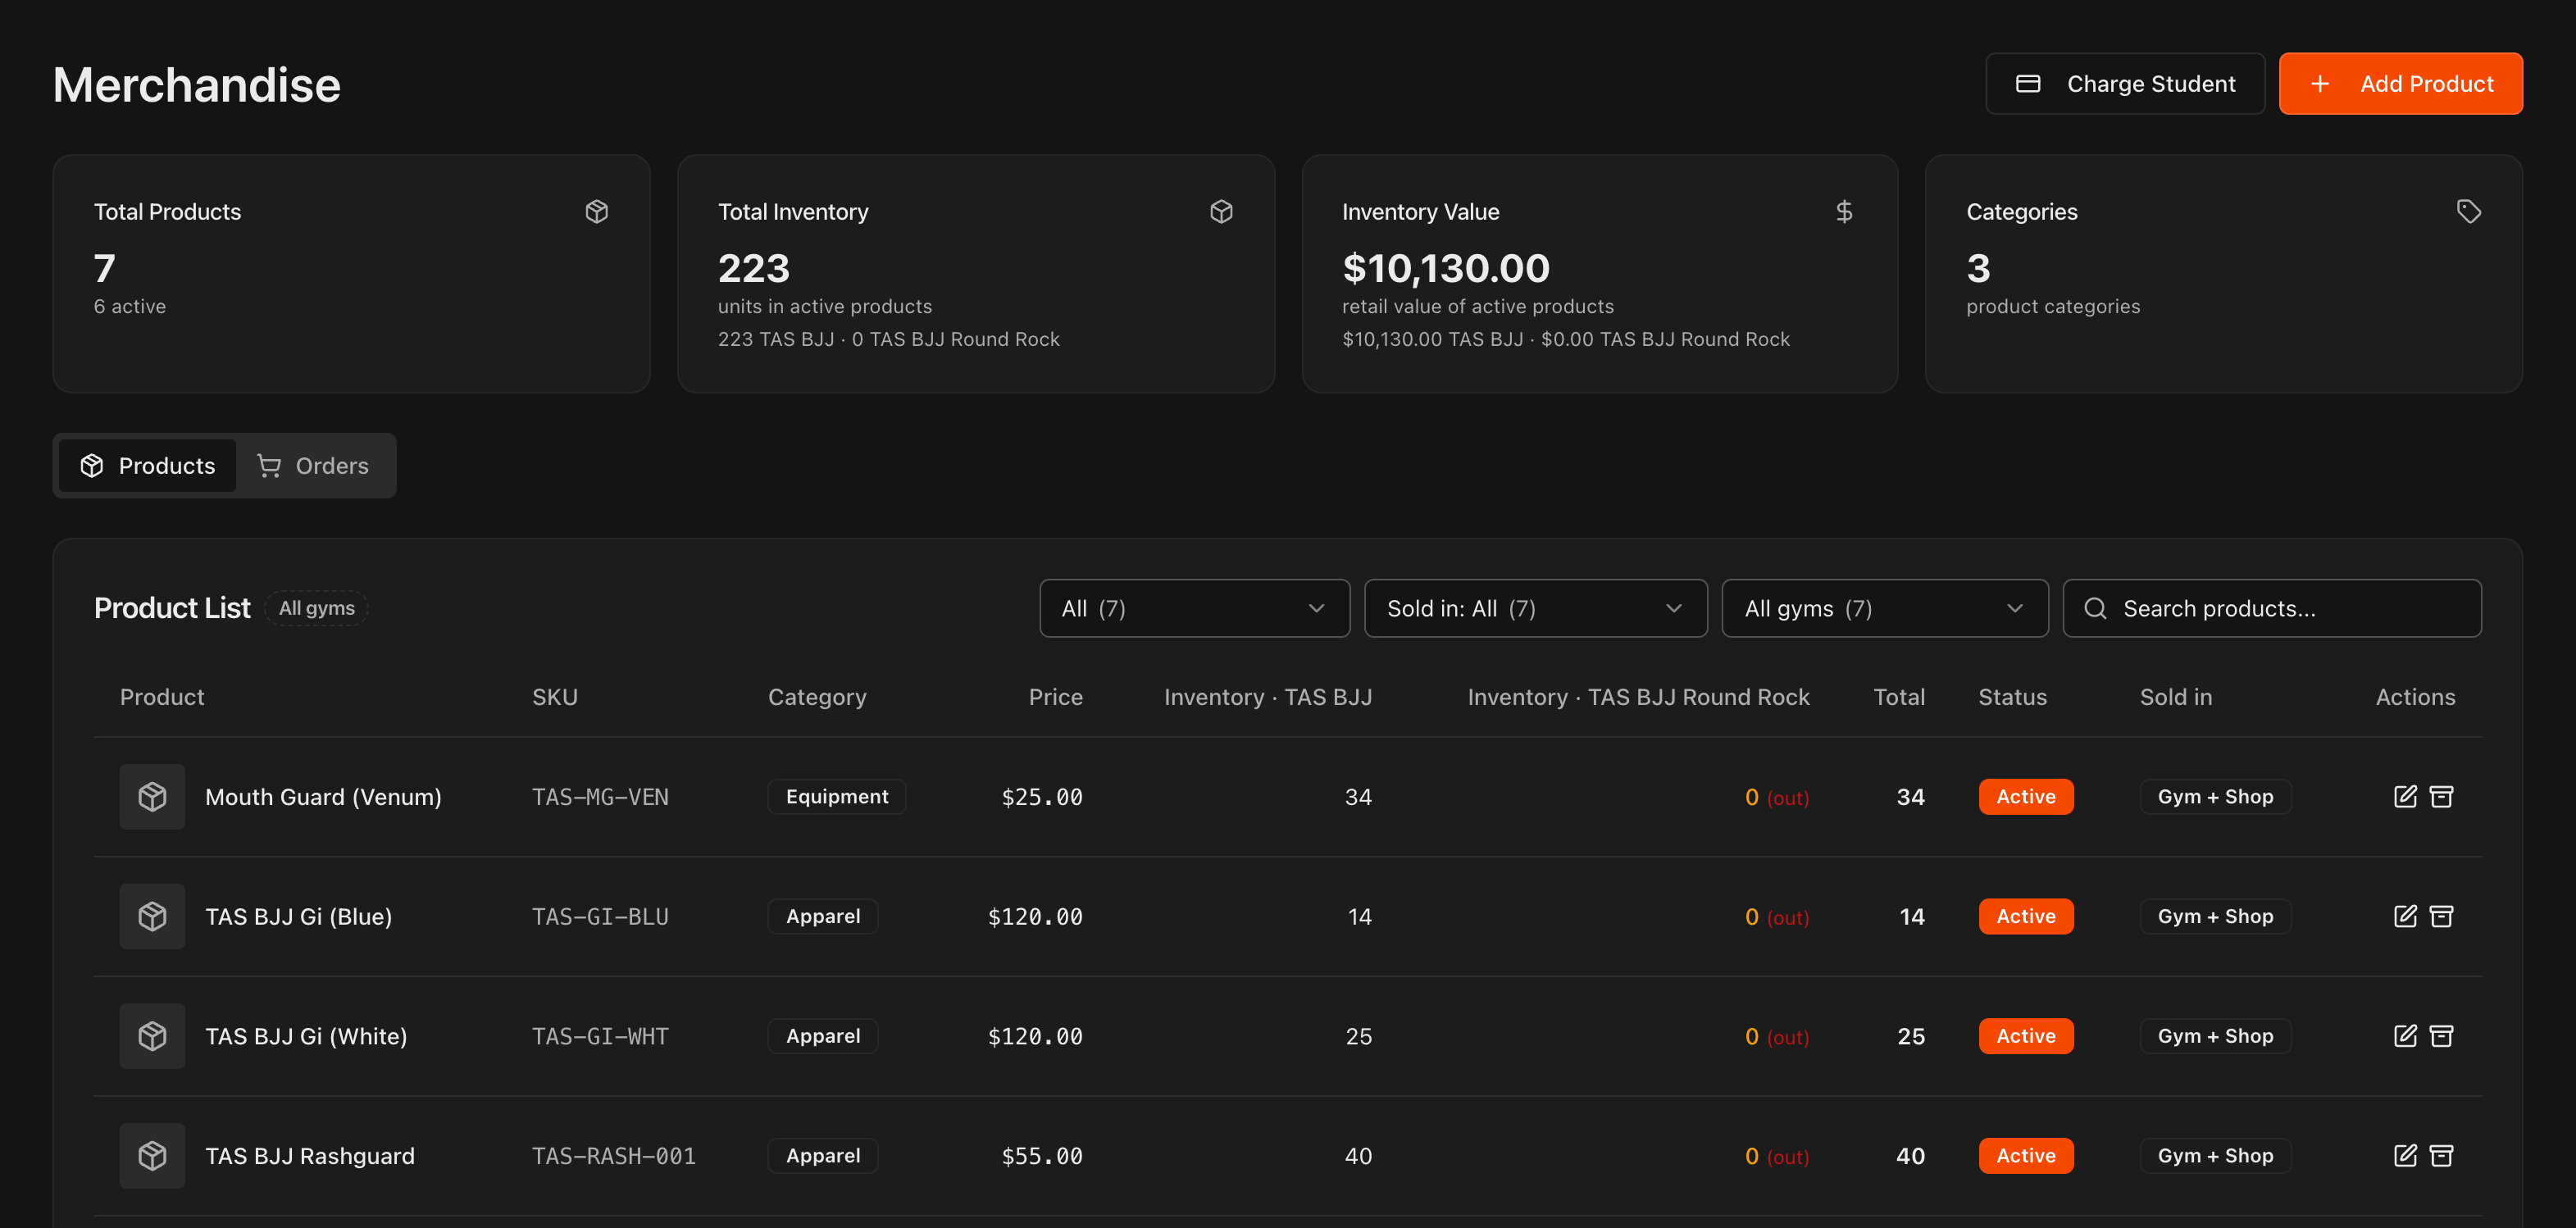
Open the Merchandise page
Click Merchandise in the left sidebar.
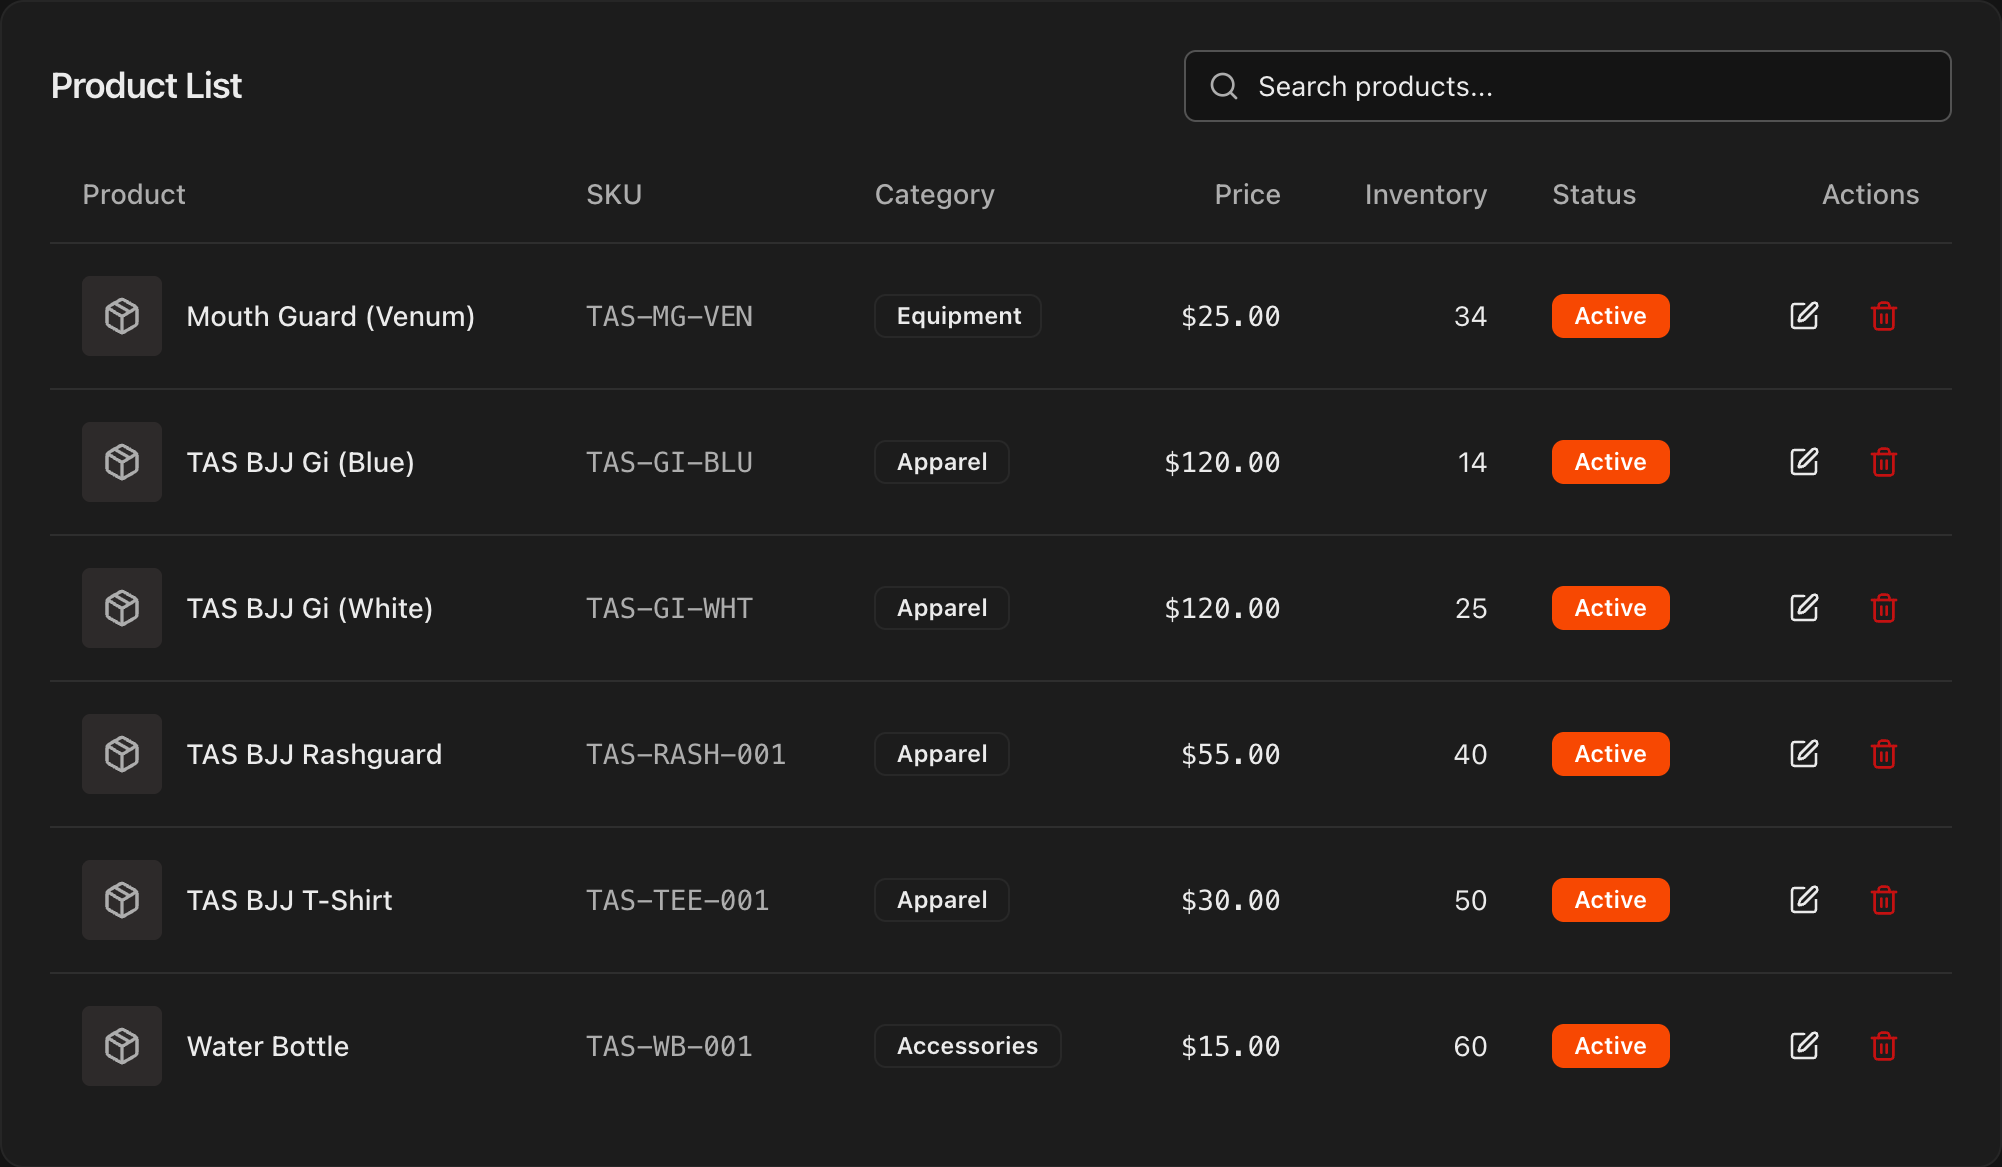
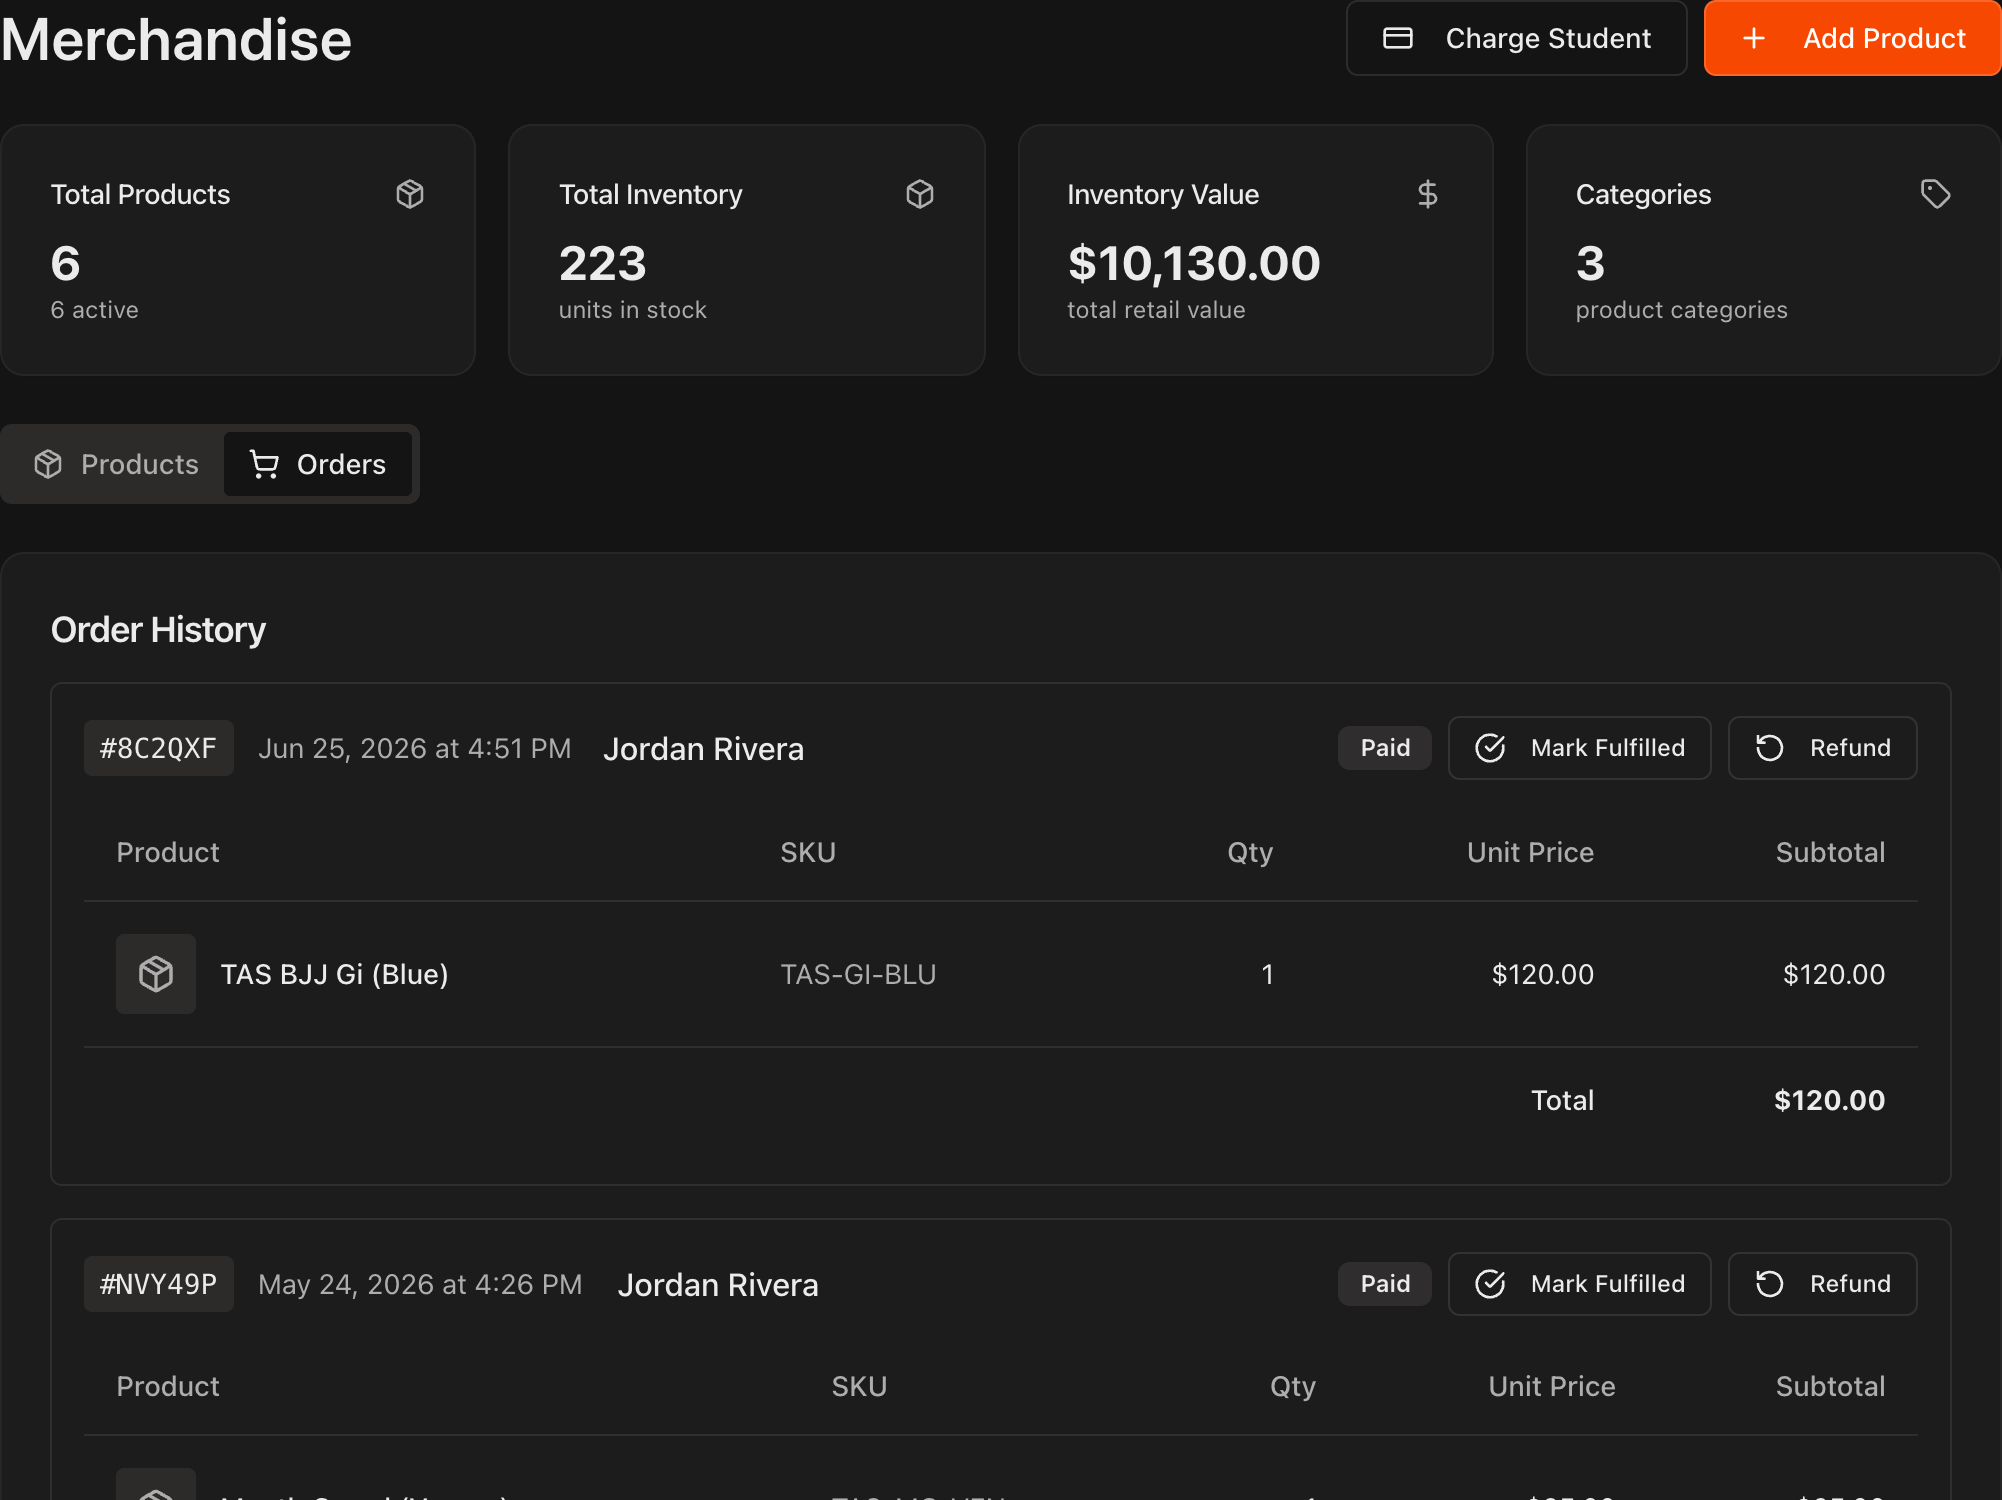
The stat cards at the top track Total Products, Total Inventory, Inventory Value, and Categories.
Switch between the Products and Orders tabs to manage your store.
With more than one gym, the stats split inventory per gym and the Product List shows an Inventory column per gym plus a Total. Use the All gyms filter to see one gym's stock.
Add a product
Click Add Product at the top right.
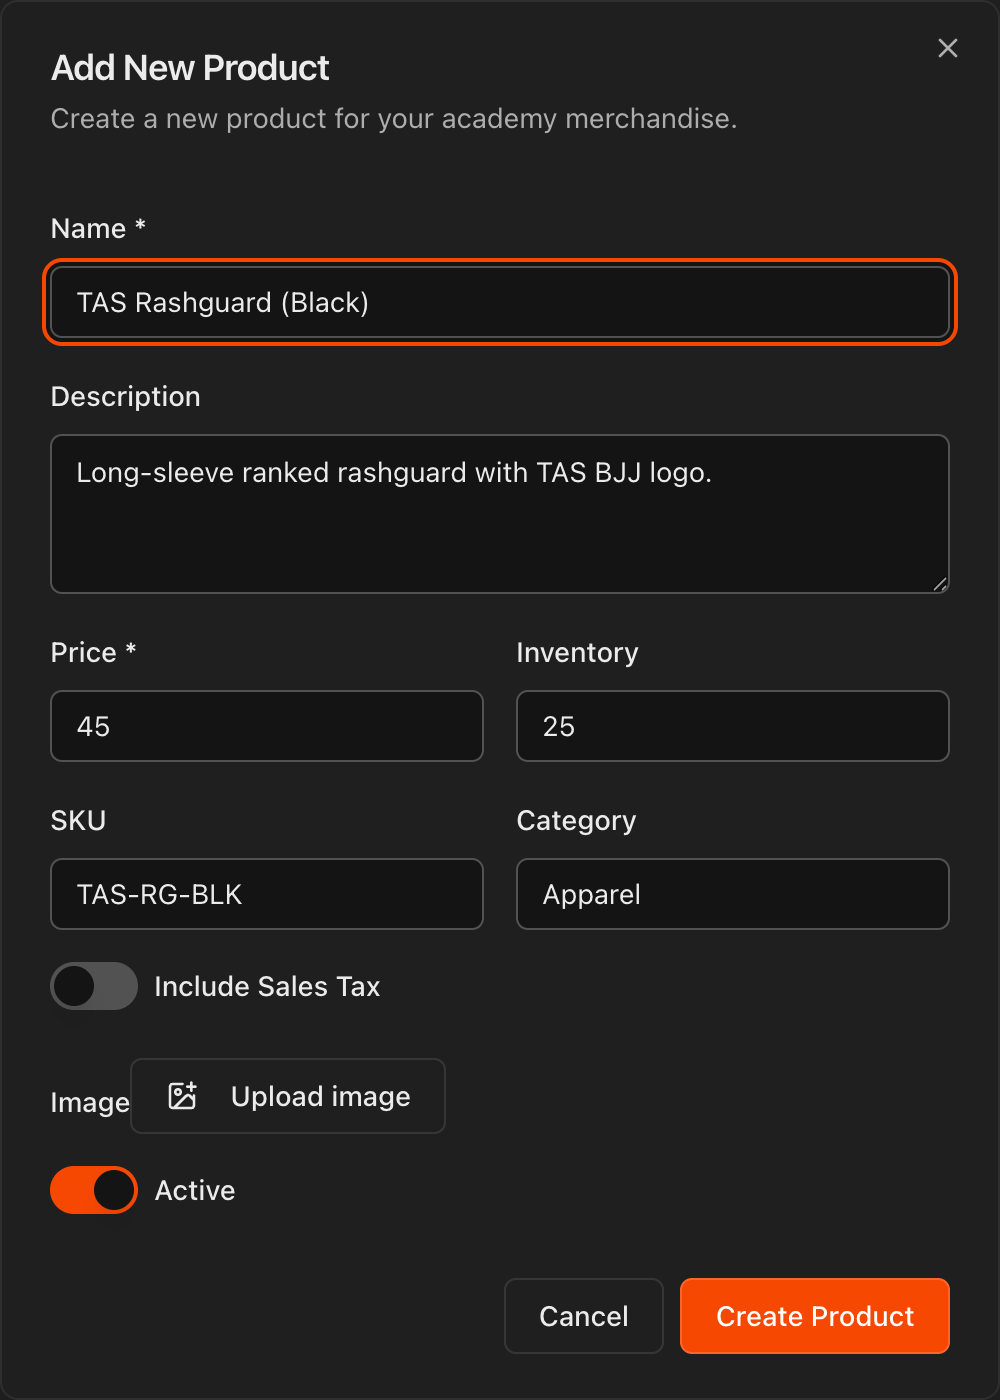
In the Add New Product dialog, enter the Name, Description, Price, Inventory, SKU, and Category.
Toggle Include Sales Tax if the price should include tax, and click Upload image to add a product photo.
Leave Active switched on so students can see the product, then click Create Product.
Under Inventory by gym, enter the stock each gym holds. Set a gym to 0 if it does not carry the product.
Tip
Add a photo to every product. Gear with images sells better in the student **Shop**.
Caution
Marking a product inactive removes it from your **Product List** entirely, exactly as if it were deleted. There is currently no way to view or reactivate an inactive product, so only turn **Active** off if you intend to remove the product permanently.
Note
Products are shared across all your gyms, but stock, inventory value and sales revenue are tracked per gym. A gym with no stock cannot sell the product.
Let students shop from their portal
Every Active product in your Product List appears on the Shop page of your students' Kmura portals.
Students add products to their cart and purchase them right from their portal.
Note
Orders placed through the student portal show up on the **Orders** tab of the **Merchandise** page, so your staff always knows what to fulfill.
Manage orders on the Orders tab
Open the Orders tab to see the Order History.
Each order shows the student, the items, the total, and its payment status.
Click Mark Fulfilled once the student has their gear, or Refund if something goes wrong.
Charge a student directly
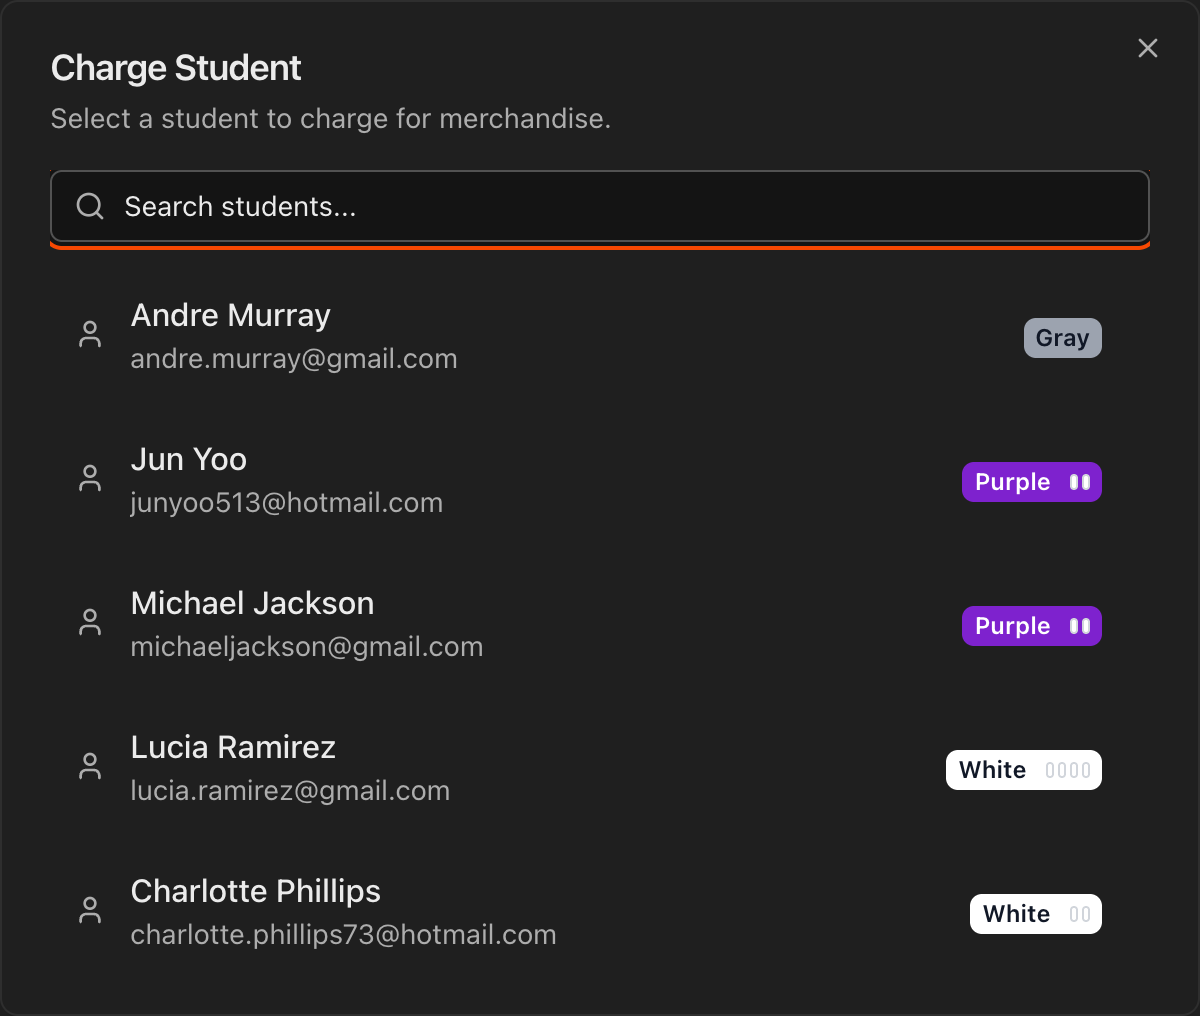
Click Charge Student at the top right of the Merchandise page.
Search for and select the student you want to charge.
Note
Direct charges use the card or bank account the student has on file, so make sure they have a payment method saved first.
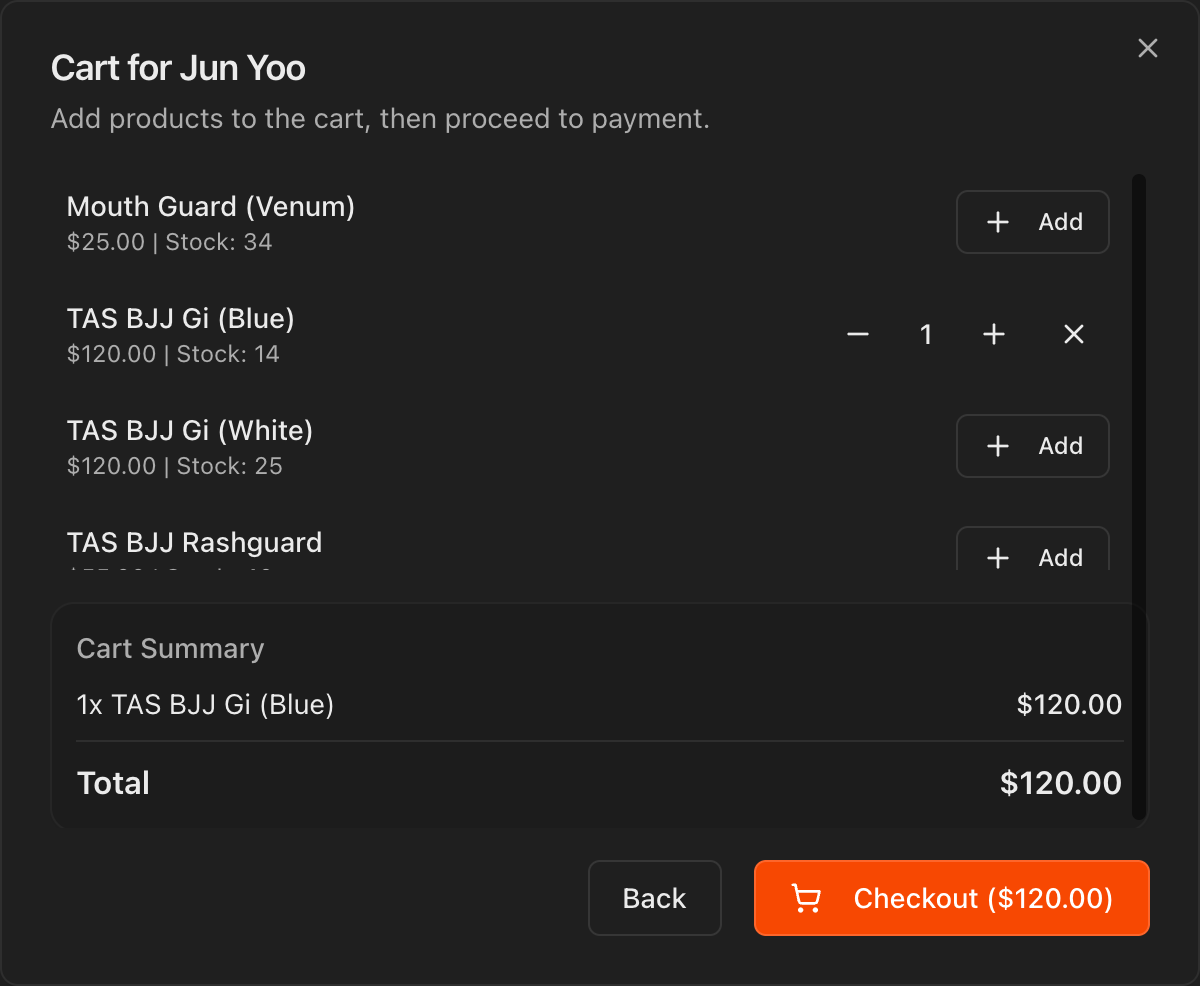
Build the cart and complete the charge
Add products to the student's cart with the Add buttons, and adjust quantities as needed.
The Cart Summary shows a running total.
Click Checkout to complete the charge.