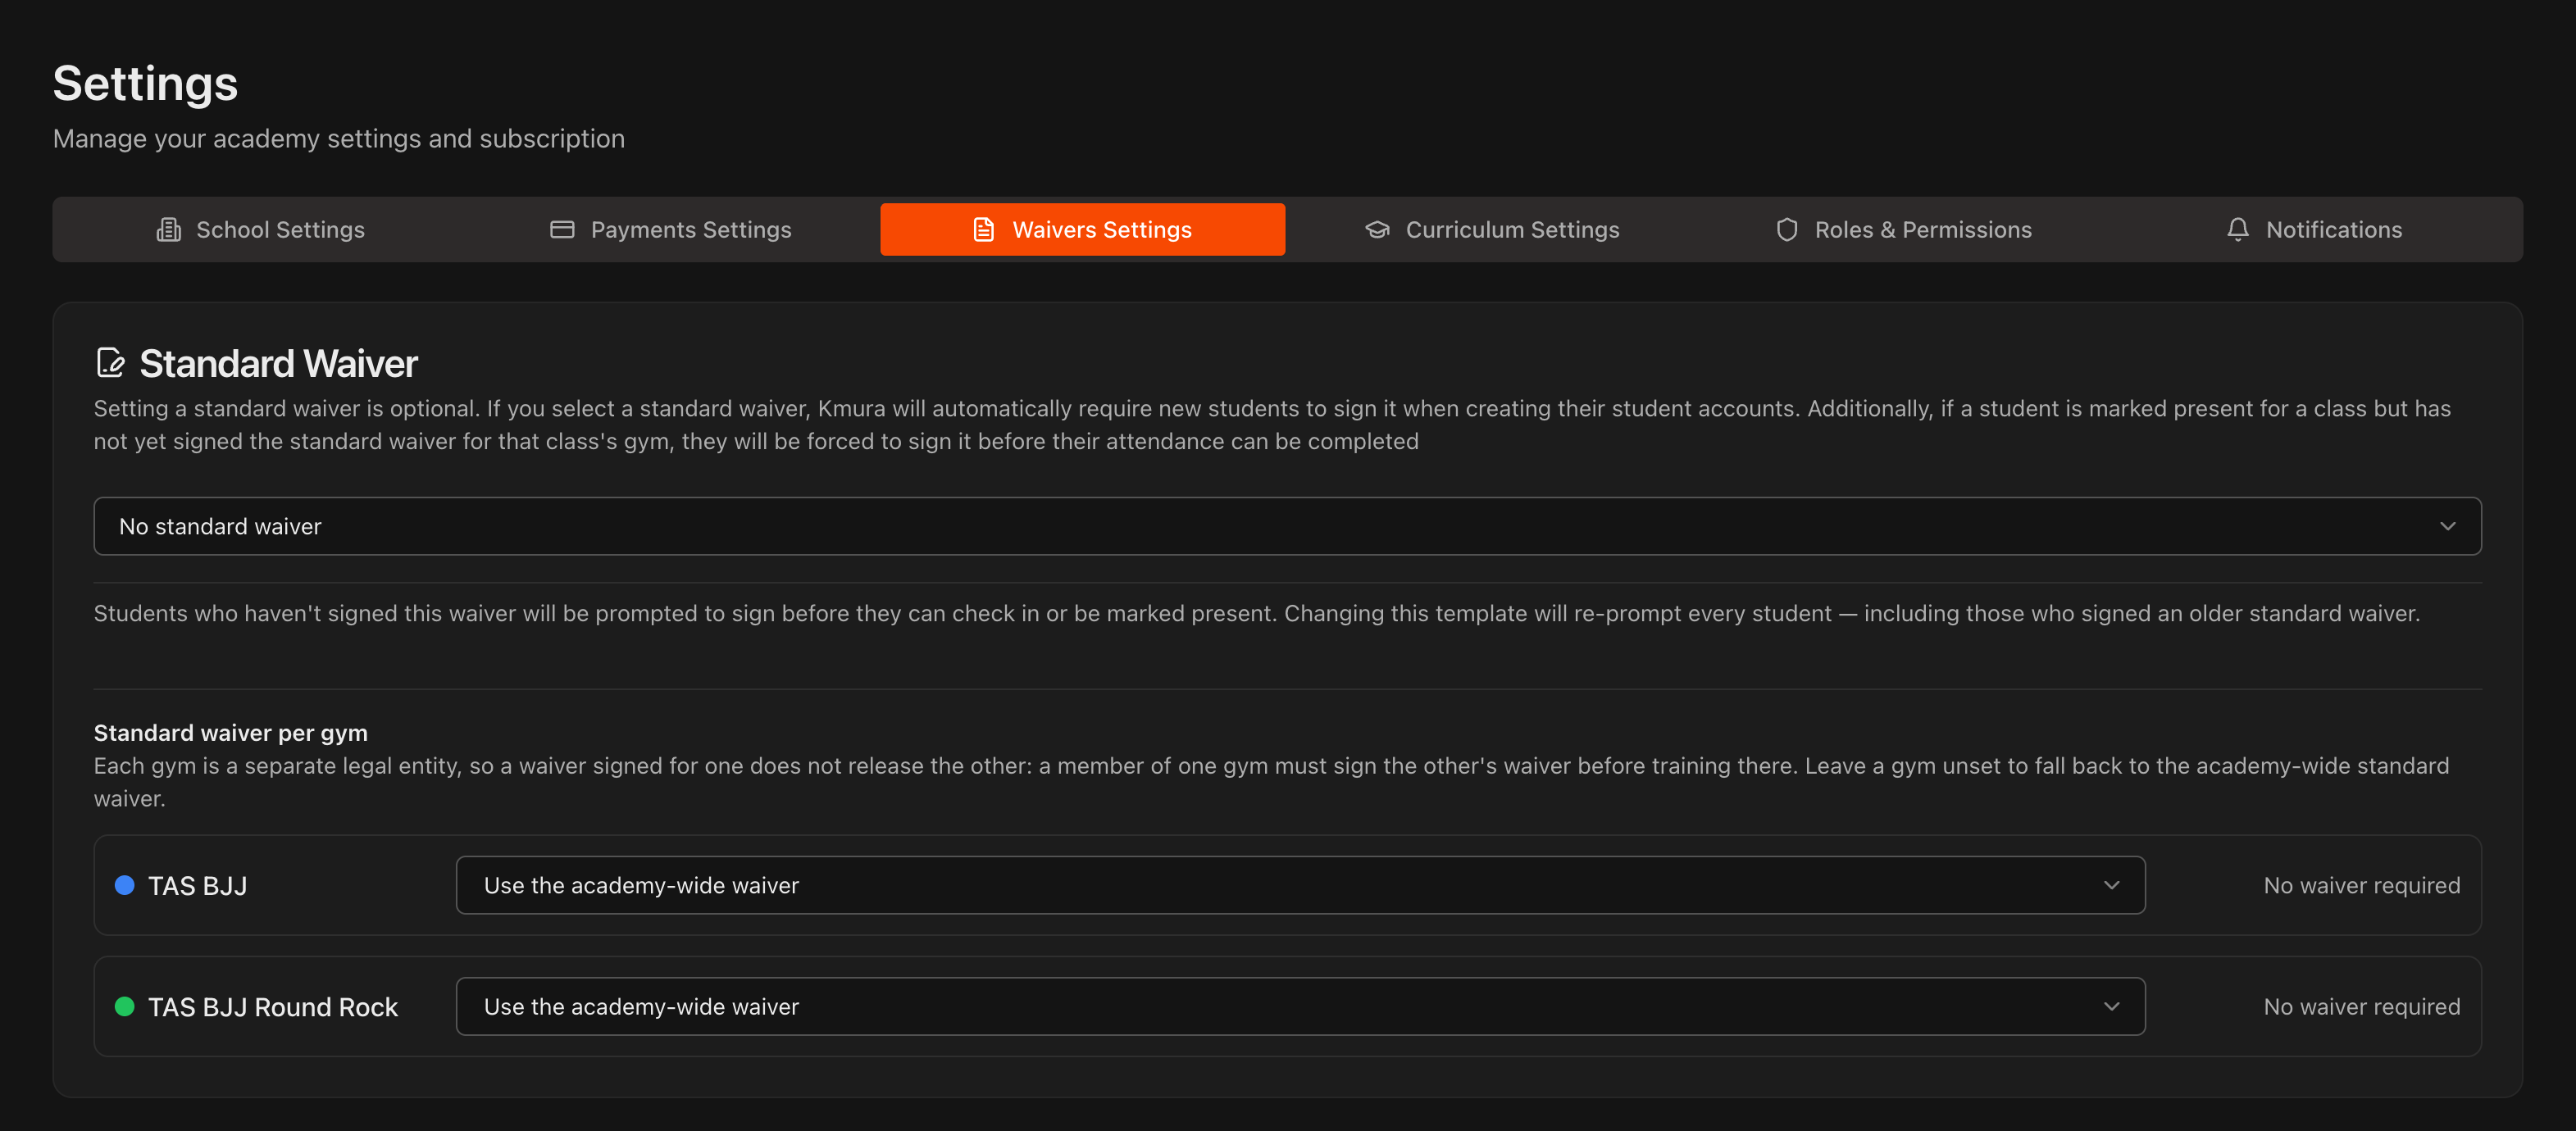
Open the Waivers page
Go to Settings in the left sidebar, then open Waivers.
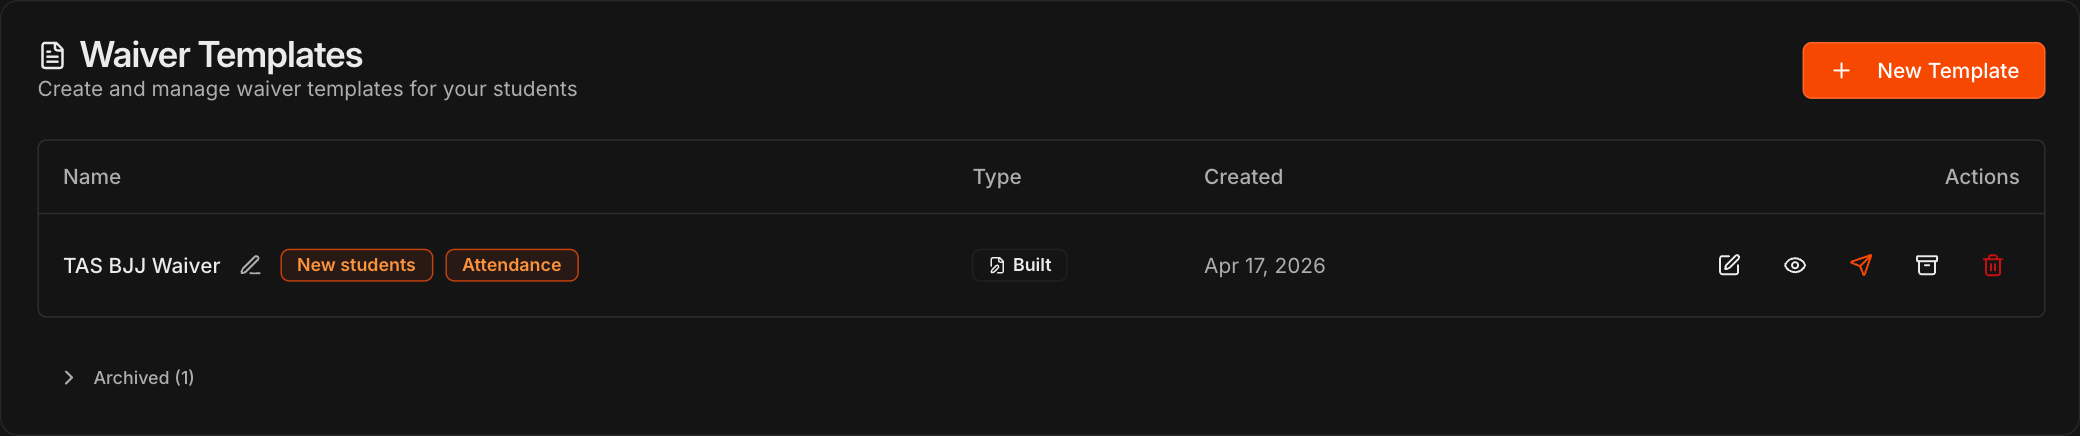
The Waiver Templates section lists every template you have saved, with its Type (Built or PDF Upload) and the date created.
Each row has action icons to edit, preview, send, archive, or delete that template.
Badges next to a template's name show which requirement it fills: New students, Attendance, or both.
Note
This page has two areas: **Waiver Templates**, where you create and store waivers, and **Required Waivers**, covered in Step 6.
Start a new waiver template
Click New Template at the top-right of the Waiver Templates section.
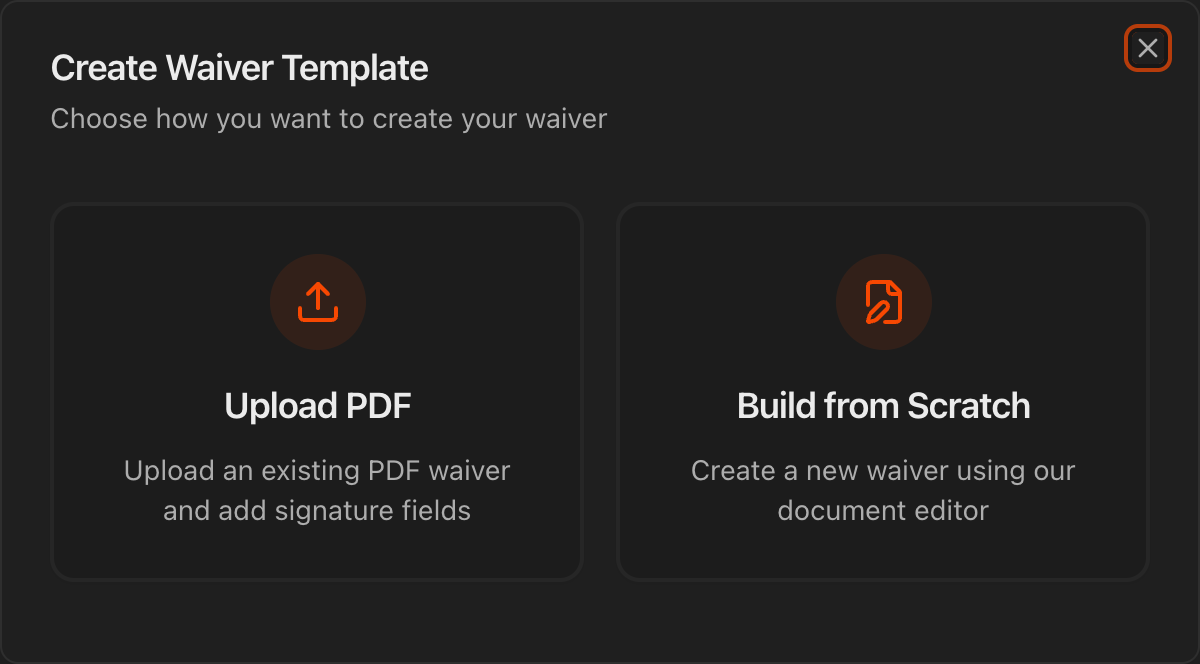
In the Create Waiver Template dialog, pick how to build it: Build from Scratch to use Kmura's document editor, or Upload PDF to add fields to a PDF you already have.
Enter a Template Name, then click Continue.
Build a waiver from scratch
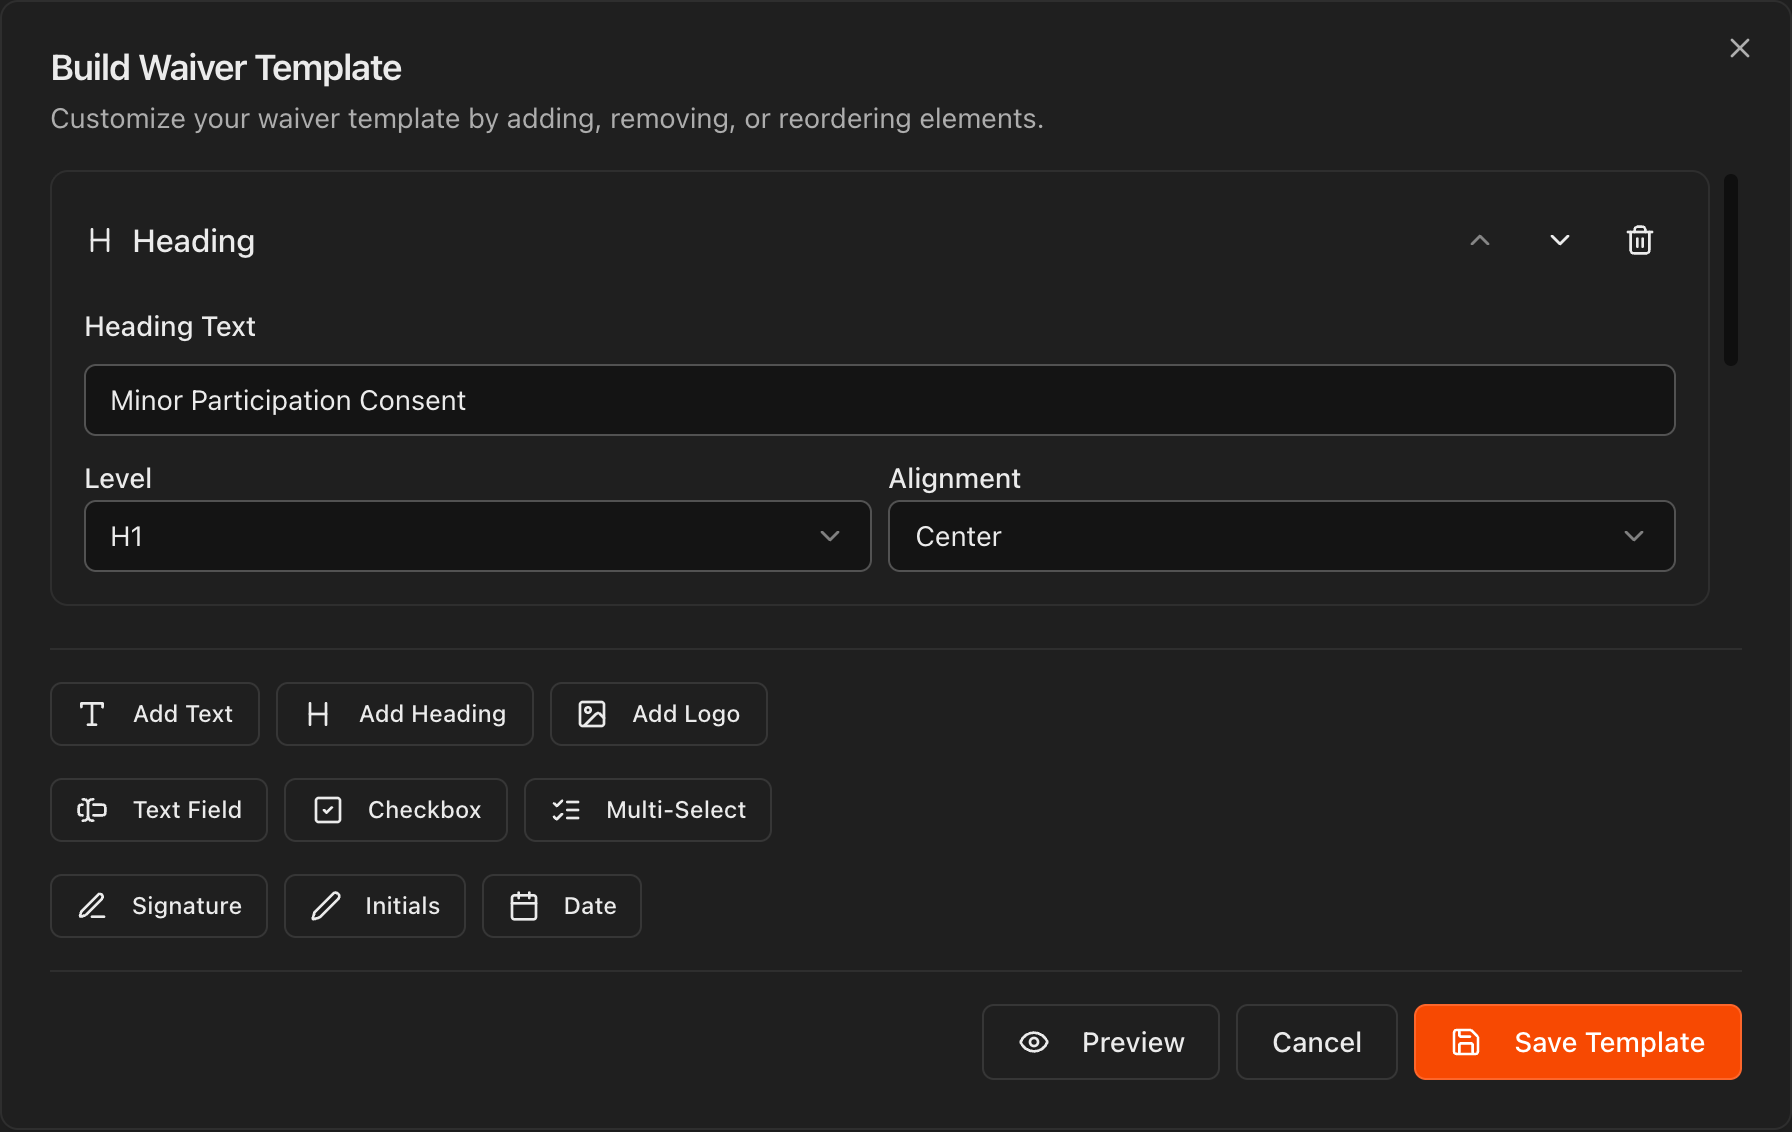
After choosing Build from Scratch, Kmura opens the Build Waiver Template editor.
Add sections with the element buttons: Add Text, Add Heading, Add Logo, Text Field, Checkbox, Multi-Select, Signature, Initials, and Date.
Edit each block inline. A heading has Heading Text, Level, and Alignment; a text block has Text Content, Font Size, and Alignment.
Reorder any block with the up and down arrows, or remove it with the trash icon.
Note
**Signature**, **Initials**, and **Date** blocks are the fields your students fill in when they sign.
Preview and save
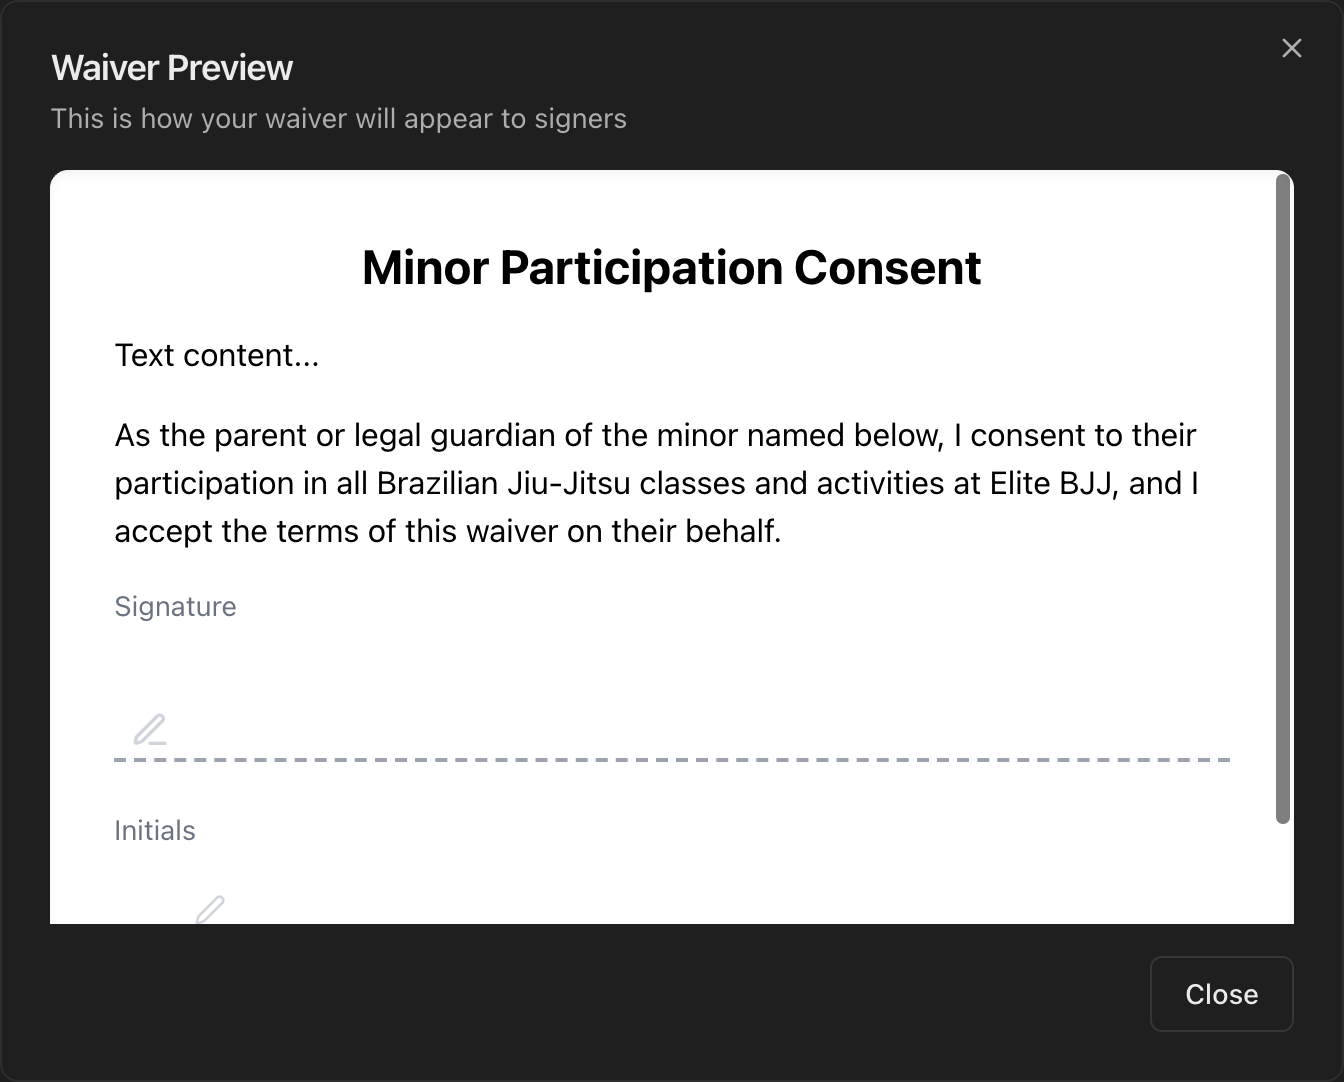
Click Preview at any point to see exactly how the waiver appears to signers in the Waiver Preview window.
Close the preview to keep editing, or click Save Template when you are done.
The saved waiver appears in the Waiver Templates list with the Built type.
Upload a PDF and place fields
From the Create Waiver Template dialog, choose Upload PDF, name the template, then drag in or click to upload your PDF.
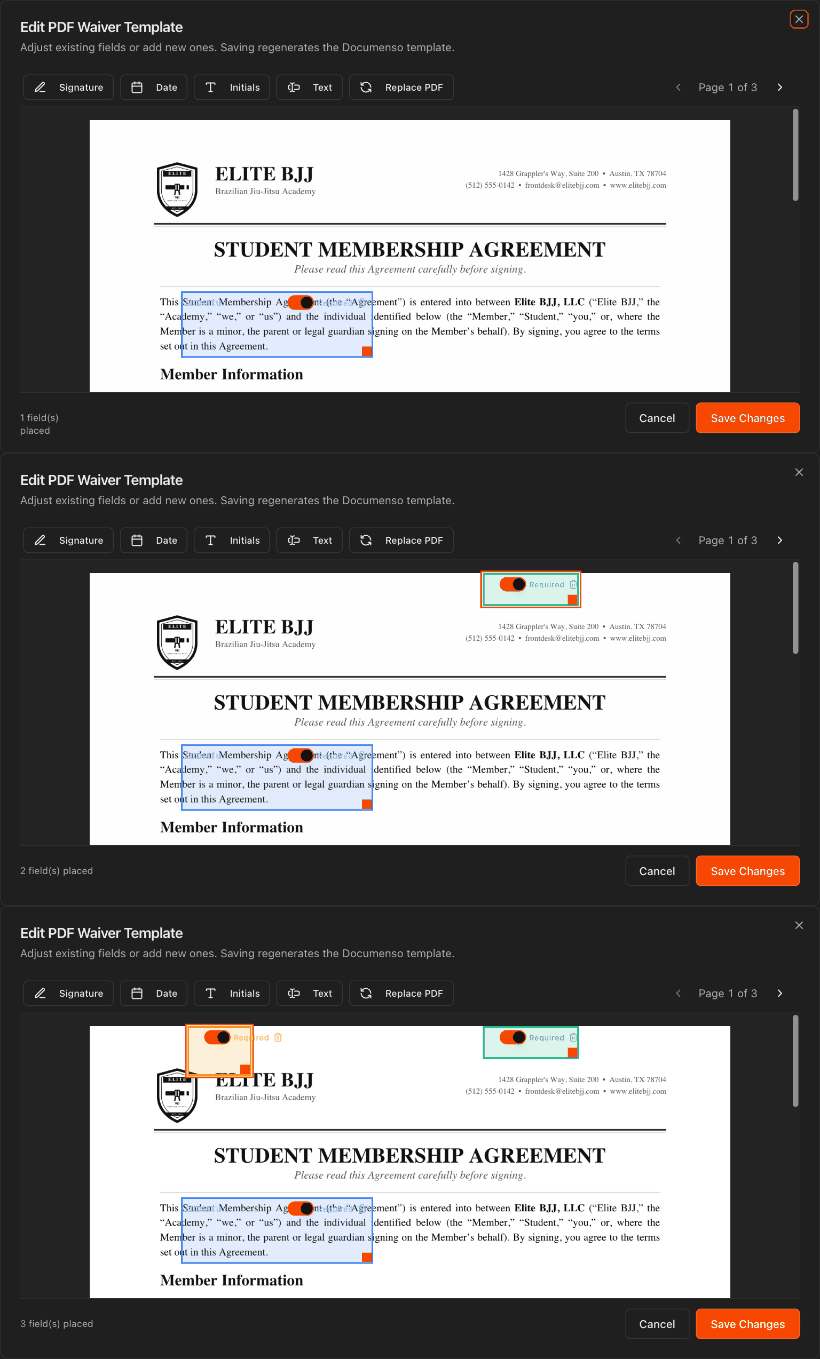
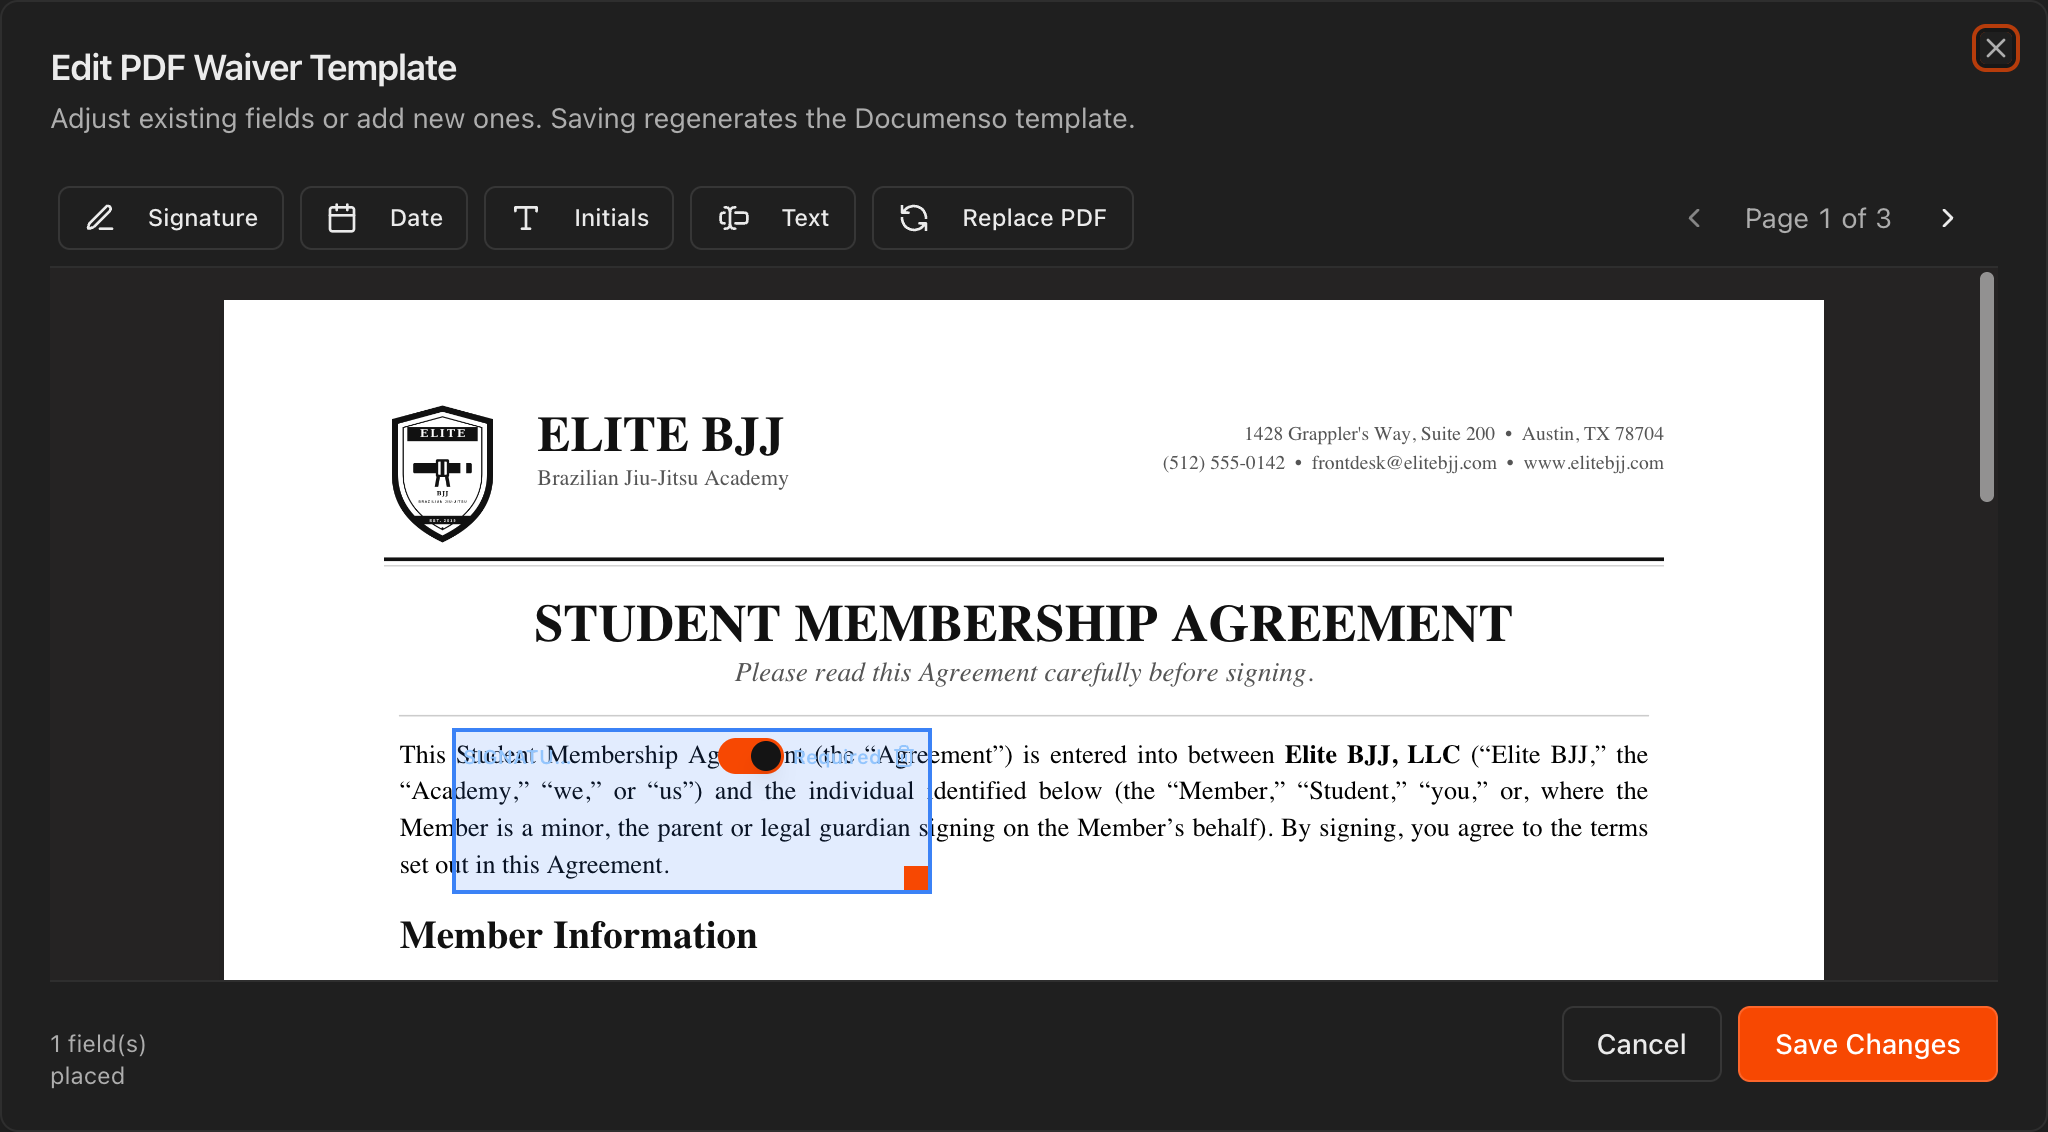
Pick a field type (Signature, Date, Initials, or Text), then click on the document to drop it where signers should fill it in. Drag or resize to adjust, and use the page arrows to move between pages.
Turn on the Required toggle for any field you want signers to be forced to complete, then click Save Template.
Tip
When you reopen a PDF template, **Replace PDF** swaps in an updated document while keeping your placed fields. Be sure to confirm the fields again after replacing the PDF.
Choose your required waivers
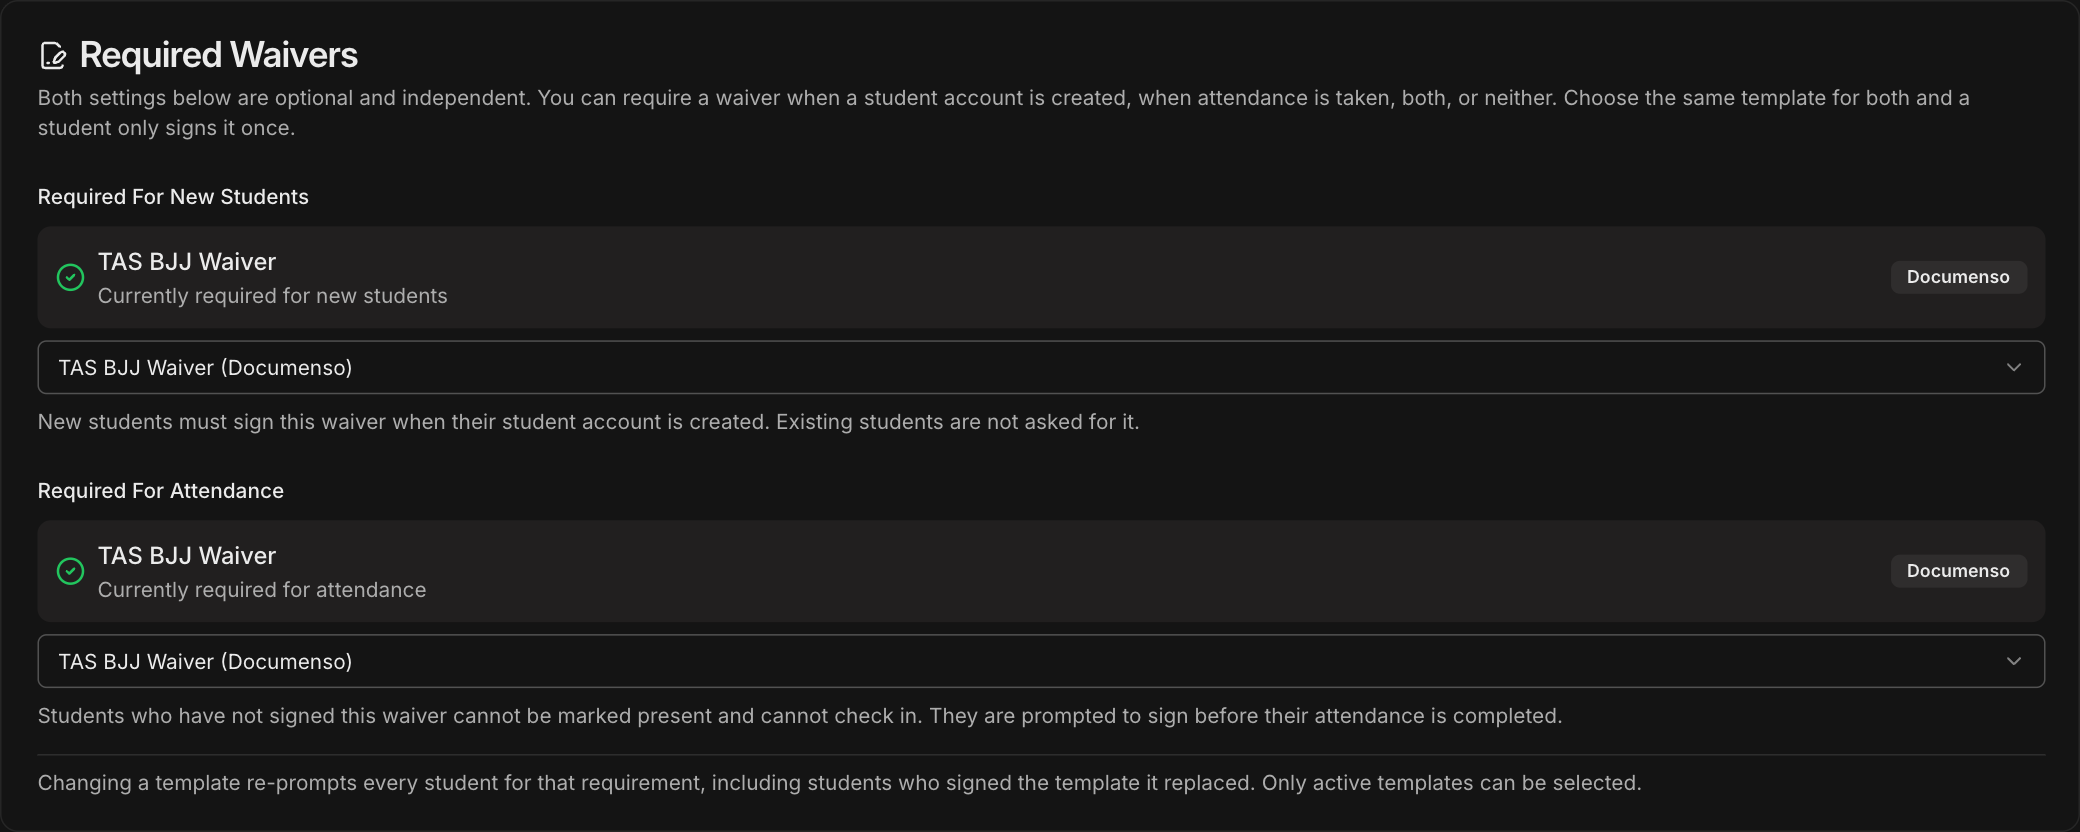
Scroll to Required Waivers. Both settings are optional and independent, and each one saves as soon as you pick a template.
Required For New Students: new students must sign this waiver when their student account is created. For students under 18, the parent or guardian signs on their behalf. Existing students are not asked for it.
Required For Attendance: students who have not signed this waiver cannot be marked present and cannot check in. Kmura prompts them to sign before their attendance is completed.
Pick the same template for both and a student only signs it once.
Caution
Changing a template re-prompts every student for that requirement, including students who signed the template it replaced. Only active templates can be selected.
Note
Sending waivers and signing waivers are covered in separate guides.
Set a standard waiver per gym
With more than one gym, the Standard Waiver card gains a Standard waiver per gym section with a row per gym.
Leave a gym on Use the academy-wide waiver to fall back to the academy standard waiver, or pick a template just for that gym.
The Gym column in Waiver Templates shows whether a template applies to all gyms or to specific ones.
Note
Each gym is its own legal entity, so a waiver signed for one does not release the other. A member of one gym must sign the other gym's waiver before training there.