Find and manage events on the Events page
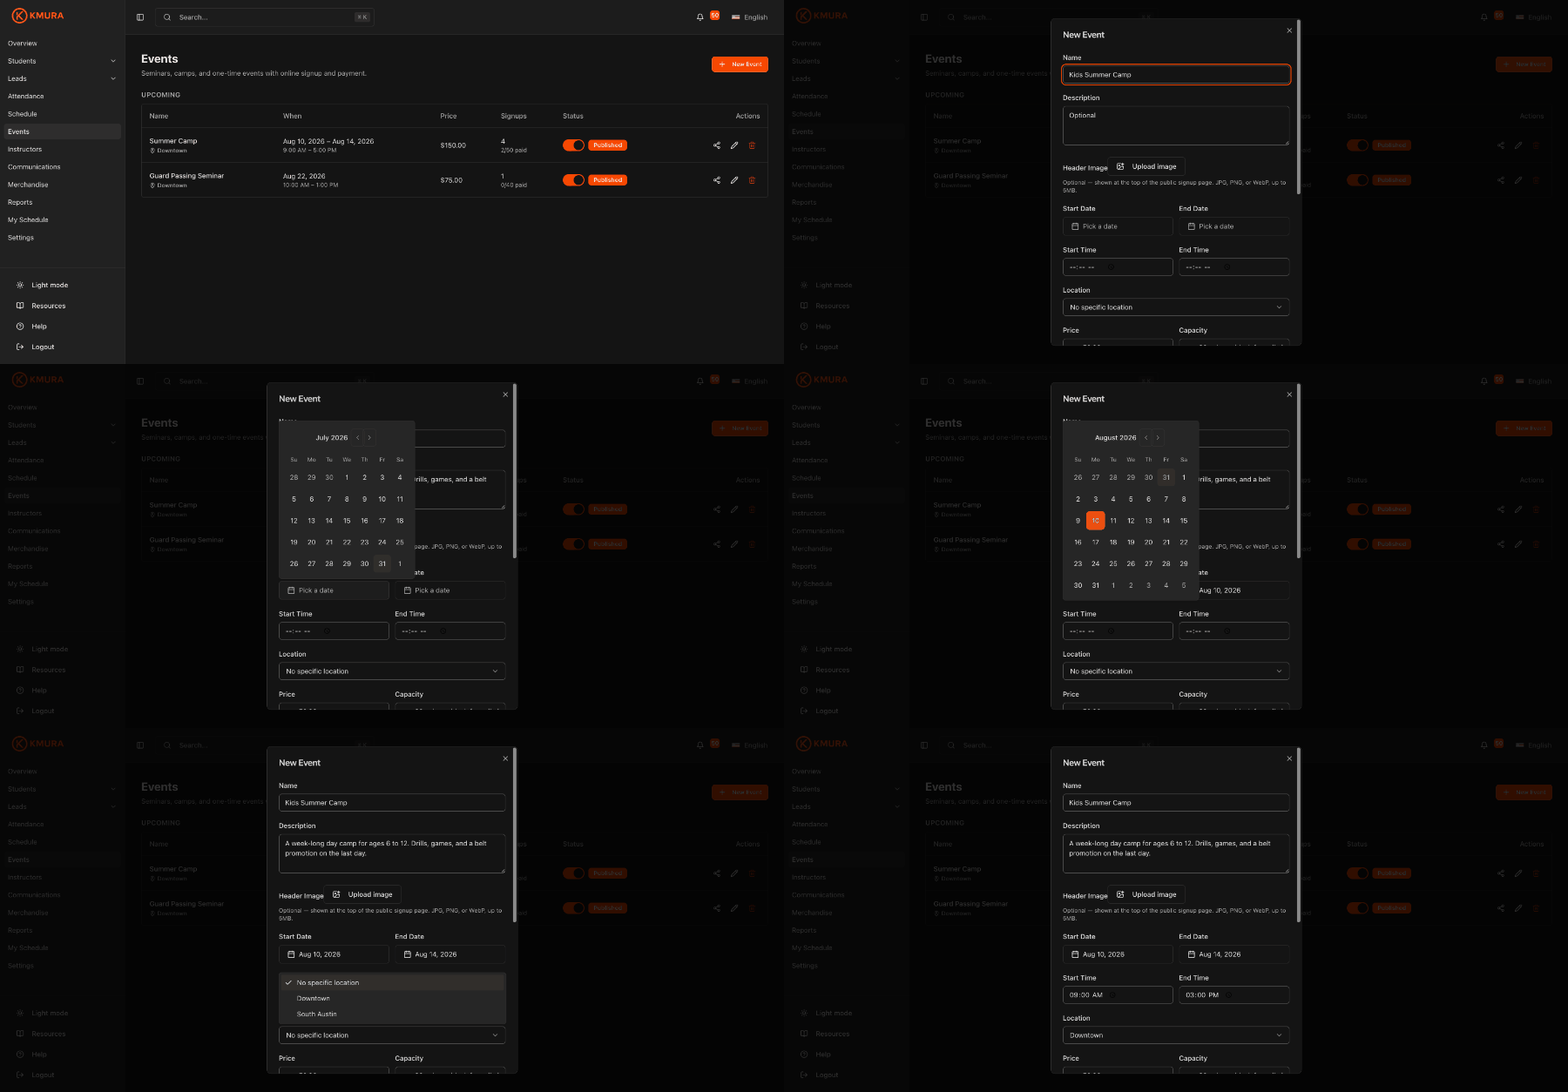
Click Events in the left sidebar to see every seminar, camp, and one-time event listed under Upcoming.
Each row shows the event Name, Location / Entity (where it runs and which gym receives the money), When, Price, Signups, and Status.
For an event with tiered pricing, the Price column shows the full range (for example $50.00 to $100.00) with a note such as 2 tiers · member price underneath.
Use the toggle in the Status column to publish or unpublish an event without deleting it.
The Actions column holds three buttons: share, edit, and delete.
Click any row to open that event and see its registrants.
Note
The **Signups** column shows total registrations on the first line and paid seats against capacity on the second, so you can read both at a glance.

Create an event
Click New Event in the top right of the Events page.
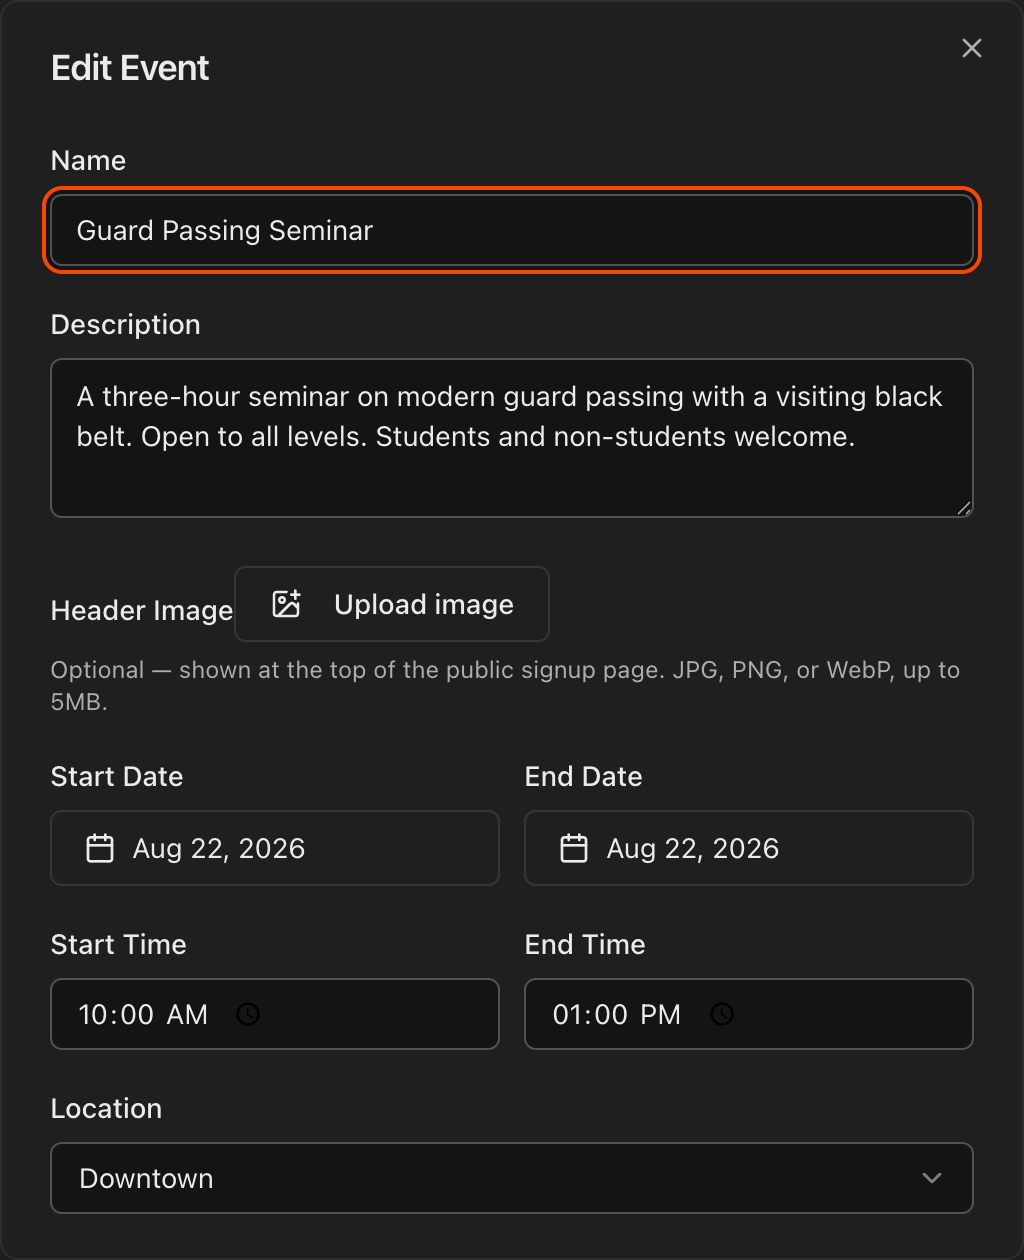
Enter a Name and an optional Description. Both appear on the public signup page.
Add a Header Image if you want a banner at the top of the signup page. JPG, PNG, or WebP, up to 5MB.
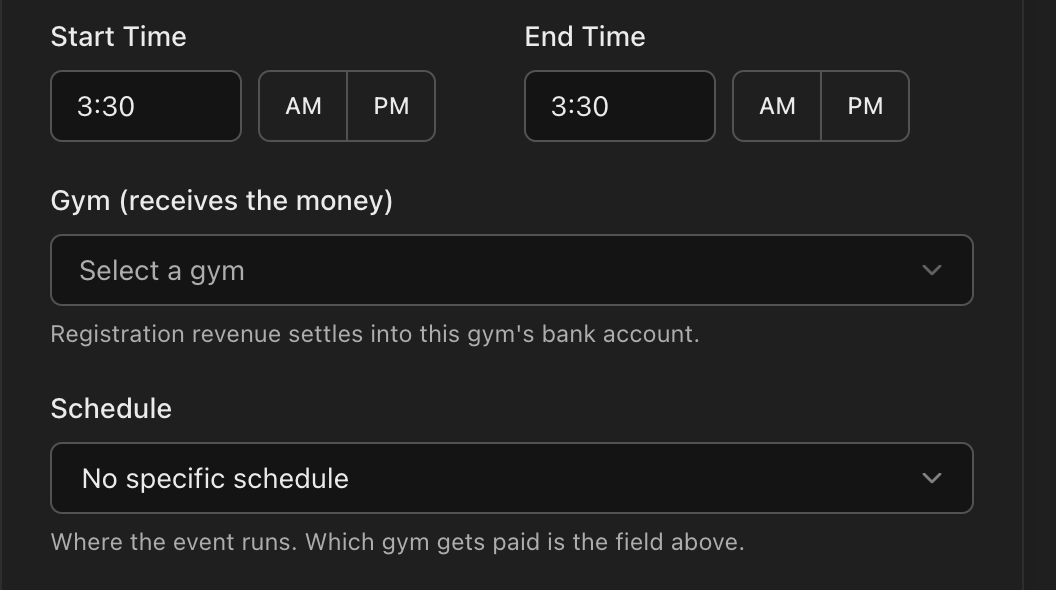
Set the Start Date, End Date, Start Time, and End Time. A one-day seminar uses the same start and end date.
Choose the Gym (receives the money): registration revenue settles into that gym's bank account. Optionally pick a Schedule to say where the event runs, or leave it on No specific schedule.
Tip
For a multi-day camp, set **Start Date** and **End Date** to the first and last day. The **Events** list then shows the full date range.
Set the price, capacity, waiver, and signup form fields
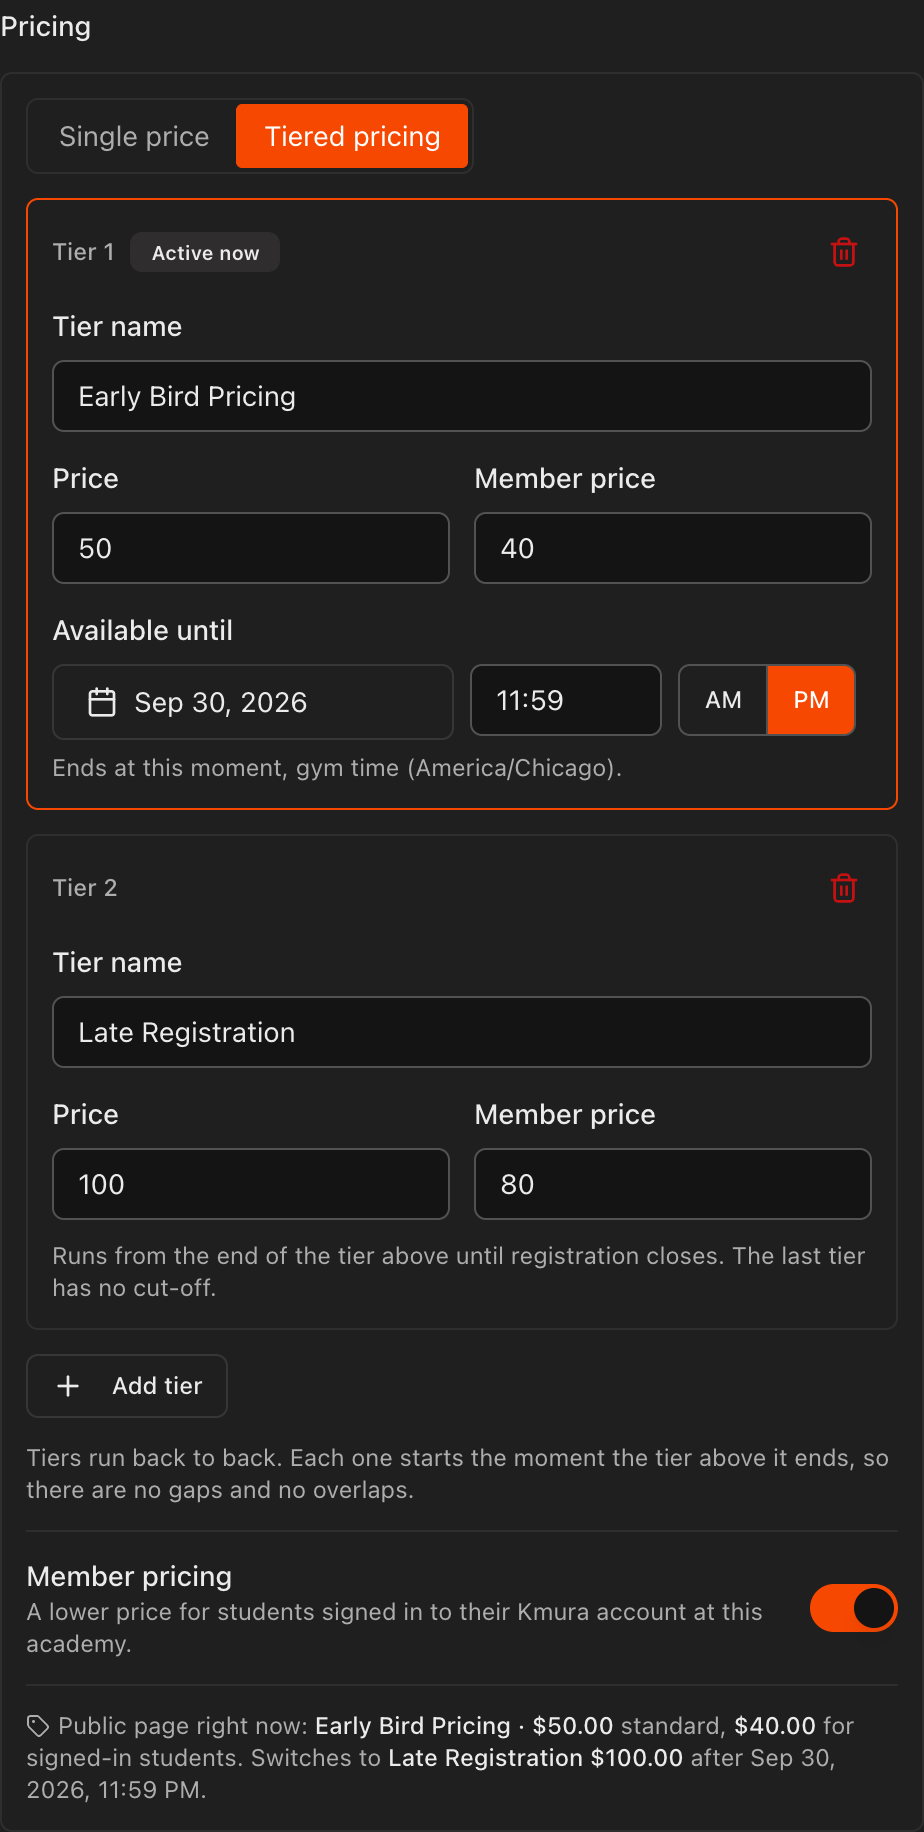
Under Pricing, choose Single price or Tiered pricing.
Single price: enter one Price for everyone. Enter 0 to make the event free.
Tiered pricing: give each tier a Tier name (for example Early Bird Pricing), a Price, and an Available until date and time. Click Add tier for the next tier.
Tiers run back to back. Each one starts the moment the tier above it ends, and the last tier has no cut-off, so it runs until signups close.
Turn on Member pricing to add a Member price next to each price. Students who sign in to their Kmura account at your academy get the member price automatically.
The Public page right now line at the bottom of the Pricing box tells you which tier and price visitors see at this moment, and when it switches.
Set a Capacity to cap registrations, or leave it blank for unlimited seats.
Choose a Waiver Template if registrants must sign a waiver before they attend, or leave it on None (no waiver).
Name and Email are always collected. Turn on any of Phone, Birthday, Gender, Parent / Guardian, and Emergency Contact to add them to the signup form.
Turn on Published, then click Create.
Note
**Waiver Template** lists the waivers saved under **Settings** > **Waivers**. Build the waiver there first and it becomes selectable here.
Tip
Only turn on the fields you actually need. Every extra field is one more step between a prospect and a paid seat.
Caution
The public signup page only works while the event is **Published**. Leave **Published** off while you are still drafting.
Tip
Tier cut-offs use your gym's time zone. Setting an early-bird cut-off to 11:59 PM on the last day of the month is the cleanest way to avoid confusion.
Share the signup link or embed the form
On the Events page, click the leftmost button in the Actions column.
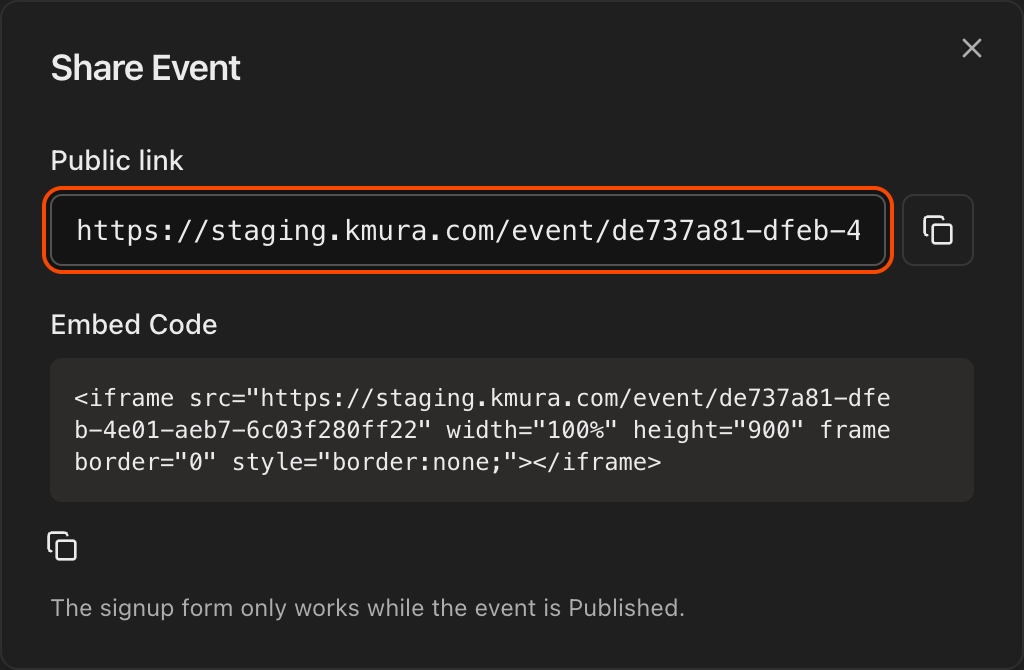
Copy the Public link to send by email, text, or social post. It opens the event's own registration page.
Copy the Embed Code to drop the whole signup flow into your website as an iframe.
Note
Both the link and the embed stop working when the event is unpublished, so publish before you share.
Edit or delete an event
On the Events page, click the pencil icon in the Actions column to reopen the event as Edit Event.
Change anything you set at creation: name, description, dates, gym, schedule, price, capacity, waiver, and signup fields.
Click the trash icon to delete the event.
You can also open an event and use the Share and Edit buttons in the top right.
Caution
Deleting an event removes its registrant list with it. If you only want to stop new signups, switch **Published** off instead.
What registrants see on the signup page
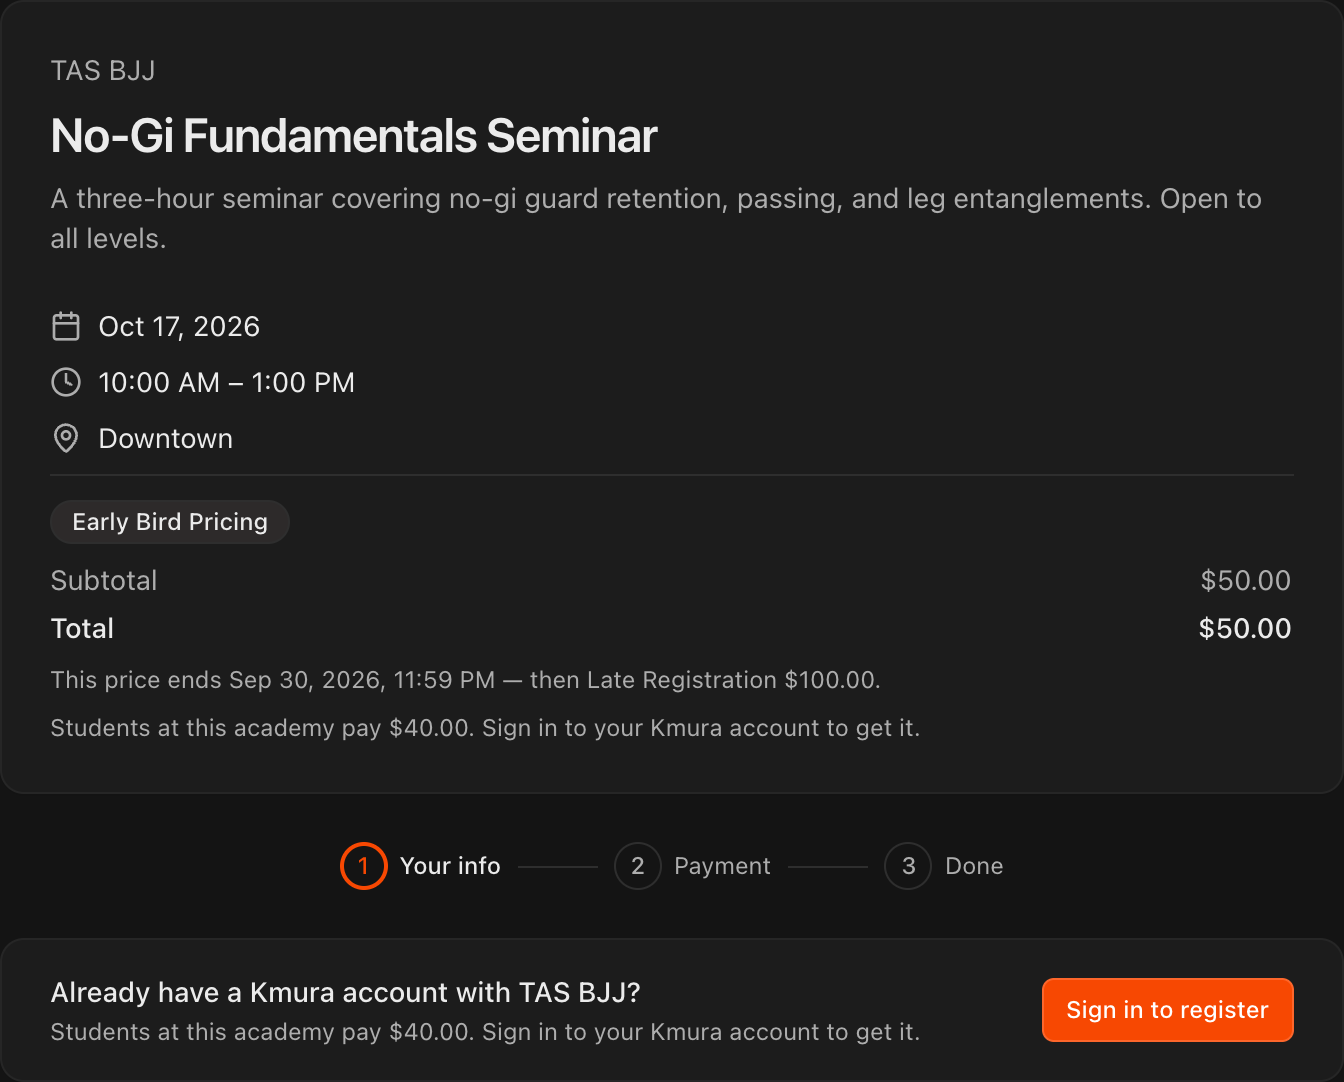
The page shows your event details, the total price, and a four-step flow: Your info, Waiver, Payment, and Done.
Anyone can register. They fill in the fields you turned on, sign the waiver on screen, and pay by Card or Bank account.
Existing students can click Sign in to register to sign into their Kmura account, choose who is attending, and pay with the card already on file.
For a tiered event, the page names the tier that is active right now, shows its price, and states when that price ends and what the next tier costs.
If you turned on Member pricing, the page tells visitors what students pay and prompts them to Sign in to register to get it.
Tip
Point your current students to **Sign in to register**. It fills in their details and skips manual card entry, so they finish in seconds.
Note
The signup form shows only the fields you turned on when you built the event, plus **Name** and **Email**.
Review registrations, payments, and waivers
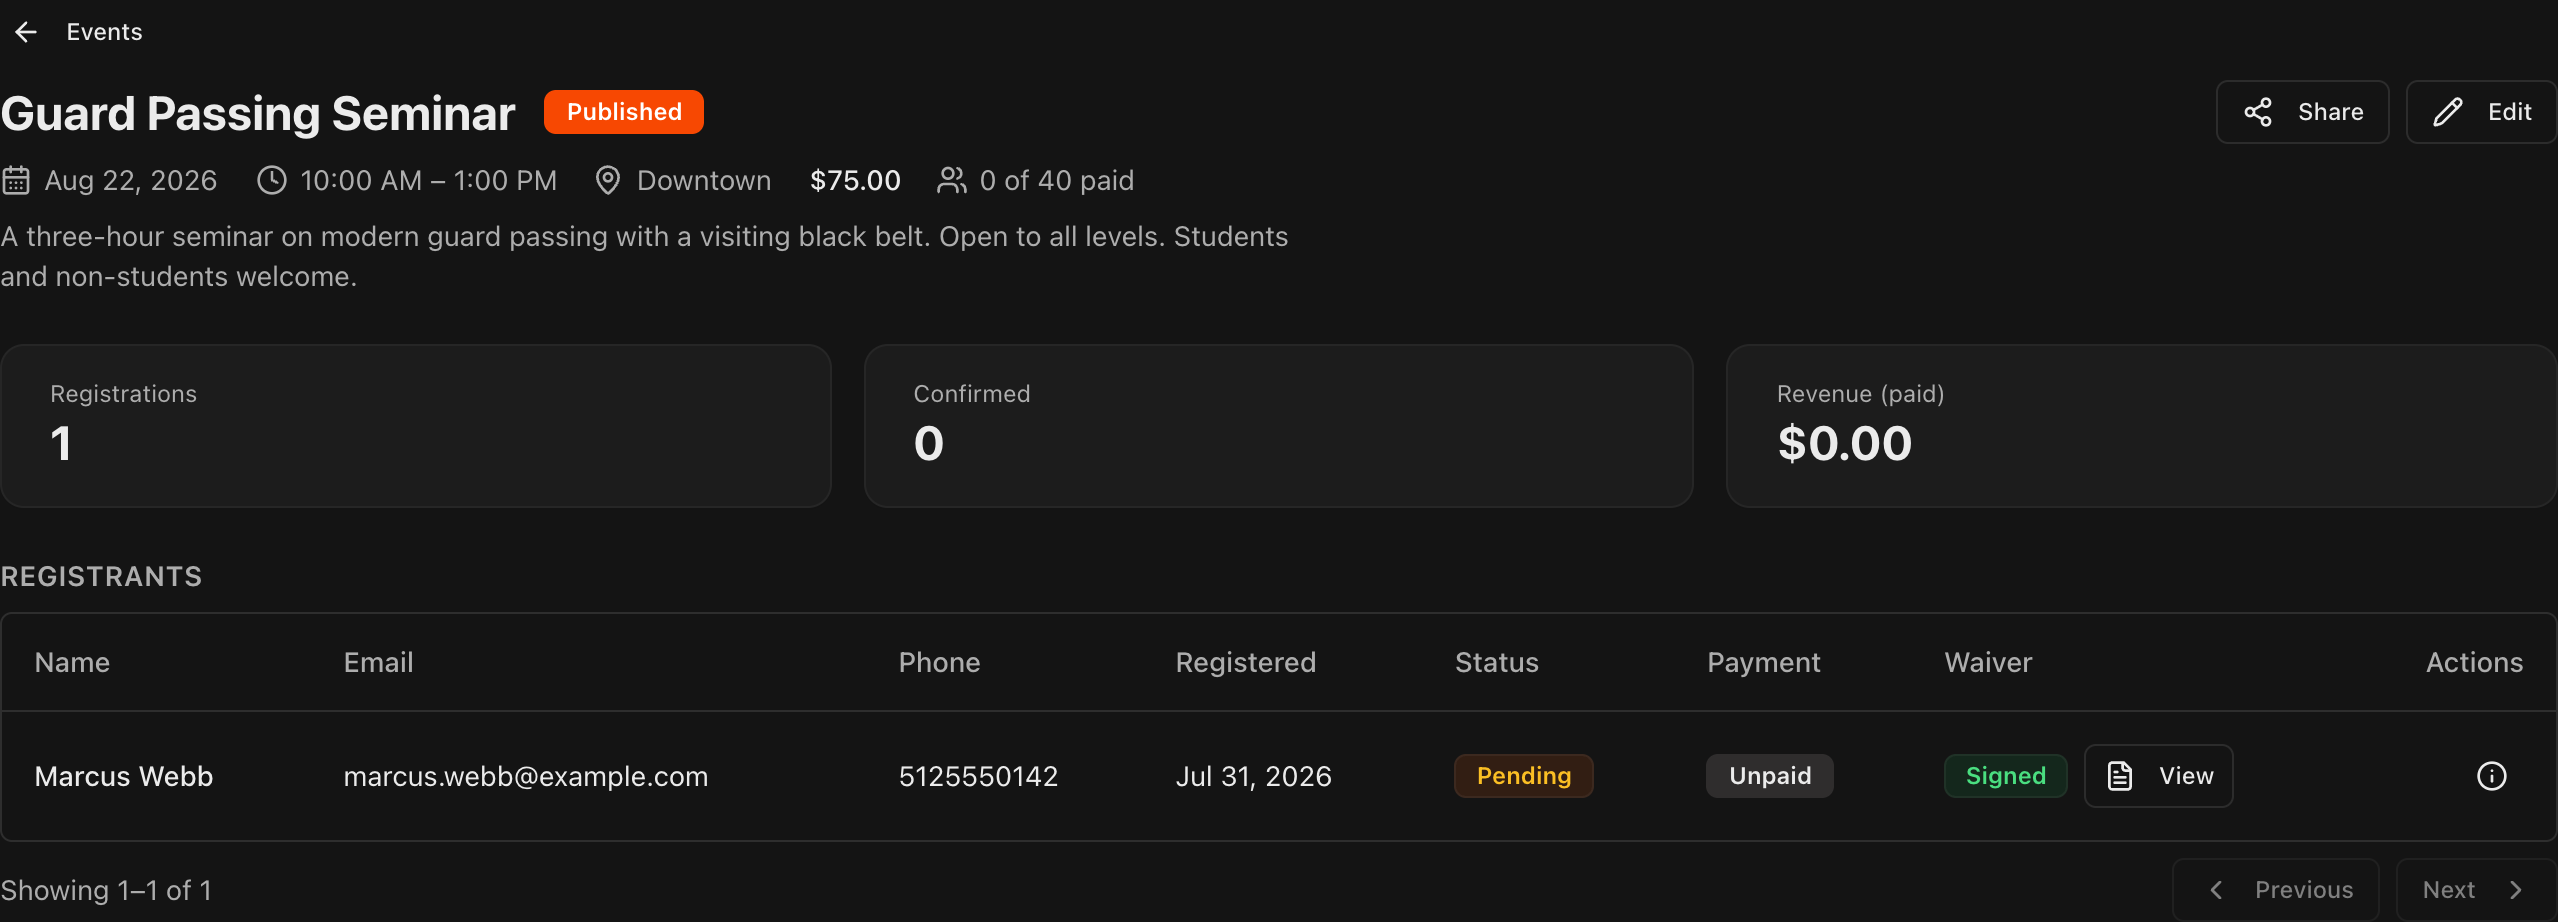
Click an event on the Events page to open it. The top of the page shows Registrations, Confirmed, and Revenue (paid).
Under the event details, badges show every pricing tier with its price and cut-off, plus the member prices when Member pricing is on. The active tier is highlighted in orange.
The Registrants table lists every signup with its Status, Payment, and Waiver.
Payment shows the amount collected, or Unpaid if the registrant has not paid yet.
Waiver shows Signed with a View button that opens the signed waiver PDF, or Pending if it has not been signed.
Signed (in app) means the registrant is an existing student who signed the waiver through their own Kmura account.
Click the info icon in the Actions column to see that registrant's extra form answers, such as birthday, parent or guardian, and emergency contact.
Click Refund to refund a paid registration.
Caution
**Refund** processes against the original payment and cannot be undone. Check the amount before you confirm.
Note
A registration stays **Pending** until its payment goes through. **Confirmed** counts the signups that are fully paid.

Tell existing students from new faces
Both current students and people outside your academy can sign up for an event.
If someone registers with an email that matches a student account at your academy, a Student badge appears next to their name in the Registrants table.
Registrants with no badge are new to you, so they are the ones worth following up with after the event.
Tip
Non-student registrants are your warmest leads. They already paid to train at your gym once, so a trial-week invite the week after converts well.