Open the Financials page
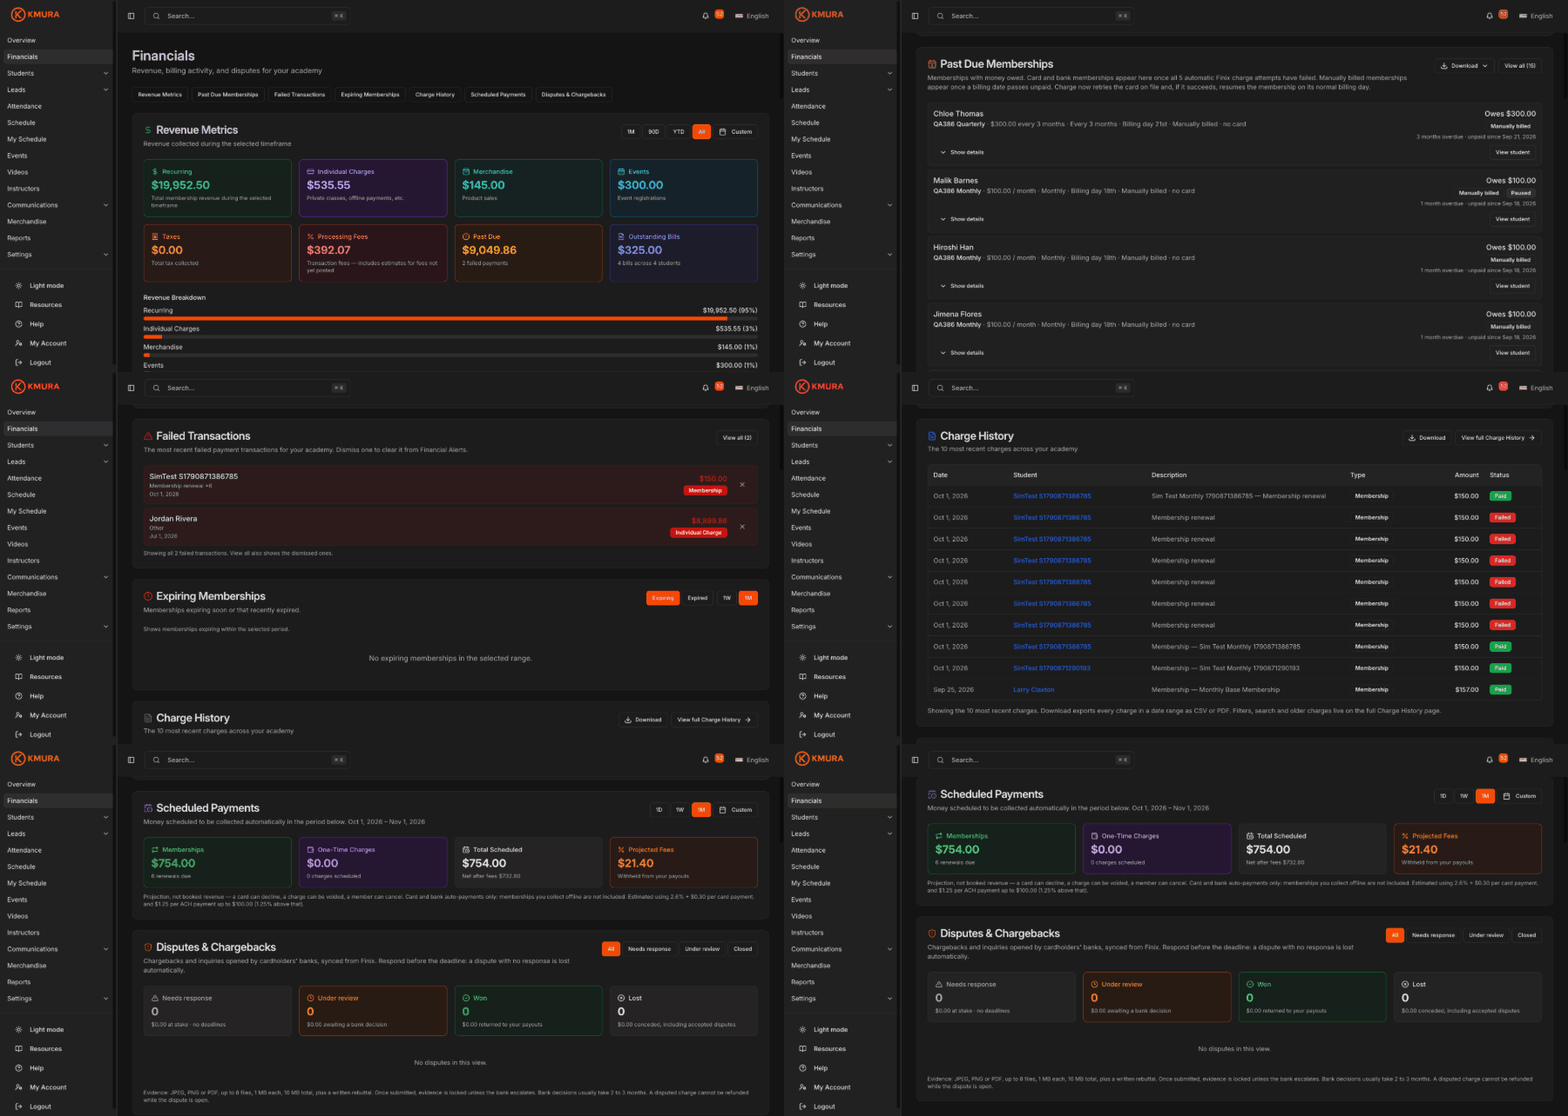
Click Financials in the left menu, directly under Overview.
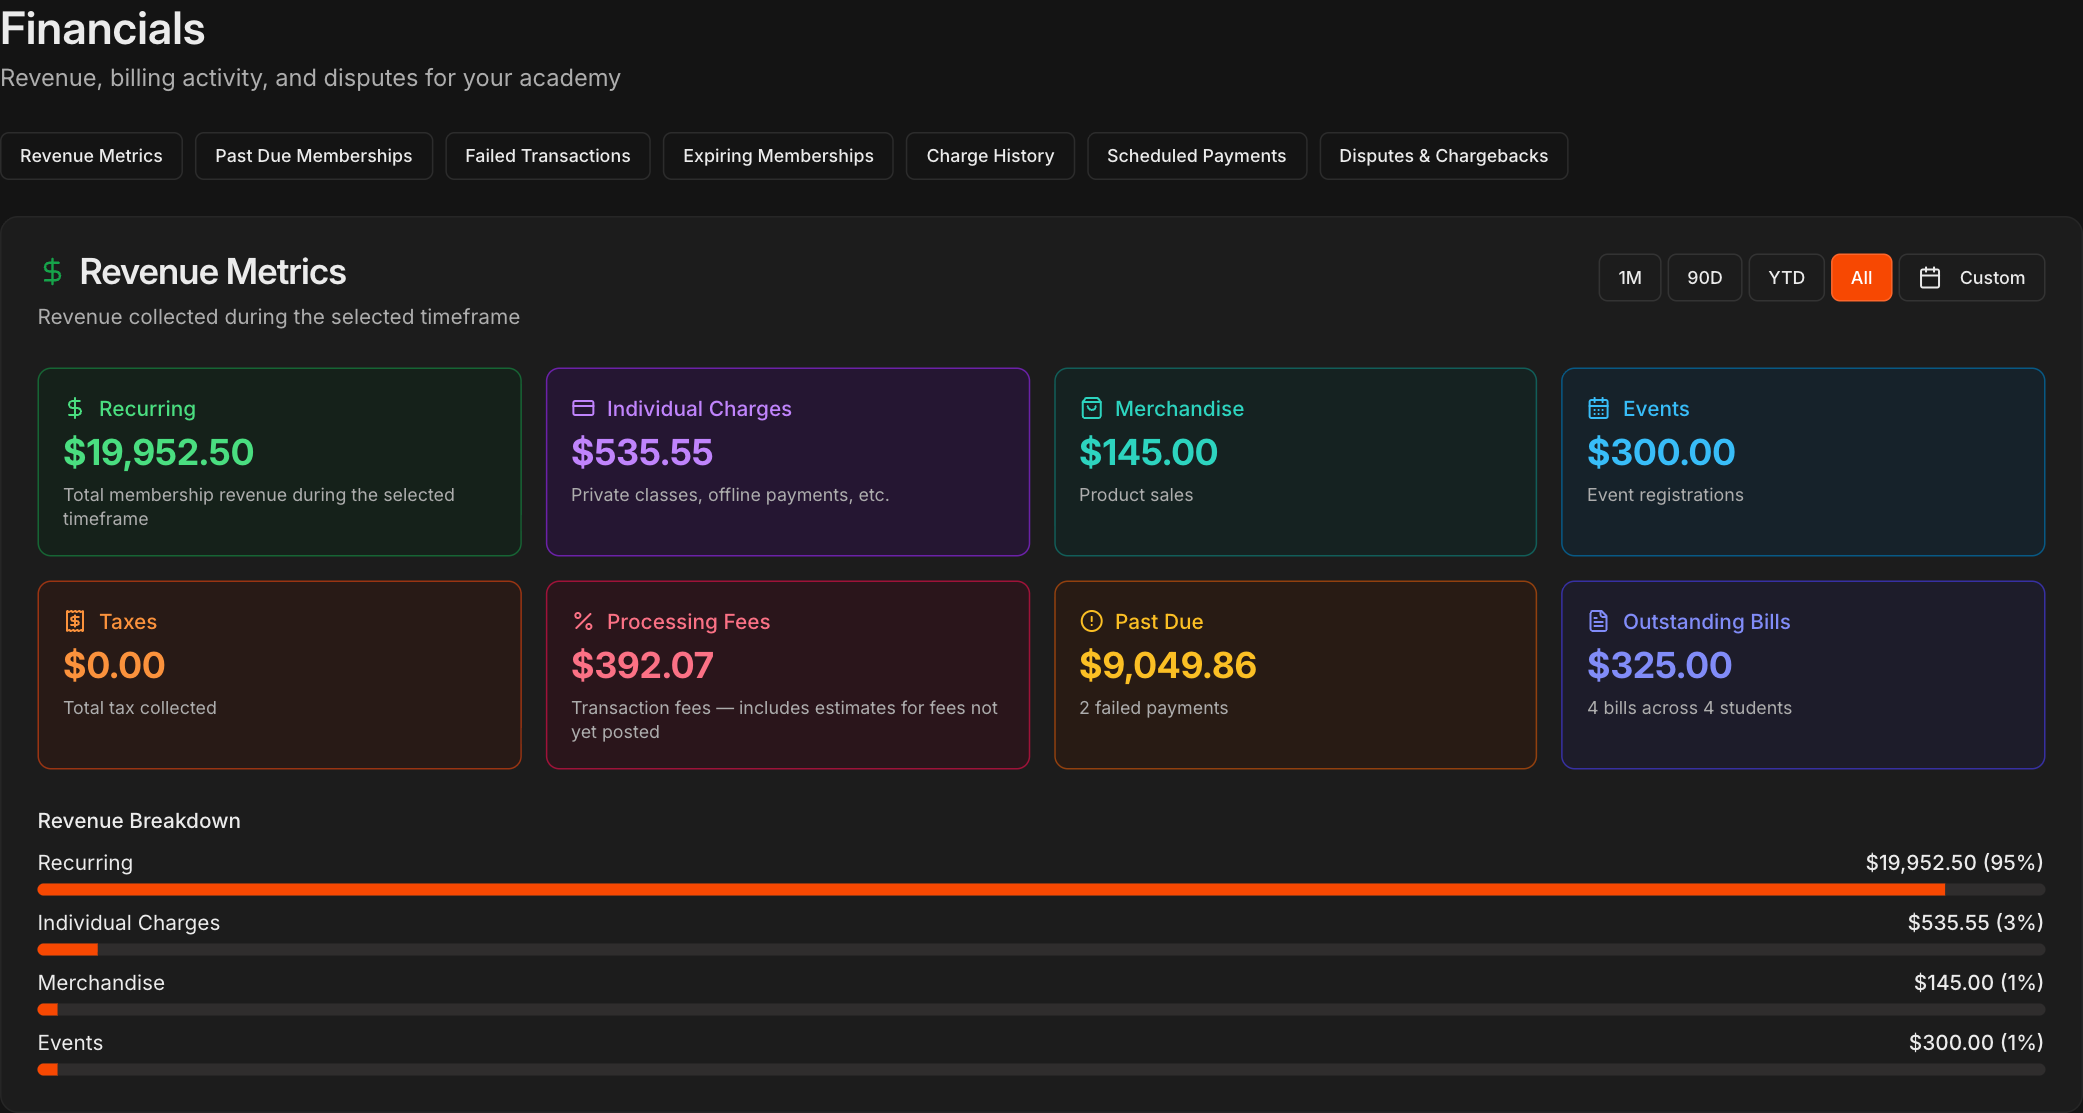
The buttons across the top jump to each section: Revenue Metrics, Past Due Memberships, Failed Transactions, Expiring Memberships, Charge History, Scheduled Payments, and Disputes & Chargebacks.
Under Revenue Metrics, review the tiles: Recurring, Individual Charges, Merchandise, Events, Taxes, Processing Fees, Past Due, and Outstanding Bills. Each tile is clickable for a deeper view.
Past Due totals payments that were attempted and failed. Outstanding Bills totals bills you created that have not been paid yet.
Adjust the timeframe with 1M, 90D, YTD, All, or Custom, then scroll to Revenue Breakdown to see each revenue source as a share of the total.
Tip
The tiles and totals all respond to the date range you pick, so set the timeframe first, then read the numbers.
Note
The **Financials** page replaces the **Revenue Dashboard** that used to sit on **Overview**. Staff see it only if their role includes **View Financials** under **Settings** > **Users & Roles**, and each section has its own permission.
See revenue per gym
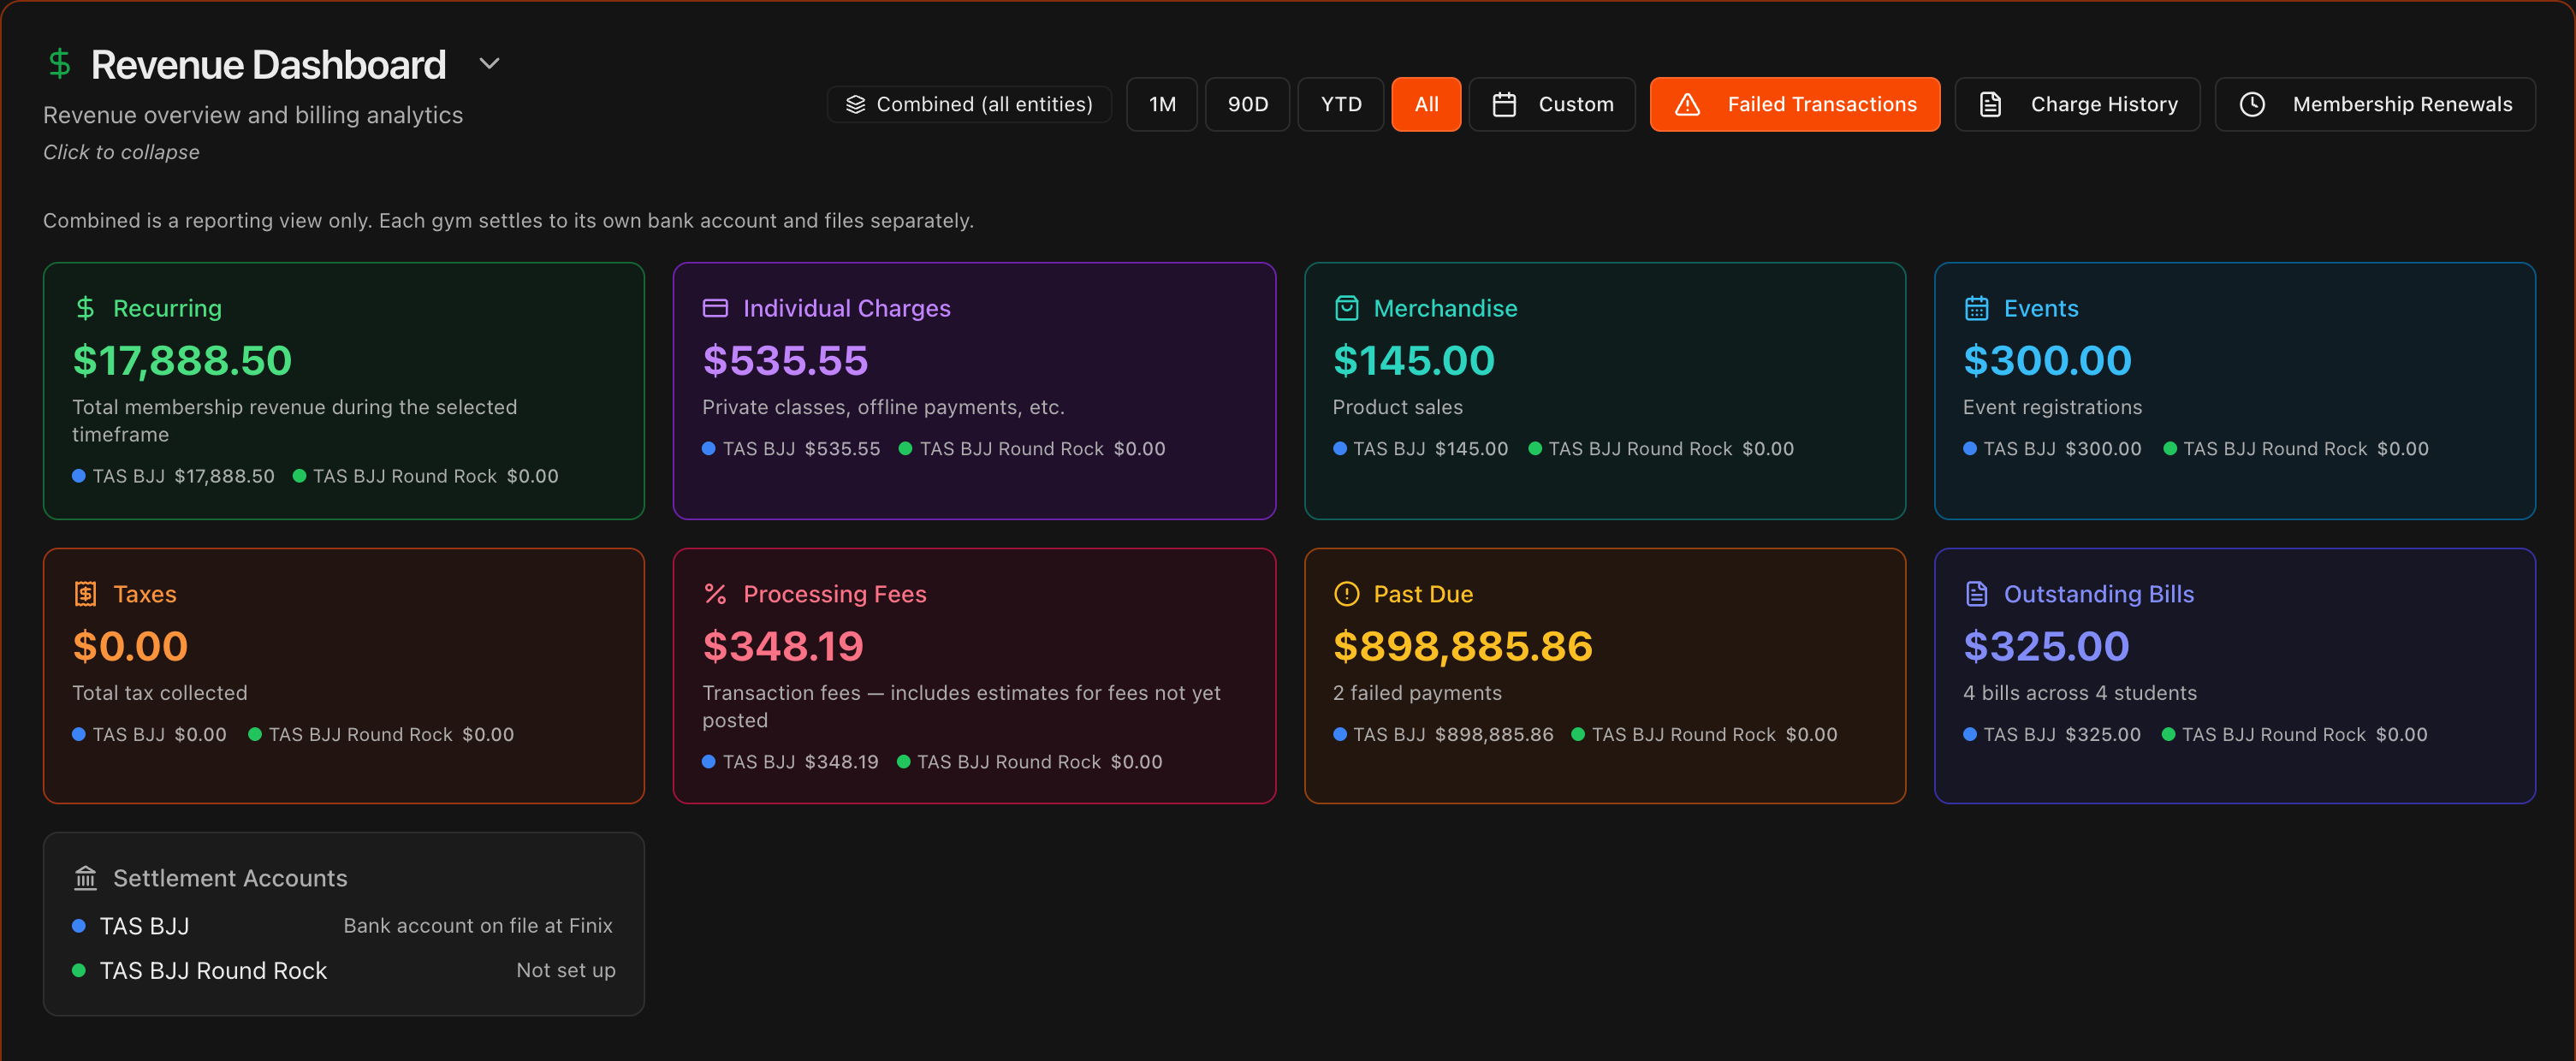
With more than one gym, the Financials page follows the gym selector in the header. On All Gyms it is tagged Combined (all entities) and every tile splits its figure per gym.
The Settlement Accounts card shows which gyms have a bank account on file and which are not set up yet.
Pick one gym in the header selector to see only that gym's figures in every section of the page.
Note
Combined is a reporting view only. Each gym settles to its own bank account and files separately.
Chase outstanding bills
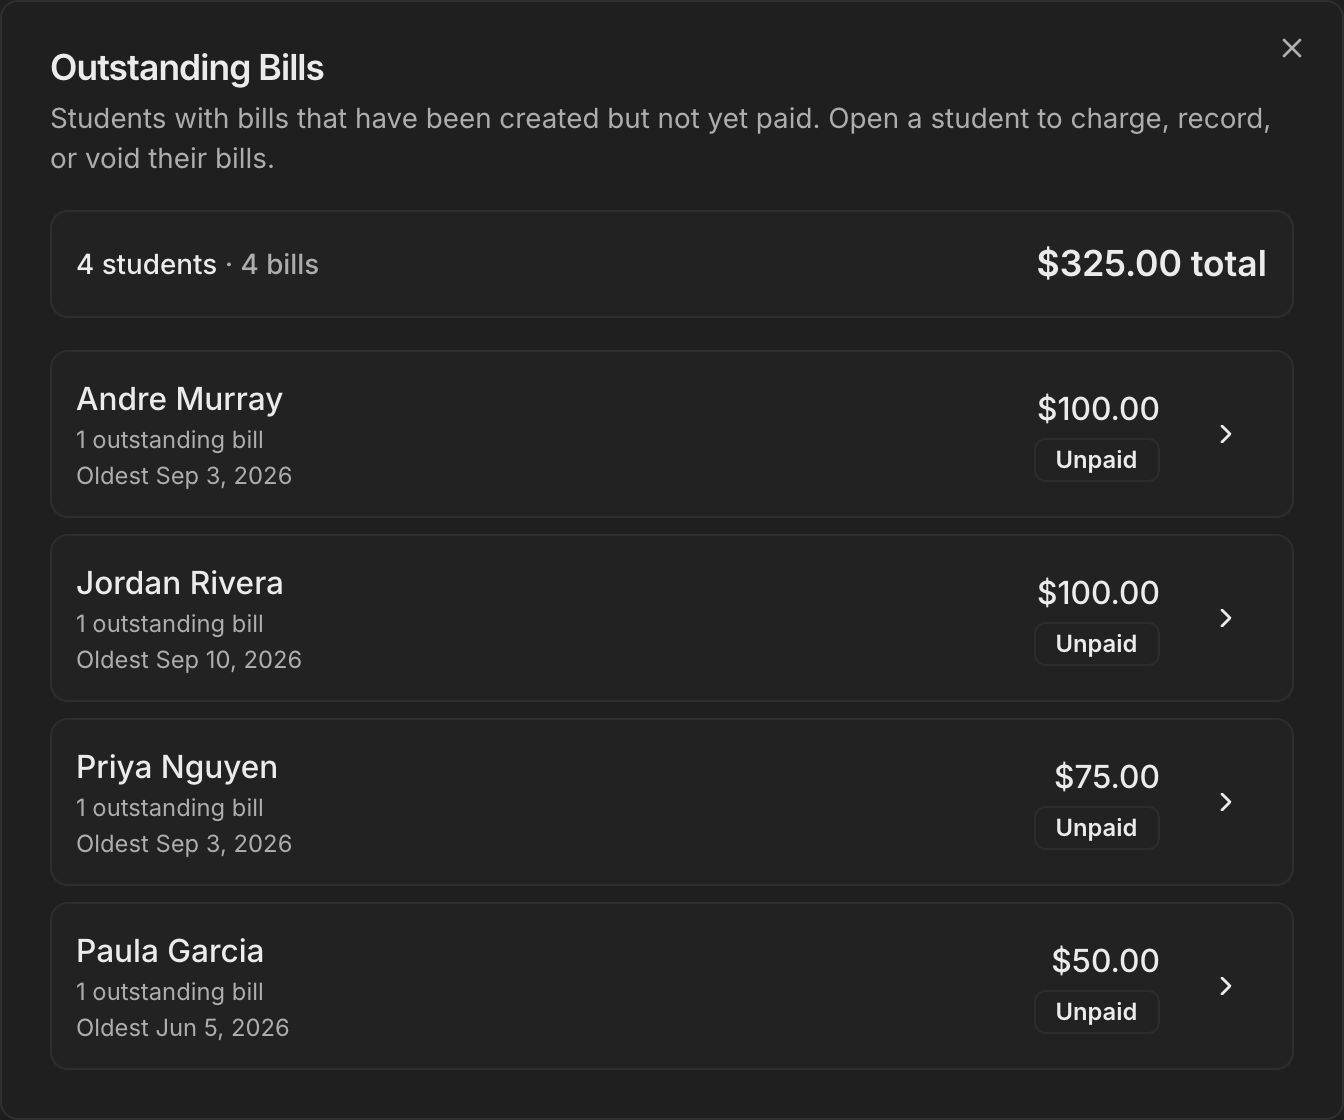
Click the Outstanding Bills tile in Revenue Metrics to open a popup listing every student who owes money, with their number of open bills, the oldest bill date, and the amount.
Click a student to jump to their Billing tab, where you can Charge Now, mark the bill paid offline, or void it from the Outstanding Bills tab.
Note
**Past Due** and **Outstanding Bills** are different money. Past Due is payments that were attempted and failed. Outstanding Bills is money you have billed but not yet tried to collect.
Collect past due memberships
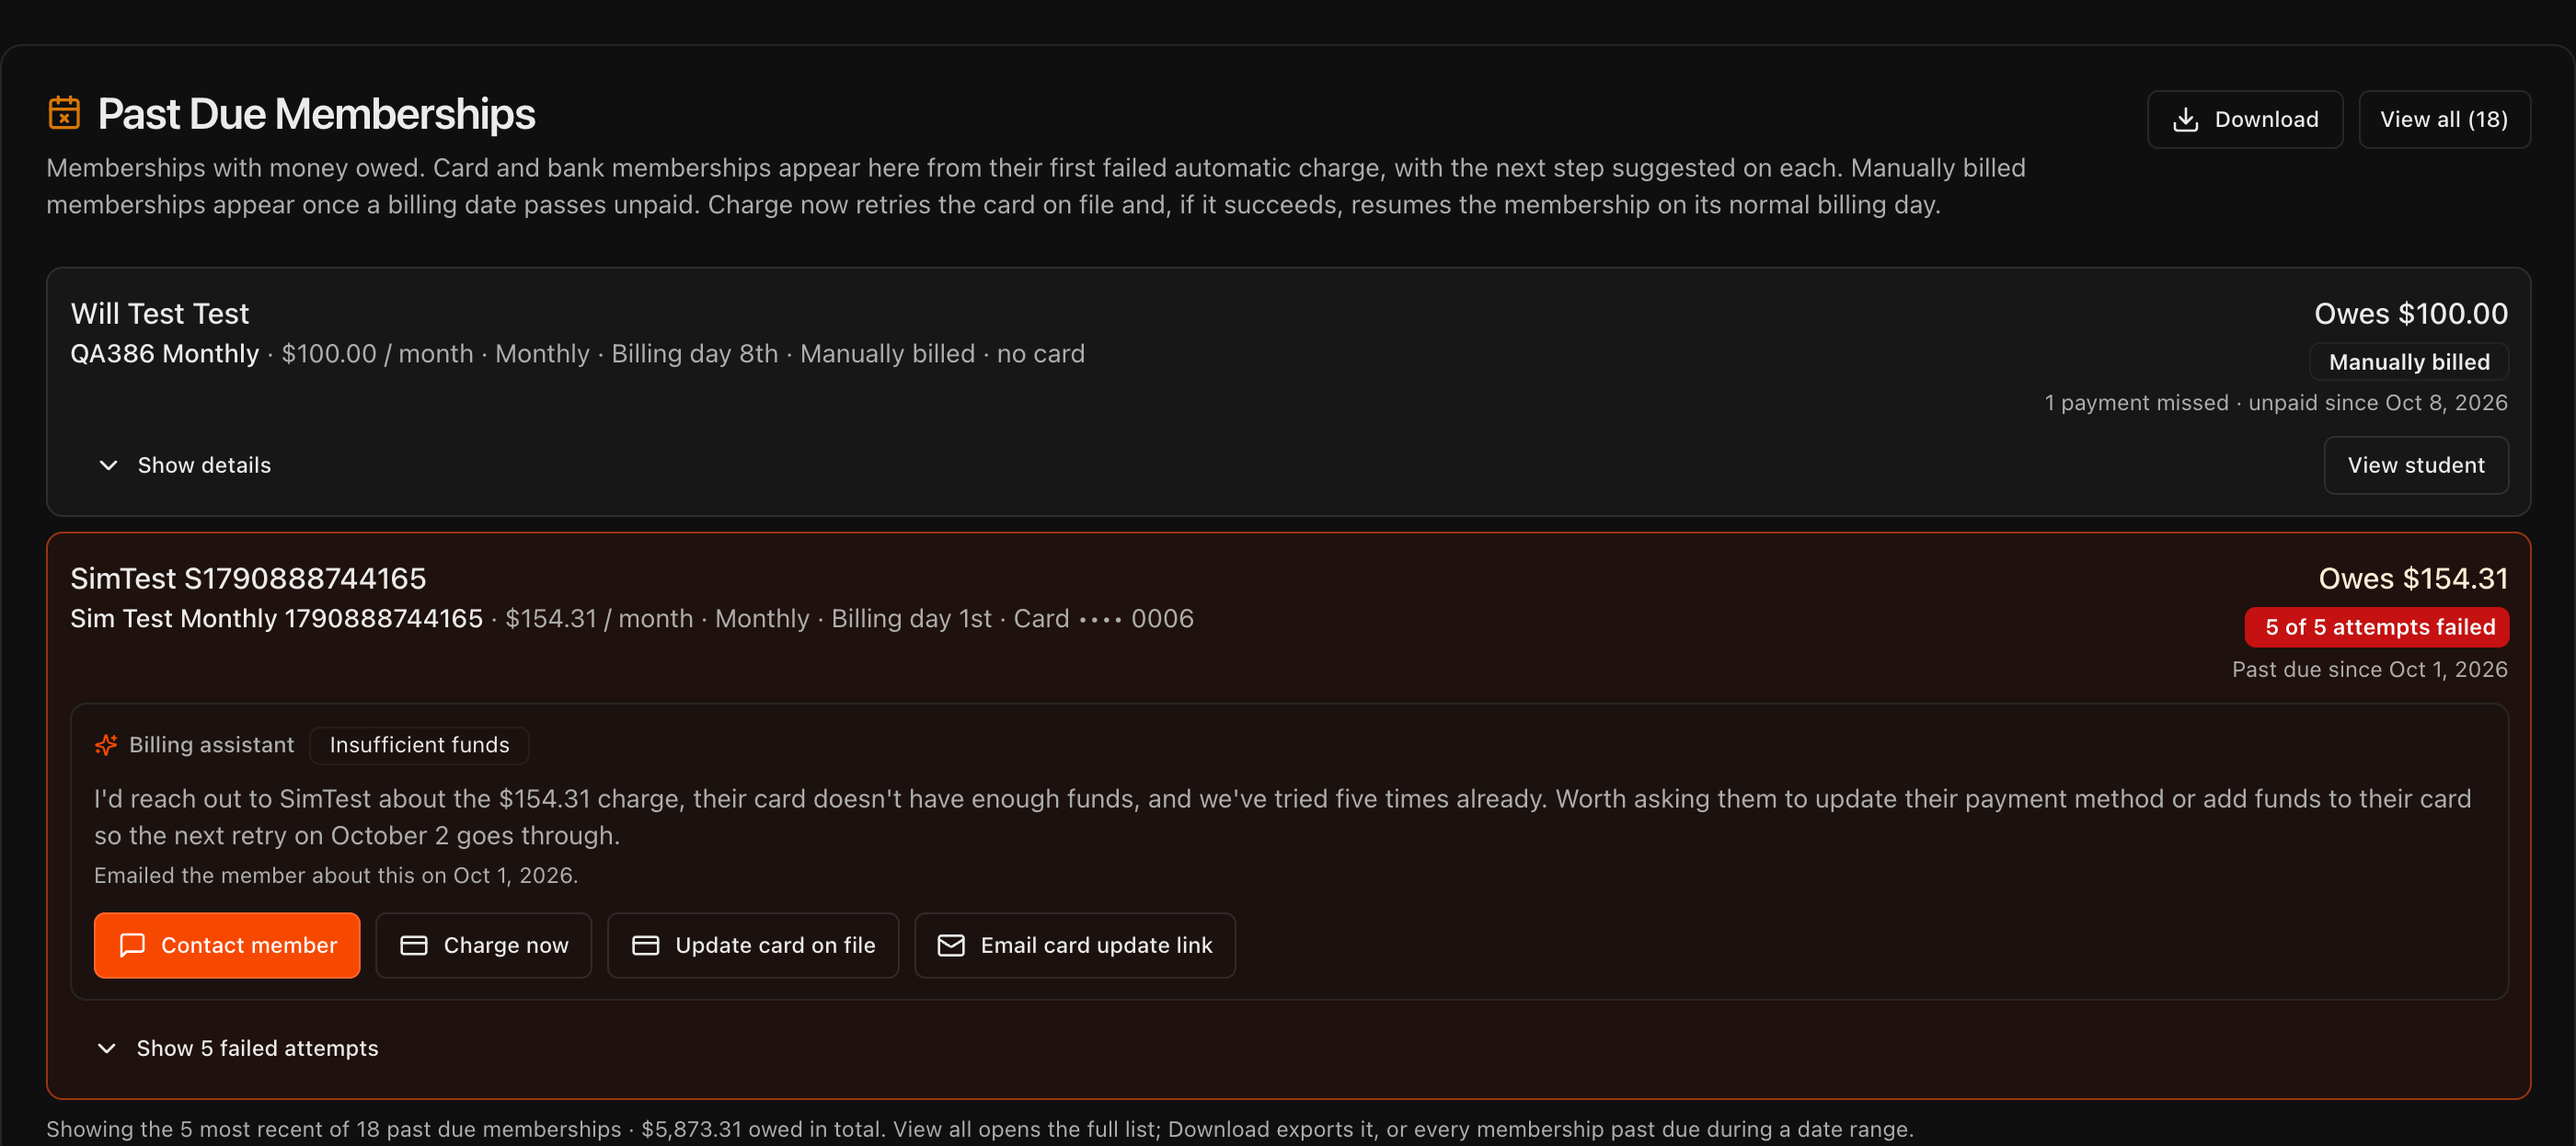
Past Due Memberships lists every membership with money owed, one row per membership, with the plan, billing details and the amount owed.
Card and bank memberships appear here from their first failed automatic charge, with a badge counting the attempts so far (for example 2 of 5 attempts failed) and the date they went past due. Manually billed memberships appear once a billing date passes unpaid.
Each card or bank row carries the Billing assistant: the decline reason, a suggested next step, and Contact member, Charge now, Update card on file and Email card update link buttons. Show failed attempts lists the date and reason of each attempt.
Charge now retries the payment method on file immediately. If it succeeds, the membership resumes on its normal billing day and the remaining automatic retries are cancelled.
Click View all for the full list, or Download to export it as CSV or PDF.
Tip
If the card expired or was replaced, update it on the student's **Billing** tab before you click **Charge now**, or the charge will be declined again. Manually billed rows have no **Charge now**; record the payment from the student's **Billing** tab instead.
Review failed transactions
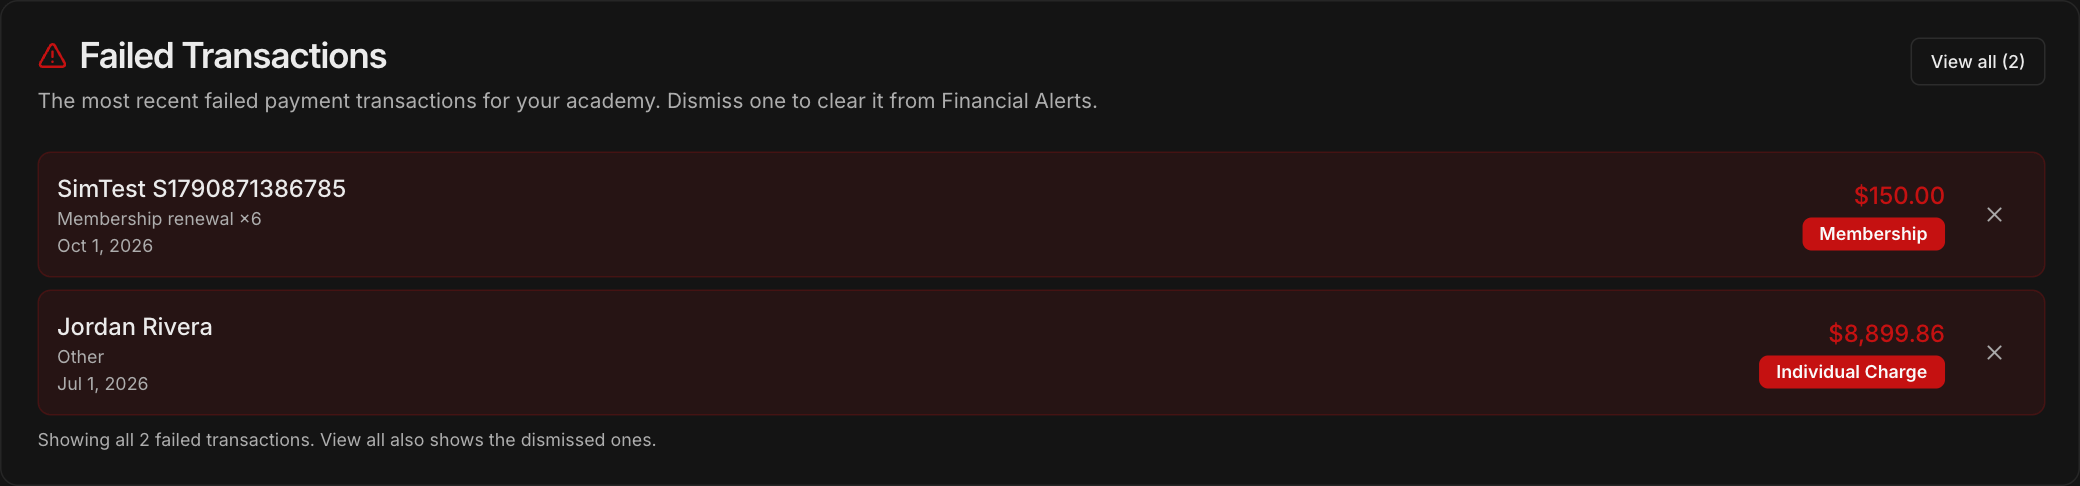
Failed Transactions shows the 5 most recent failed payments, newest first, with the student, amount, and charge type.
Click the X on a row to dismiss it. It also clears from Financial Alerts on the Overview page.
Click View all to see every failed transaction, including the ones you dismissed, and restore any of them.
Note
Failed Transactions lists every declined attempt. A membership appears under **Past Due Memberships** from its first failed attempt, so one past due membership can account for several rows here while the retries run.
Track expiring memberships
Expiring Memberships shows memberships that are ending soon or have recently ended.
Use Expiring and Expired with the 1W and 1M range buttons.
Memberships expiring within 30 days also appear in Financial Alerts on the Overview page.

Browse and download charge history
Charge History lists the 10 most recent charges across your academy.
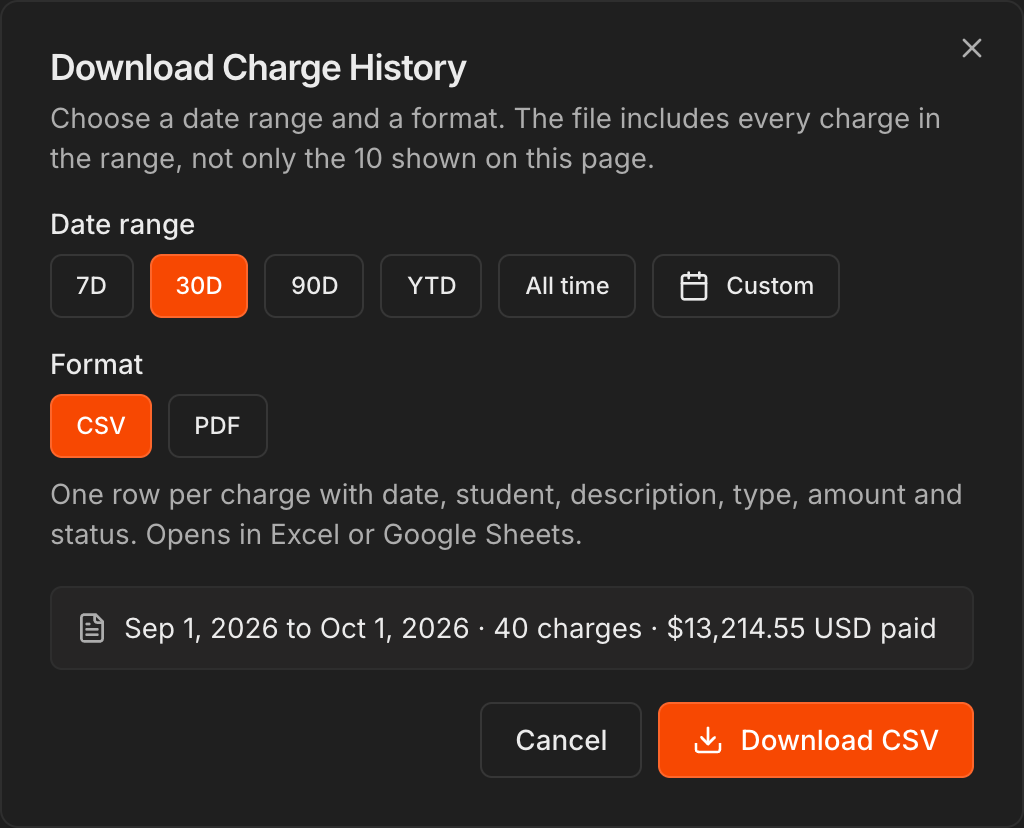
Click Download, choose a date range (7D, 30D, 90D, YTD, All time, or Custom) and a format (CSV or PDF), then click Download CSV or Download PDF. The file includes every charge in the range, not only the 10 shown.
Click View full Charge History to open the standalone page, where you can search by name, email, or phone and filter by status, type, and date.
Note
A charge's **Status** shows its current state, such as **paid**, **partially refunded**, or a failed result.
See what is scheduled to be collected
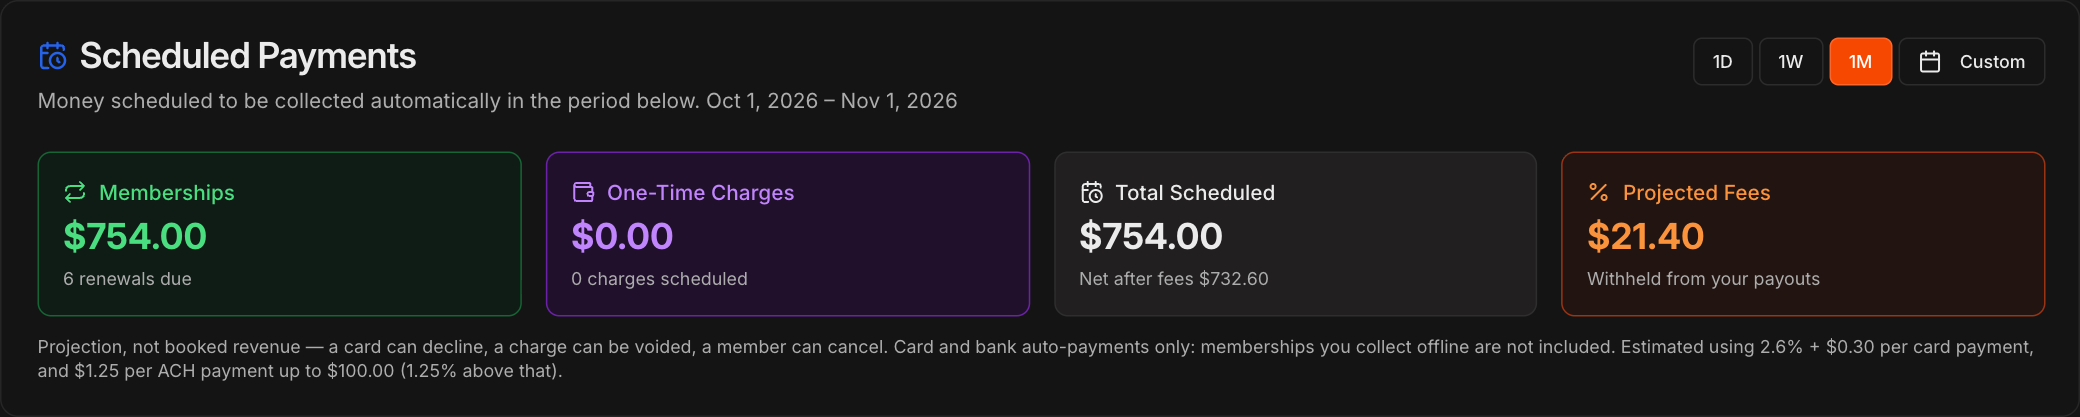
Scheduled Payments projects the money Kmura will collect automatically in the period you pick: 1D, 1W, 1M, or Custom.
The tiles show Memberships renewals due, One-Time Charges scheduled, the Total Scheduled, and the Projected Fees withheld from your payouts.
Note
This is a projection, not booked revenue. A card can decline or a member can cancel, and memberships you collect offline are not included.
Respond to disputes and chargebacks
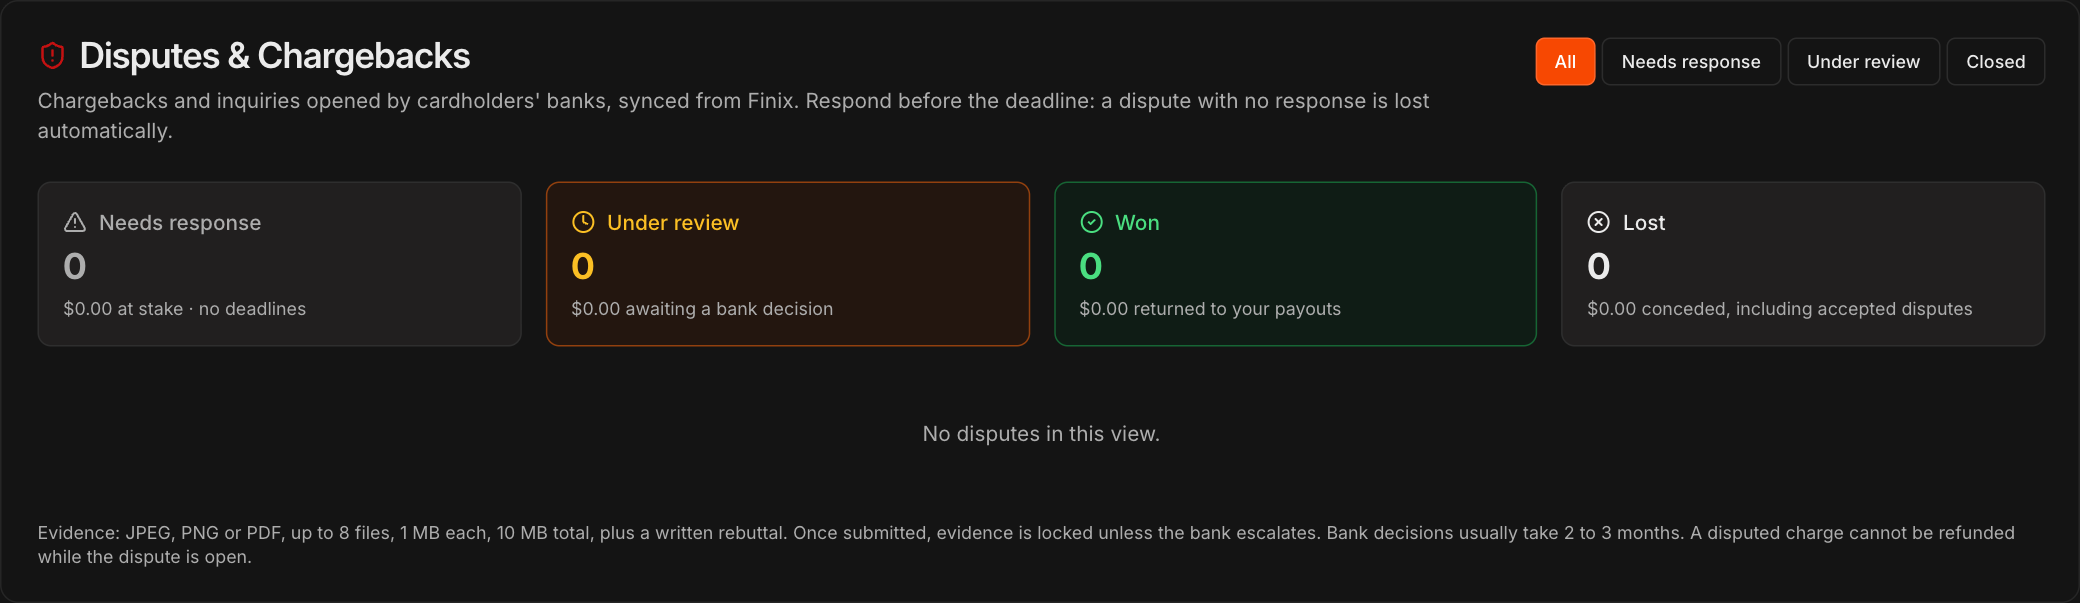
Disputes & Chargebacks lists chargebacks and inquiries opened by cardholders' banks, synced from Finix.
The tiles count disputes by status: Needs response, Under review, Won, and Lost. Click a tile or a filter (All, Needs response, Under review, Closed) to narrow the list.
Open a dispute that needs a response to upload evidence (JPEG, PNG or PDF, up to 8 files, 1 MB each) and a written rebuttal, then submit it to Finix. You can also accept the dispute, which concedes the amount.
Respond before the deadline. A dispute with no response is lost automatically. Bank decisions usually take 2 to 3 months.
Caution
Submitted evidence is locked unless the bank escalates, and accepting a dispute cannot be undone. A disputed charge cannot be refunded while the dispute is open.
Note
Anyone with access to this section can view disputes. Only roles with **Financials: Respond to Disputes** can respond to or accept one.
Turn on daily and weekly payment summaries
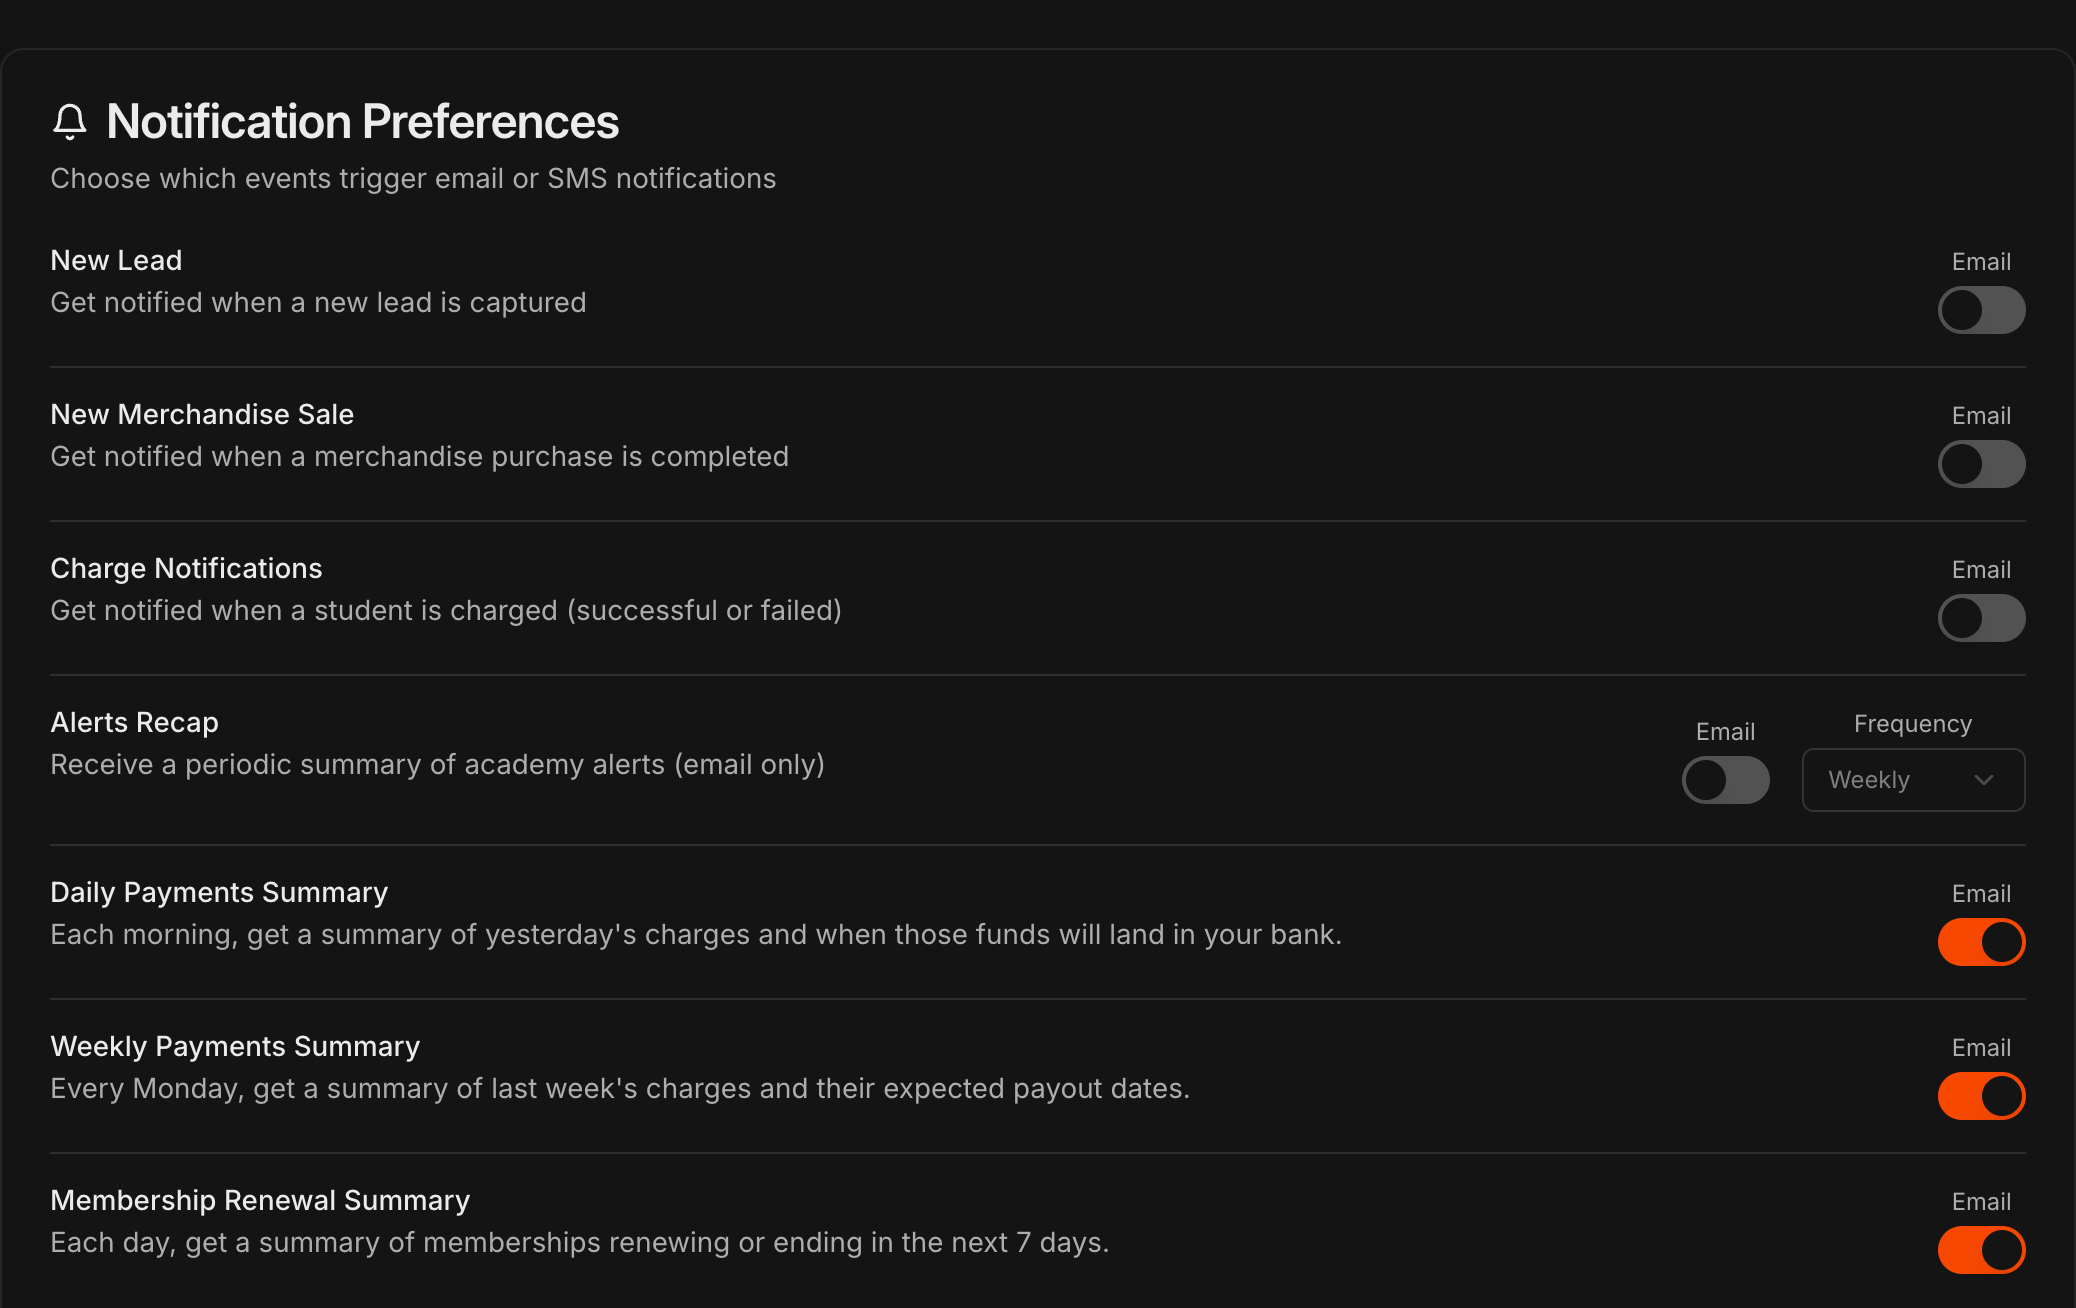
Go to Settings, open Notifications, and scroll to Notification Preferences.
Toggle Daily Payments Summary on to get a morning summary of yesterday's charges and when those funds will land in your bank.
Toggle Weekly Payments Summary on to get a Monday summary of last week's charges and their expected payout dates.
Once your phone number is verified under SMS notifications from Kmura, either summary can also arrive by SMS.
Tip
Both summaries include a standalone list of failed charges plus the expected payout amount and payout date to your gym's bank account.
Review a student's charge history
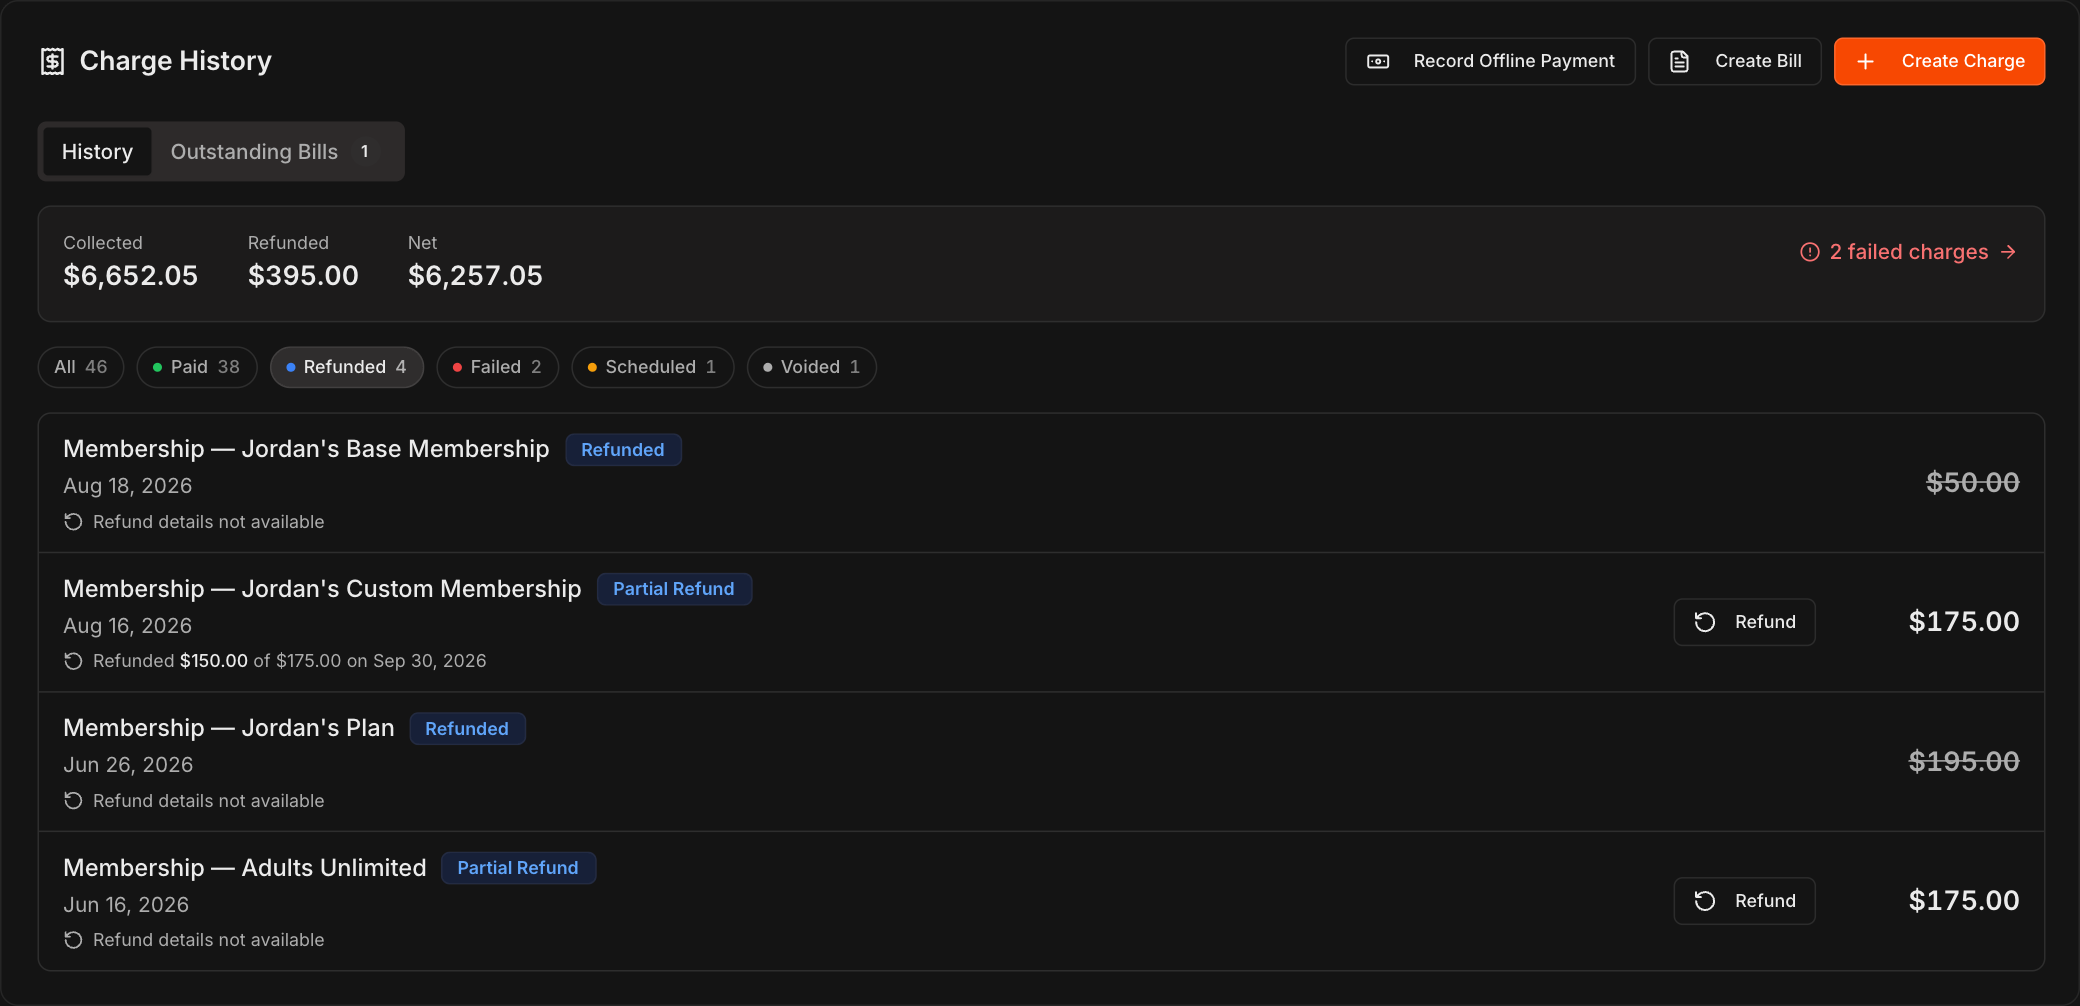
Open a student's Student Information page, click the Billing tab, and scroll to Charge History.
The strip at the top totals what the student paid (Collected), what was Refunded, and the Net, and links to any failed charges.
Use the chips (All, Paid, Refunded, Failed, Scheduled, Voided) to filter the list. Each status has its own color.
Refunded charges show how much was refunded and when, for example "Refunded $150.00 of $175.00 on Sep 30, 2026".
Note
Refunds made before this update may read **Refund details not available**.
Set your card statement descriptor
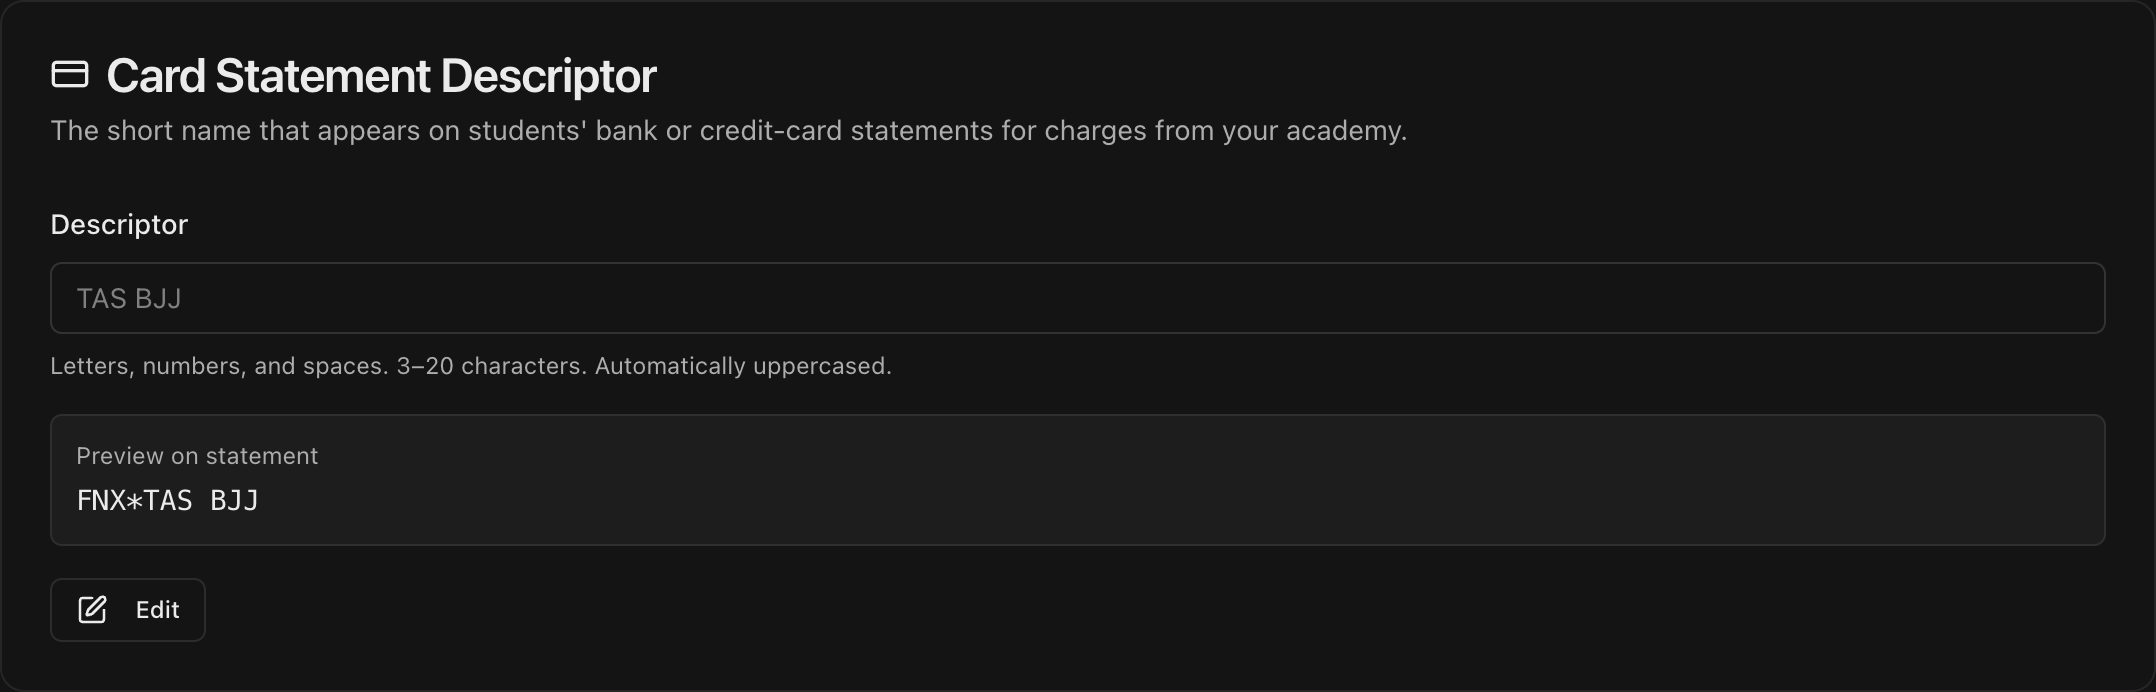
Go to Settings, open Payments, and scroll to Card Statement Descriptor.
Click Edit and set the short name students will see on their bank or credit-card statements (letters, numbers, and spaces; 3 to 20 characters).
Check the Preview on statement to confirm how the charge will read.
Note
A clear descriptor reduces confused students and chargebacks, since they recognize the charge as coming from your academy.
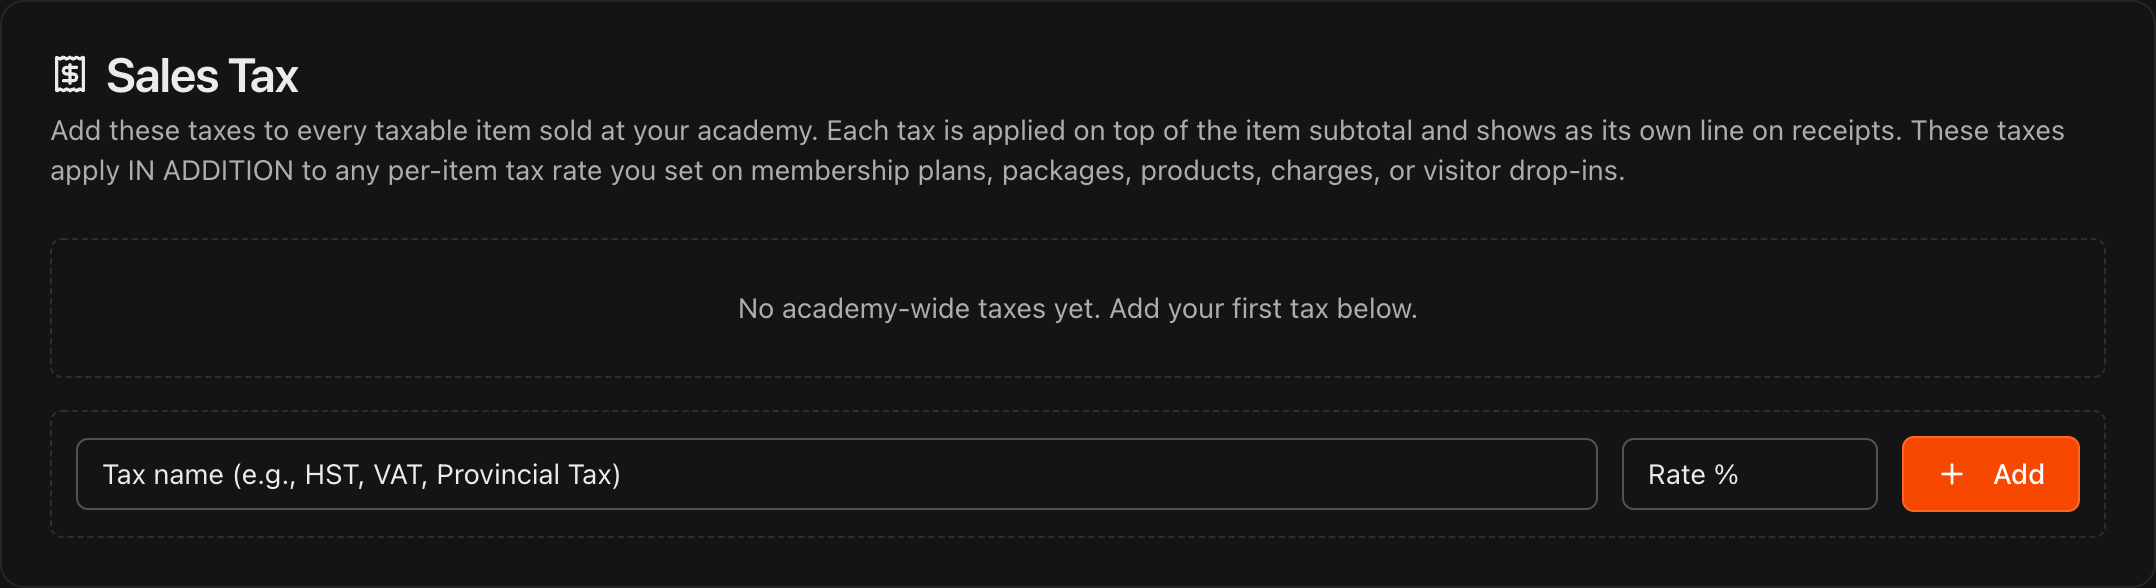
Create academy-wide sales taxes
On the Payments page, scroll to Sales Tax.
Enter a Tax name (for example, HST, VAT, or Provincial Tax) and a Rate %, then click Add to apply it to every taxable item sold.
Each tax shows as its own line on receipts and applies on top of the item subtotal.
Under Applies at, choose All gyms or Selected gyms. A tax is charged by the gym that receives the money, and a new gym inherits every All gyms tax automatically.
Caution
Academy-wide taxes apply **in addition** to any per-item tax. If you don't want a tax on everything, skip this and instead assign taxes individually when creating a membership plan (**Include Sales Tax**) or when adding a product on the **Merchandise** page.