Open the Lead Forms page
In the left navigation, expand Leads and click Lead Forms.
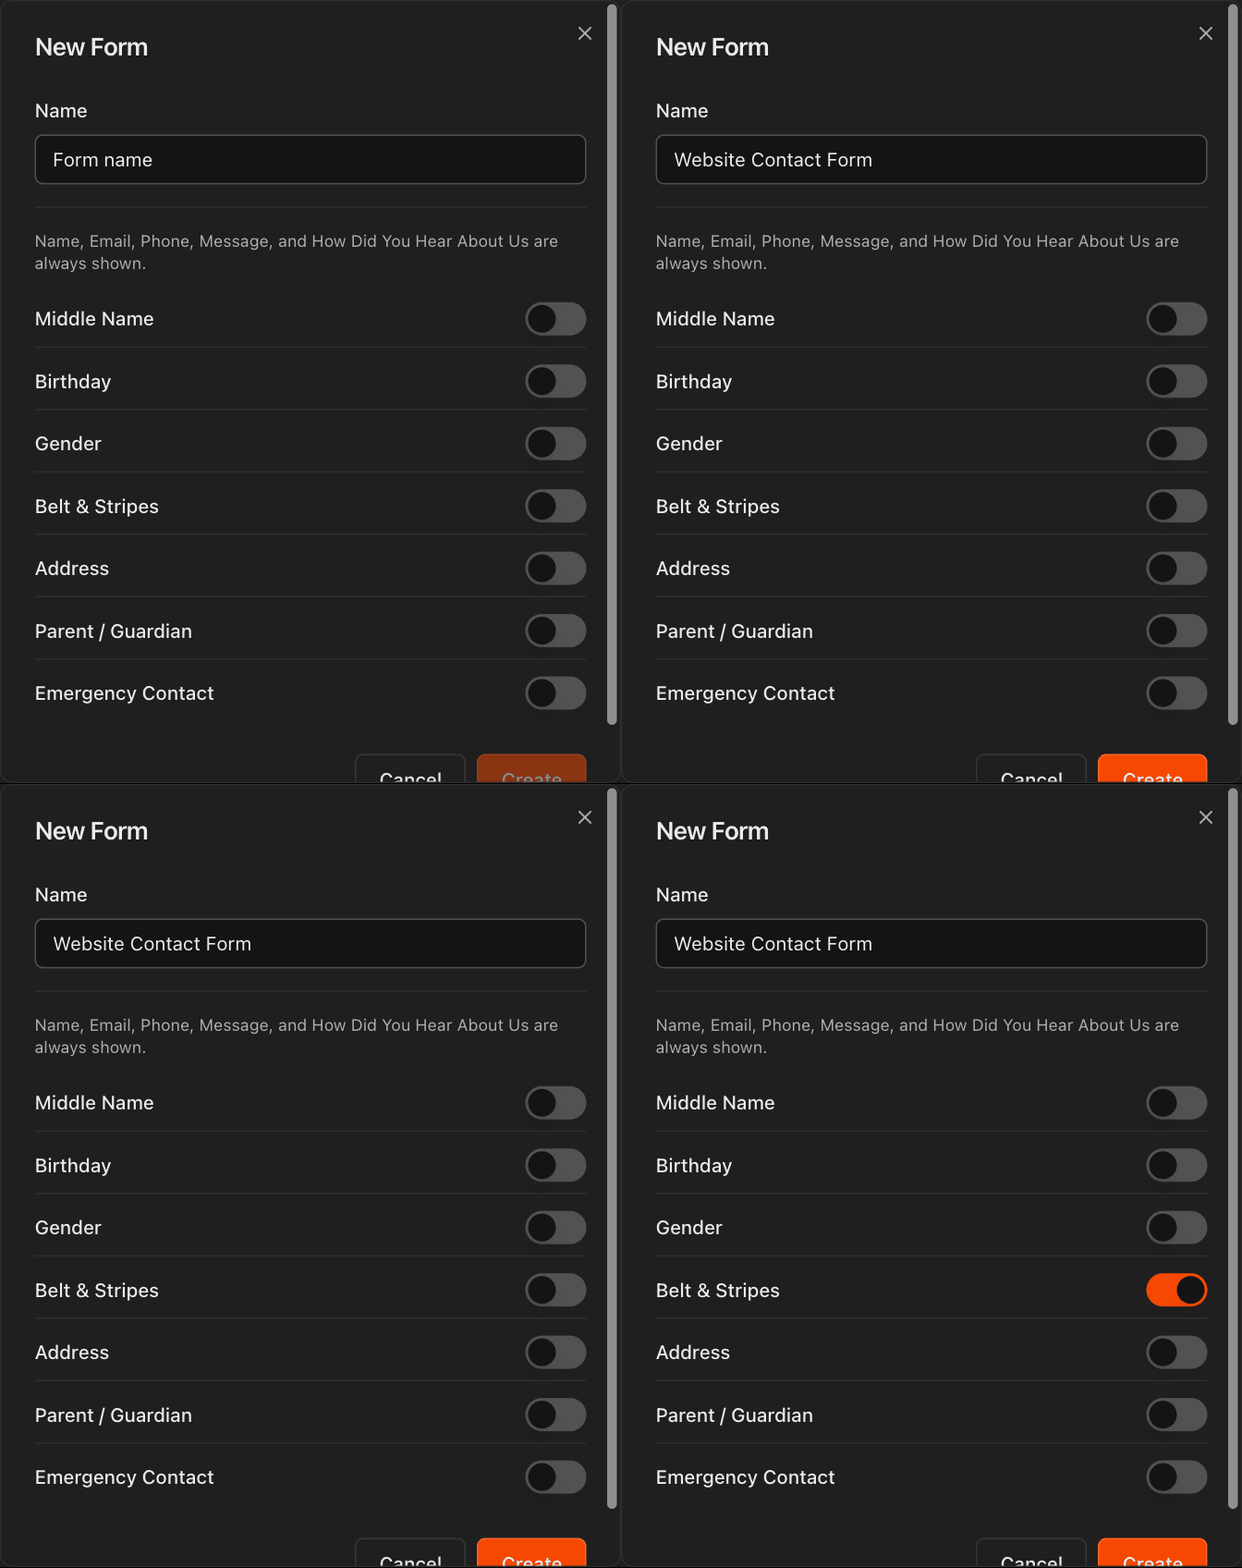
Each form shows Submissions for the last 30 days, a Trend sparkline, Last submission, and its Status, so you can see at a glance which forms are actually producing leads.
Click New Form in the top right to start building.
With more than one gym, the Gym column shows which gym each form belongs to.
Note
The **Lead Forms** page is for standalone forms you embed on your own website. It is separate from your Kmura **Landing Page**.
Choose the gym the form belongs to
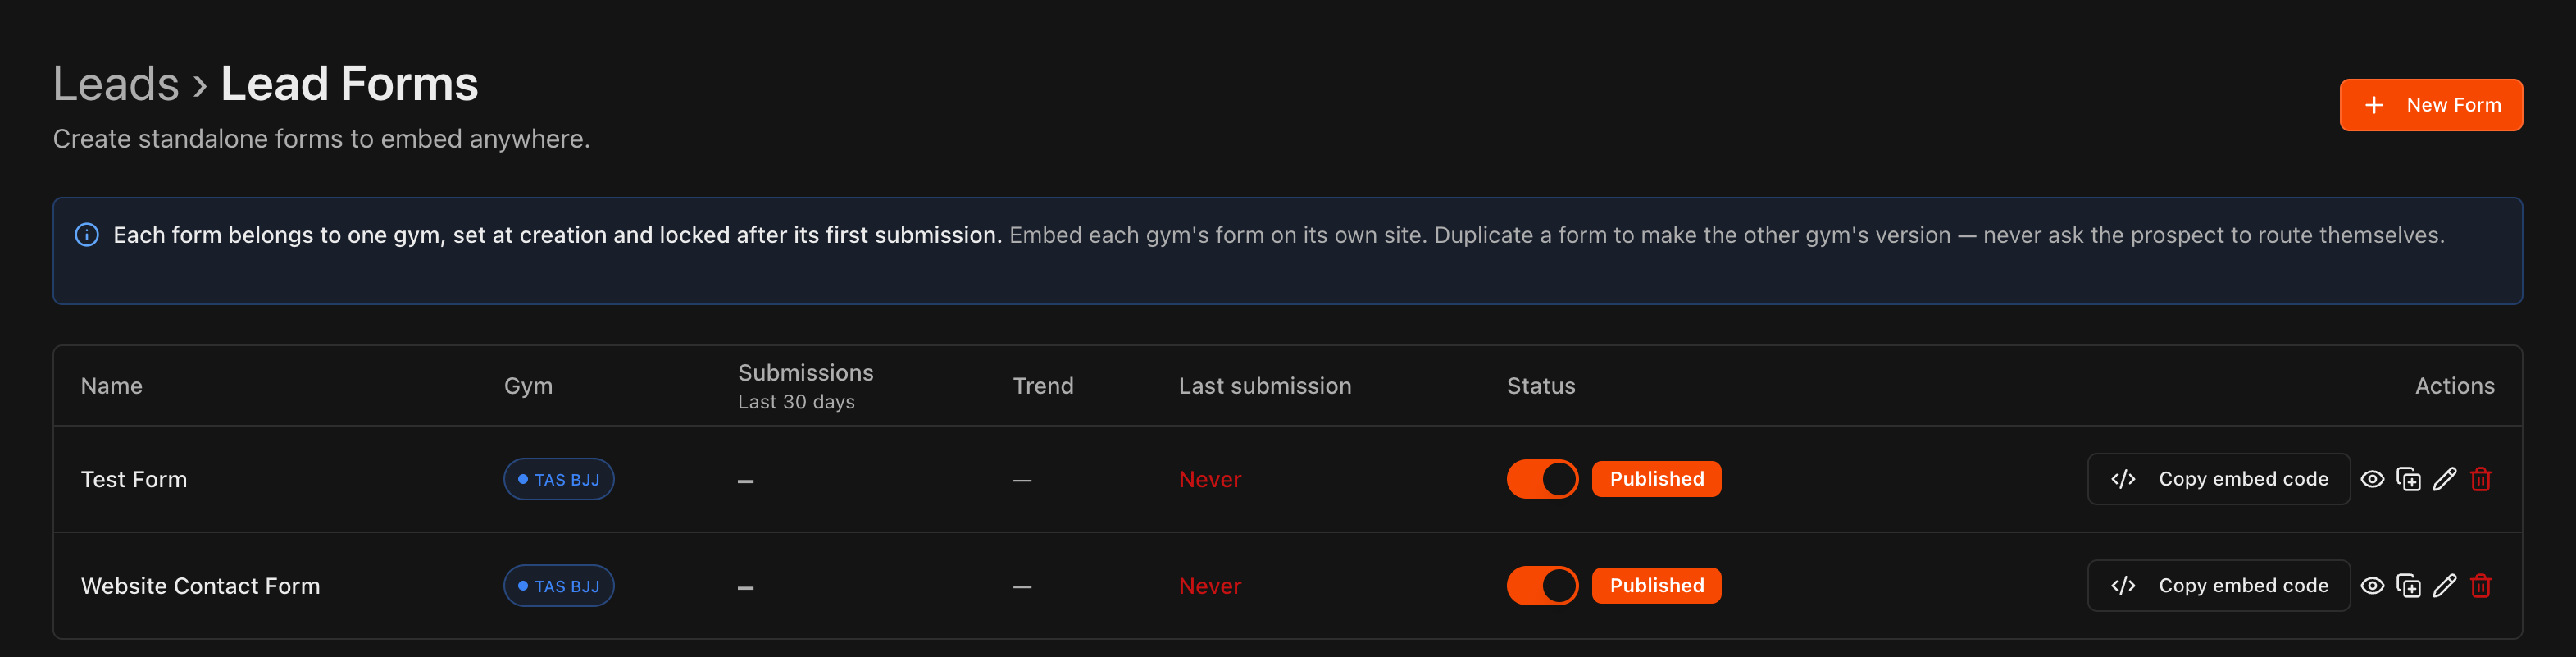
Every form belongs to one Gym, chosen when you create it. Each submission creates a lead at that gym and, when the lead converts, that gym becomes the member's home gym.
After the first submission the Gym field locks.
Tip
To make another gym's version of a form, use **Duplicate for another gym** in the form's **Actions**, pick the gym, and edit the details. Embed each gym's form on its own site rather than asking prospects to choose.
Name your form and choose its fields
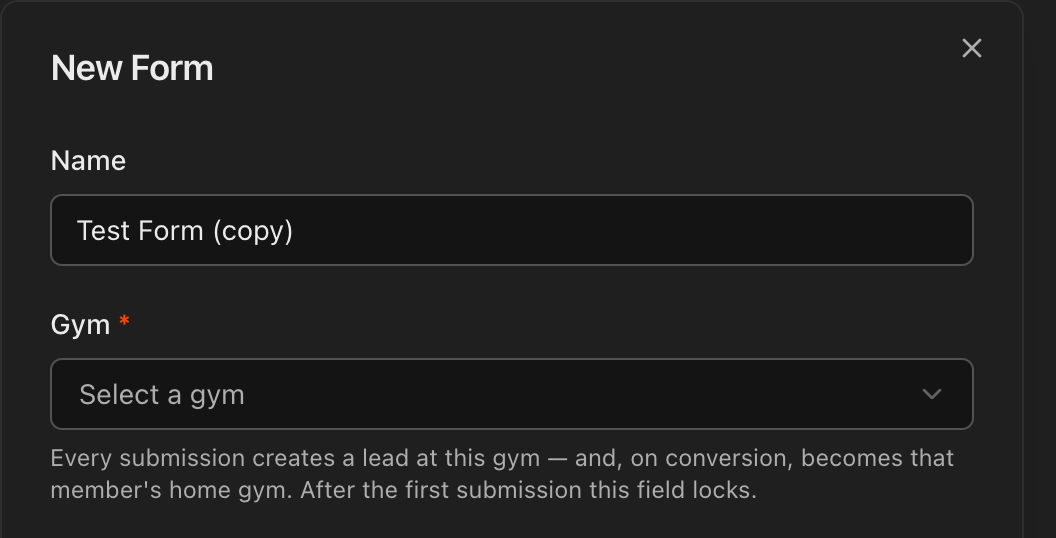
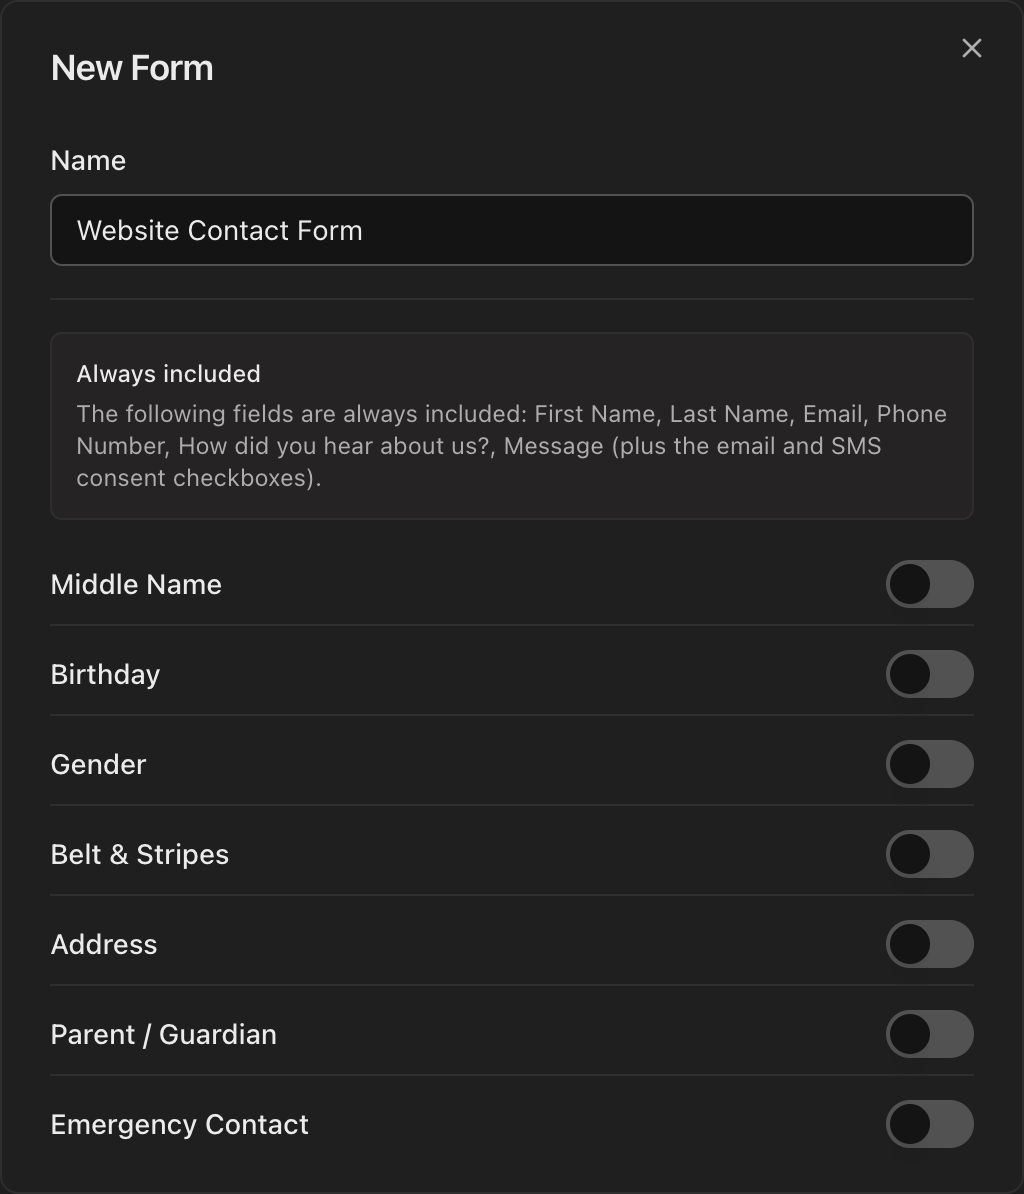
In the New Form dialog, type a Name for your form, for example Website Contact Form. This name is only for your reference inside Kmura.
The Always included box lists what every form collects: First Name, Last Name, Email, Phone Number, How did you hear about us?, and Message, plus the email and SMS consent checkboxes.
Toggle on any extra fields you want: Middle Name, Birthday, Gender, Belt & Stripes, Address, Parent / Guardian, or Emergency Contact.
Tip
Keep forms short. Turn on only the fields you truly need, since shorter forms tend to get more submissions.
Choose what happens when someone submits
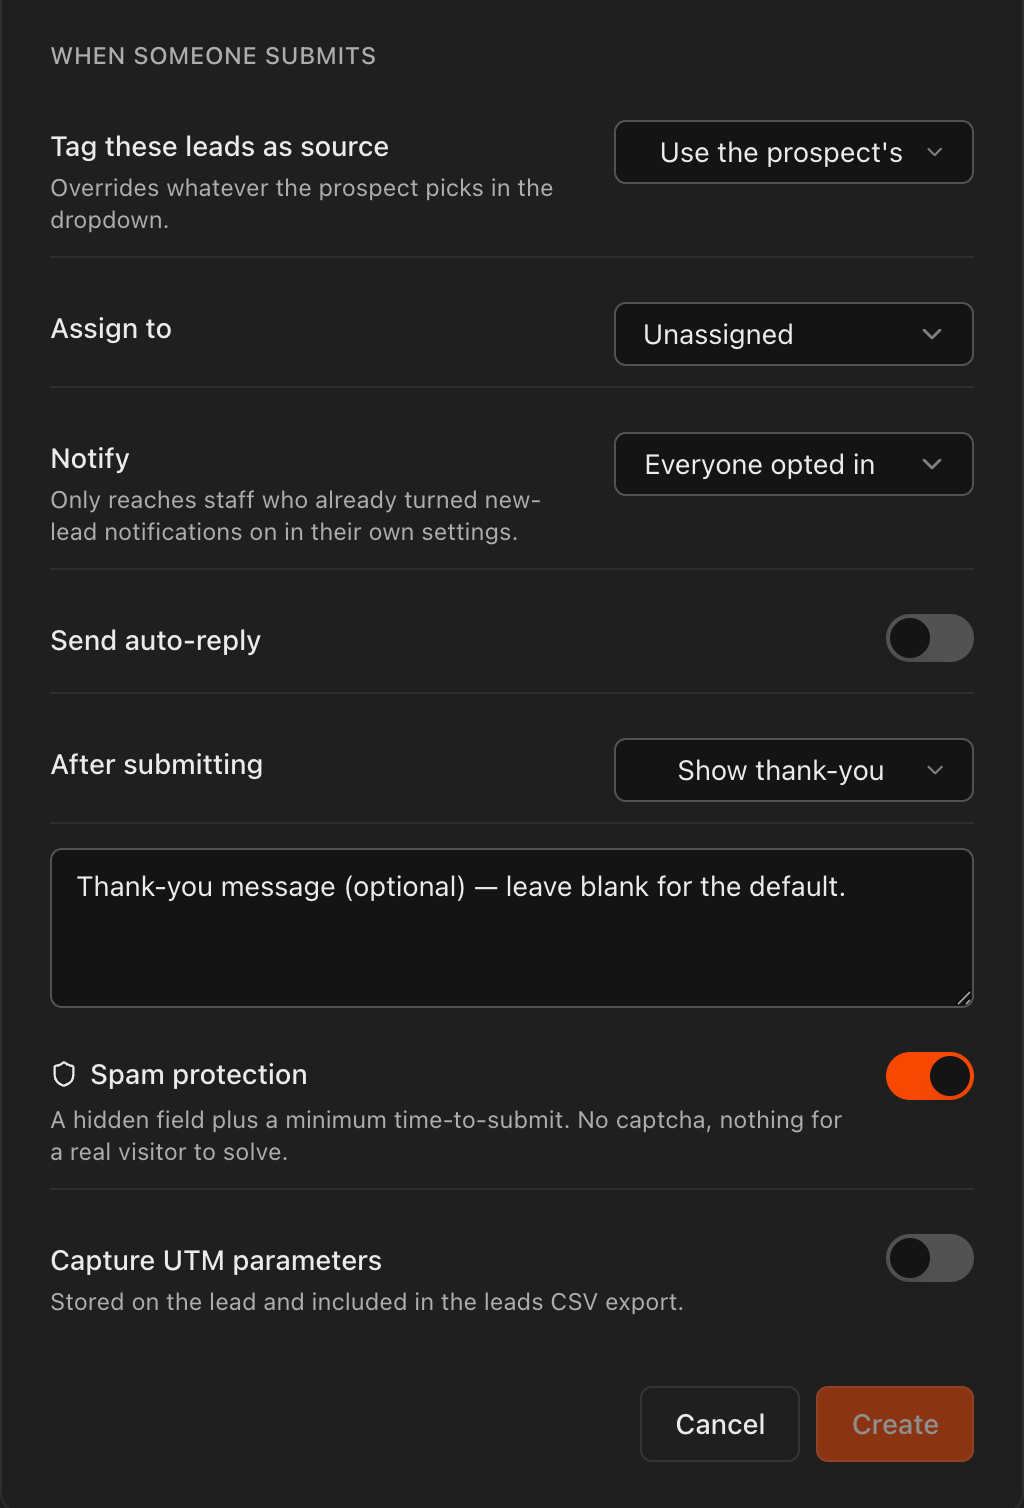
Scroll to When someone submits in the same dialog.
Tag these leads as source overrides whatever the prospect picks in the dropdown, so every lead from this form is tagged the same way.
Assign to hands every new lead to a specific staff member, and Notify controls who gets the new-lead alert.
Turn on Send auto-reply to email the prospect automatically, and use After submitting to show a thank-you message or send them elsewhere.
Spam protection is on by default and uses a hidden field plus a minimum time-to-submit, so real visitors never see a captcha.
Turn on Capture UTM parameters to store campaign tags on each lead and include them in the leads CSV export.
Click Create to save the form.
Tip
Turn on **Capture UTM parameters** on any form you send paid traffic to. It is the only way to tell which ad actually produced the lead.
Copy the embed code
Your saved form now appears in the Lead Forms list, marked Published.
In the Actions column, click Copy embed code. Kmura confirms Embed code copied.
This copies an iframe snippet to your clipboard. Paste it into your website wherever you want the form to appear.
Note
The form stays connected to Kmura through that embed code, so you never have to touch the code again when you edit the form's fields here.

Watch new leads land on your board
When someone submits your embedded form, Kmura automatically creates a new lead.
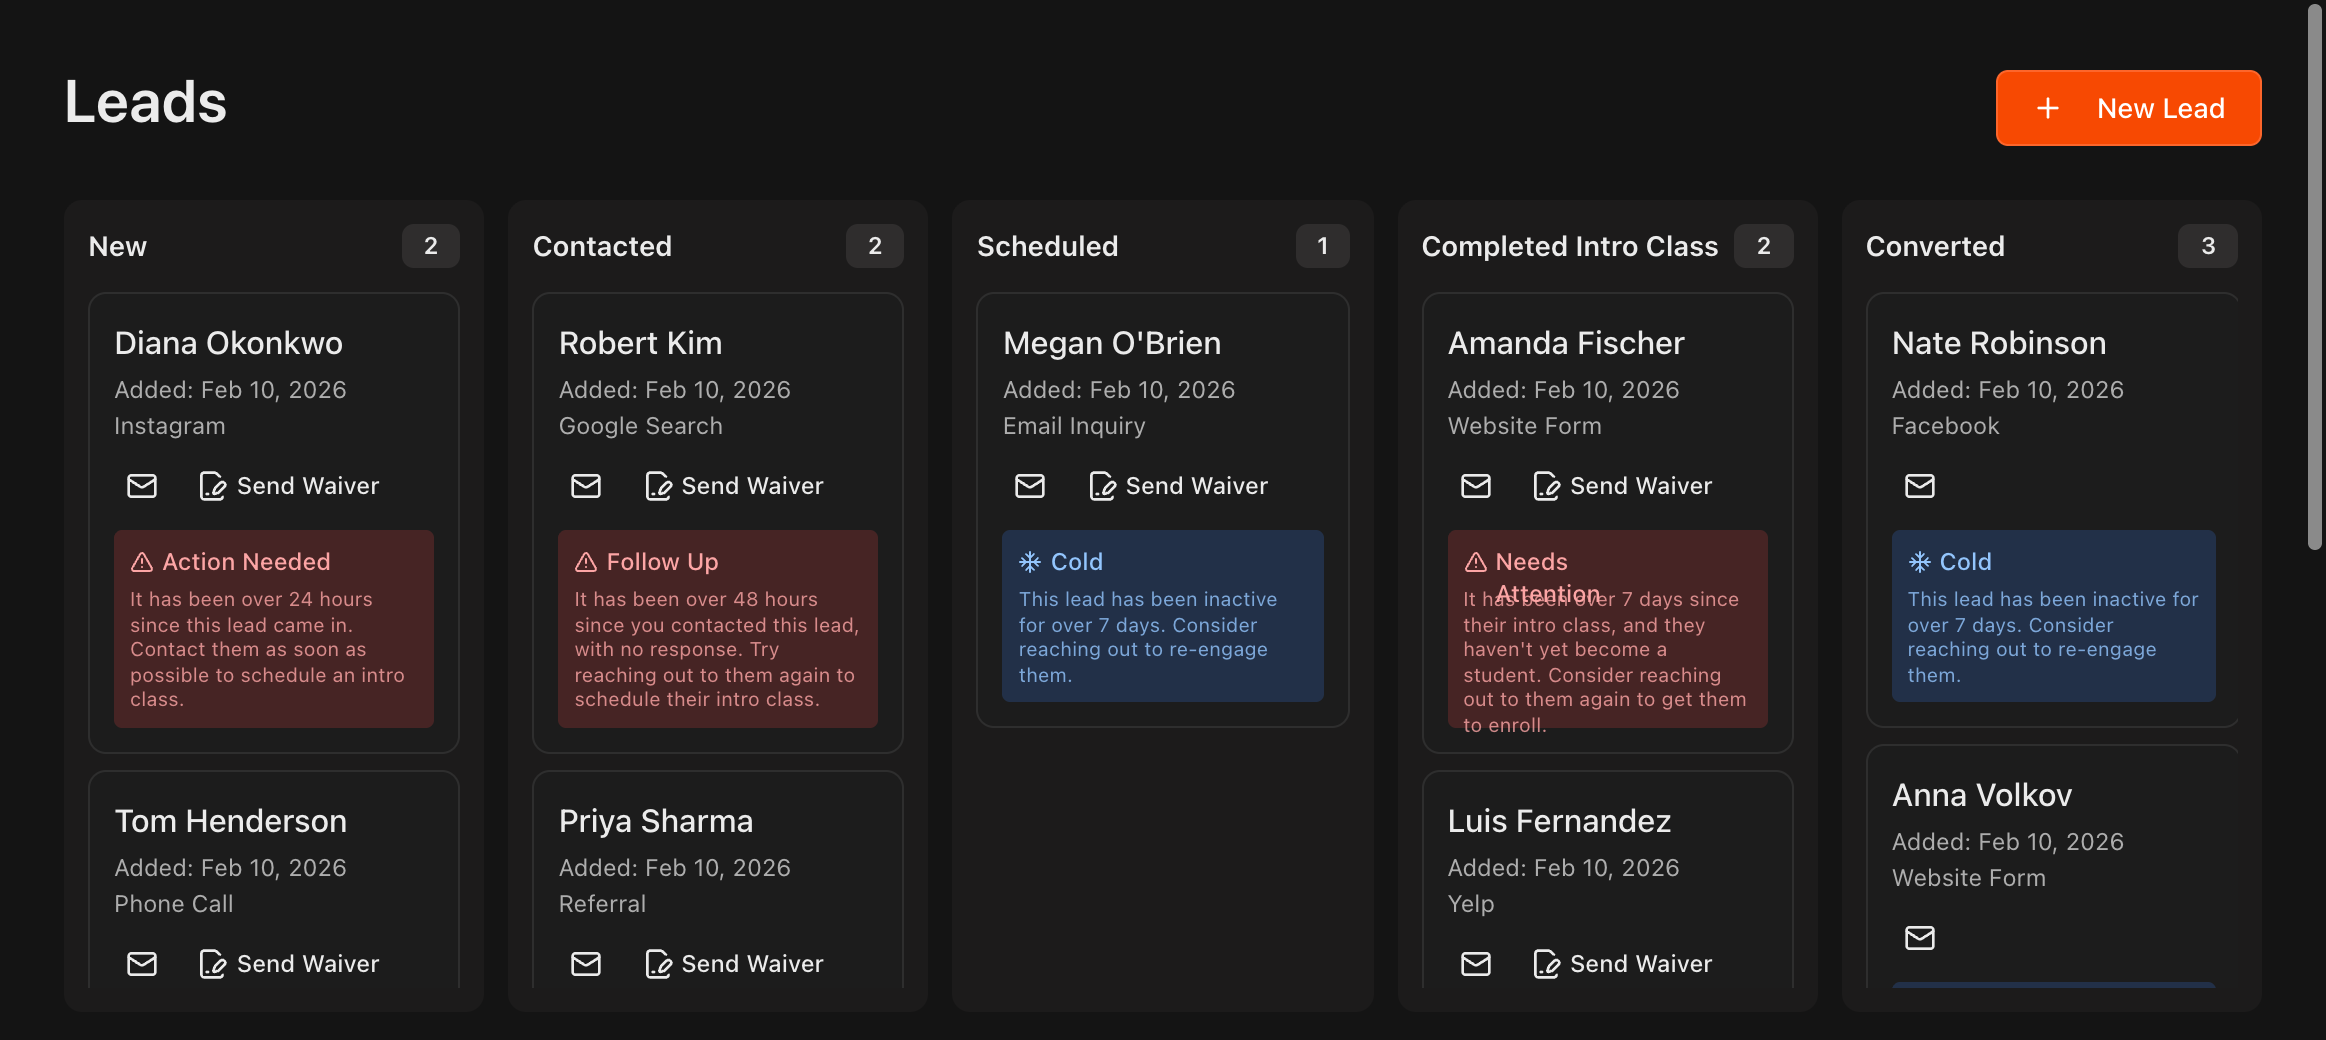
The lead appears as a card in the New column of the Leads board.
From there you can move the lead through your pipeline: Contacted, Scheduled, Completed Intro Class, and Converted.
Tip
Each lead card shows where the lead came from, so form submissions are easy to spot among your other sources.