Open the student's membership
Open the student's Student Information page and click the Billing tab.
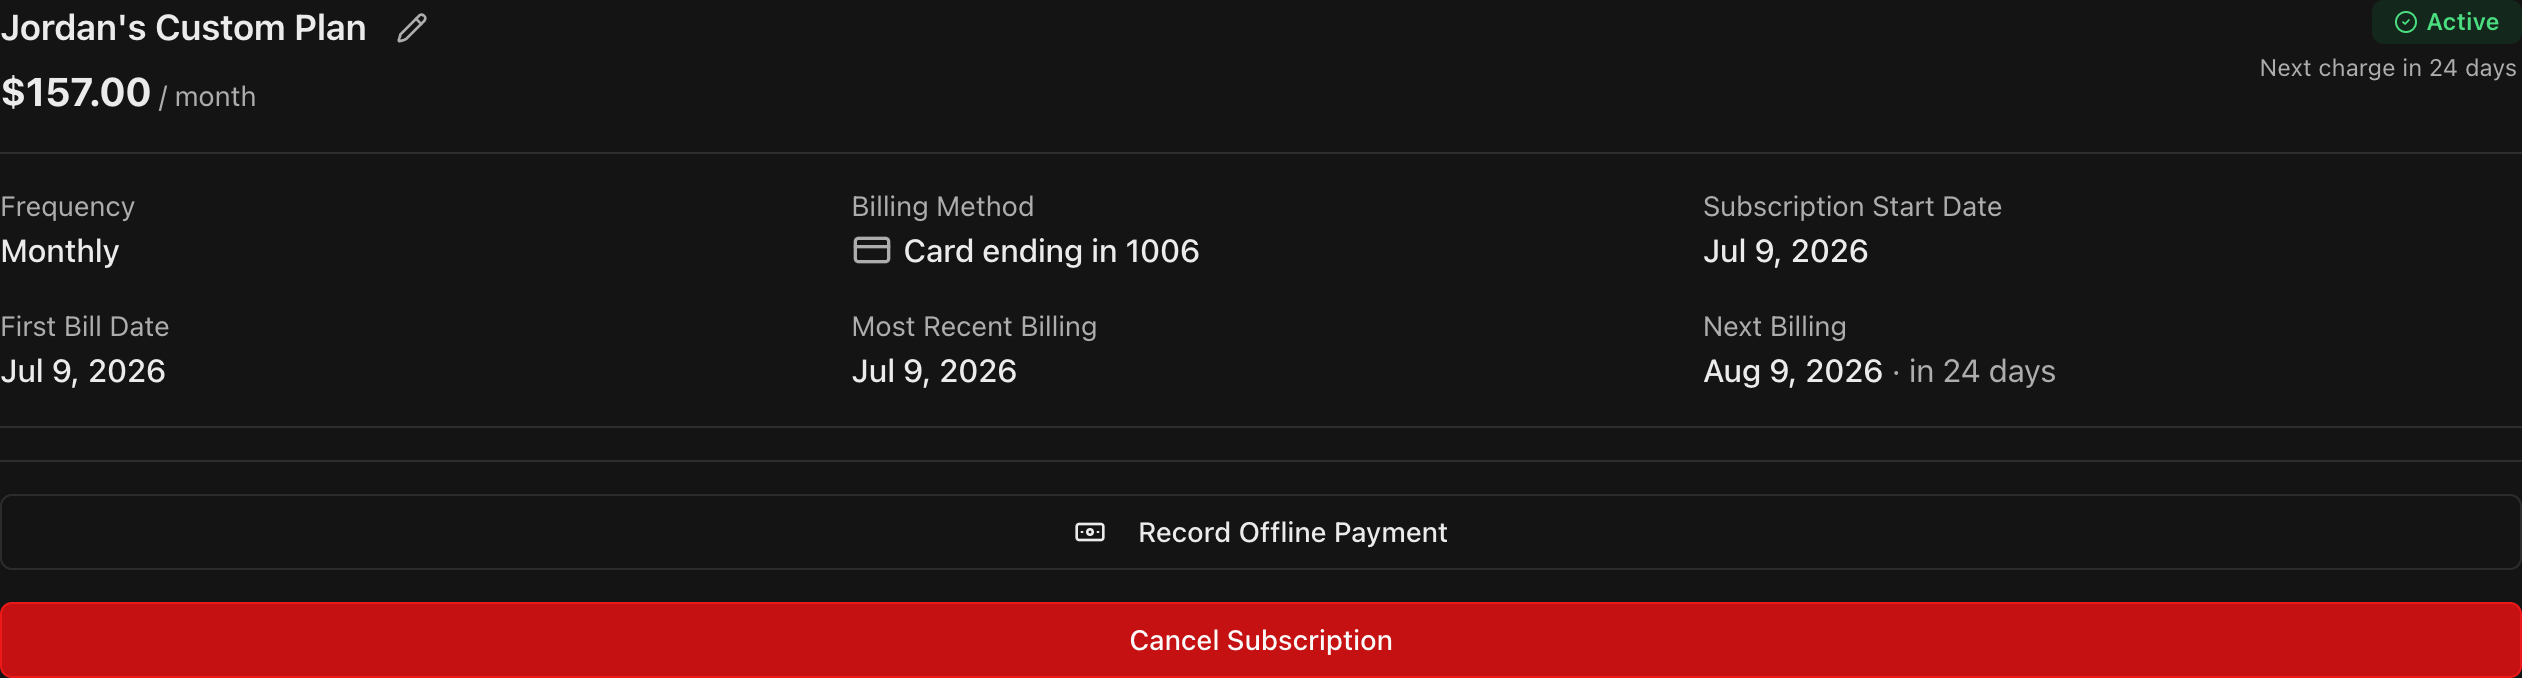
The top of the tab shows the student's current plan, price, Frequency, Billing Method, and Next Billing date at a glance.
Find the Billing Settings section
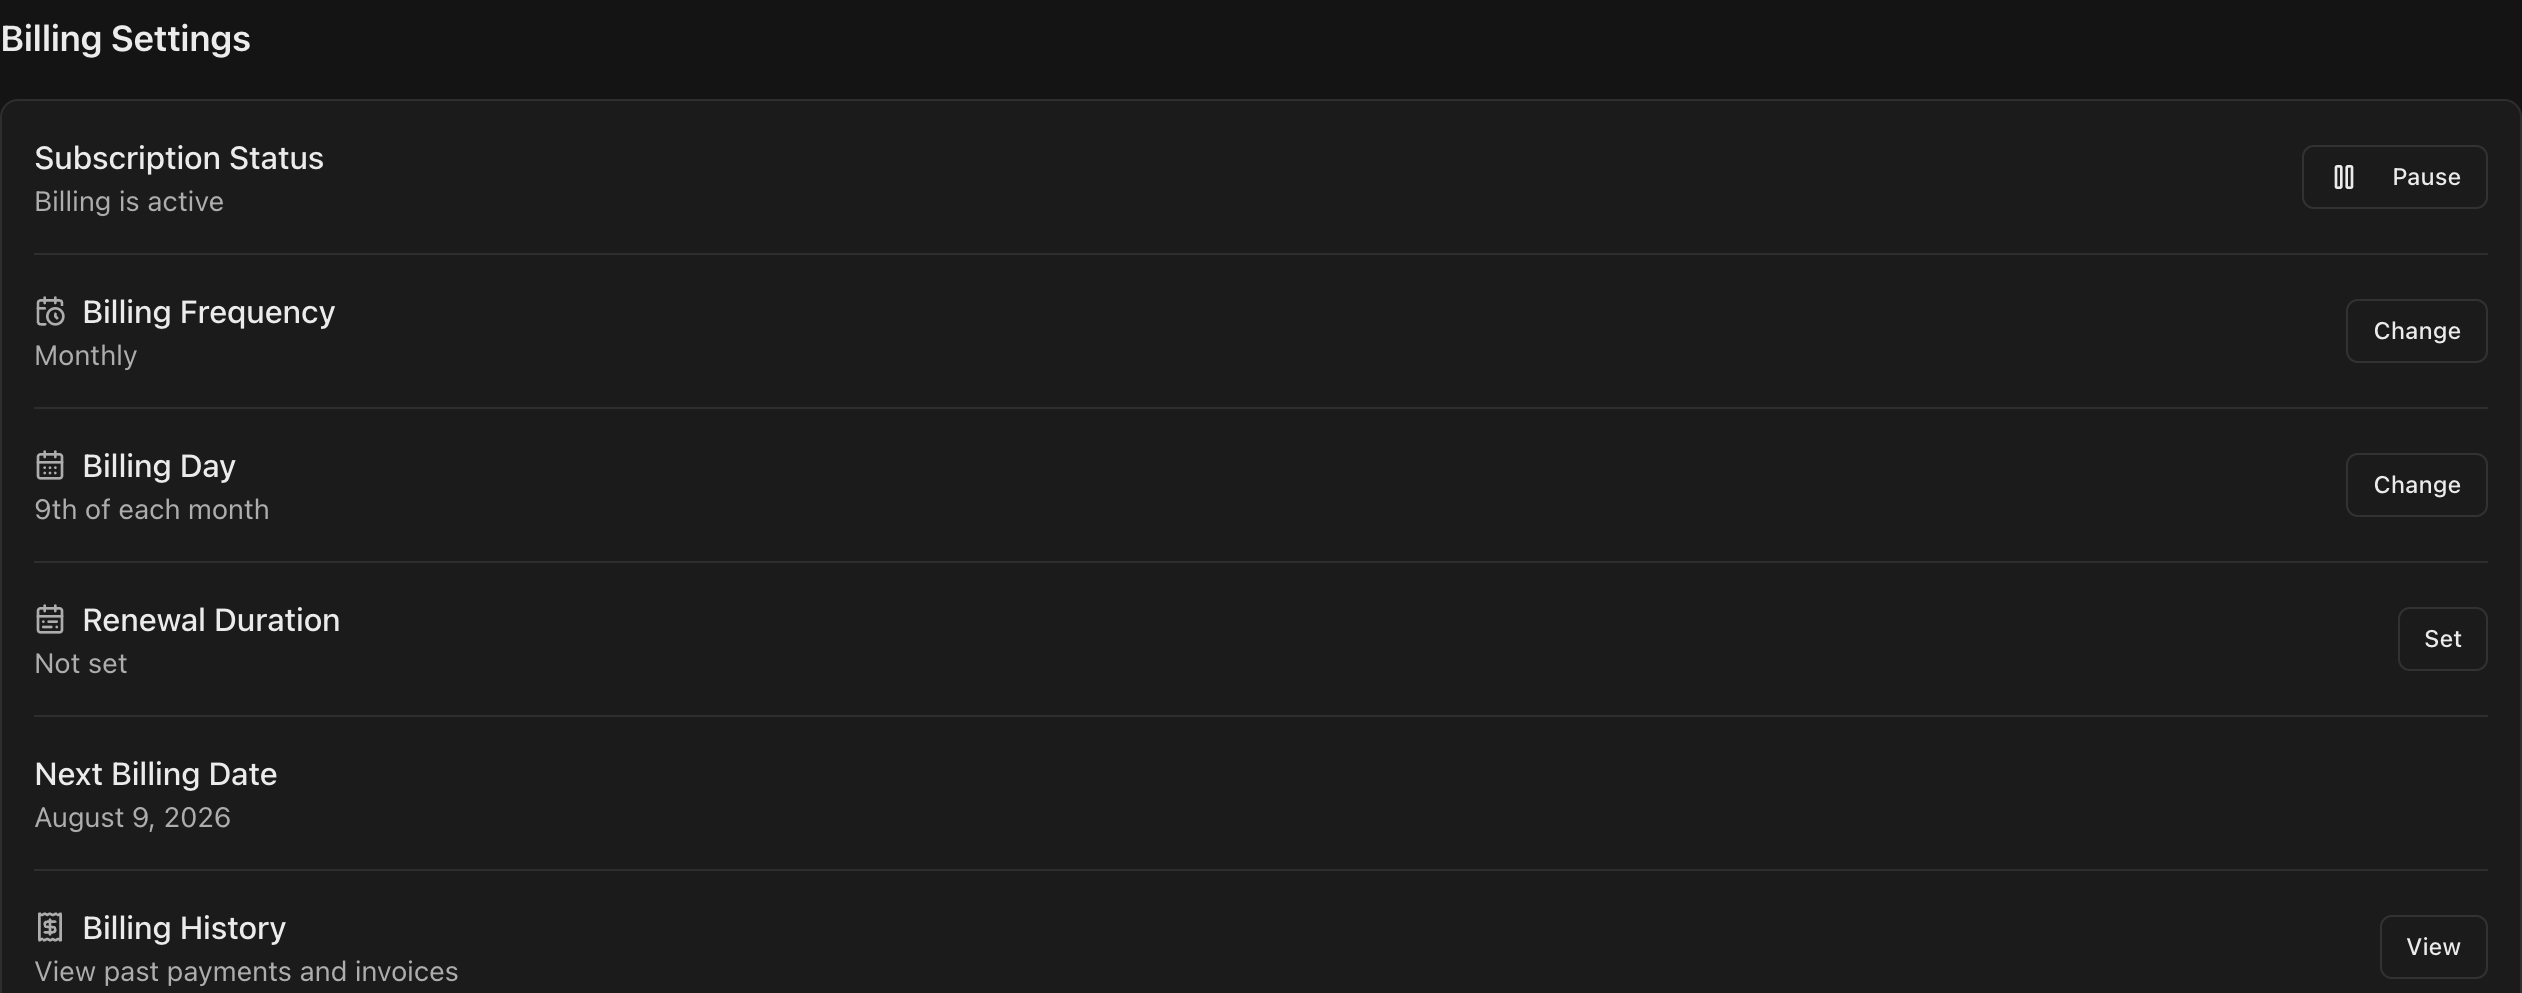
Scroll down to Billing Settings on the Billing tab.
From here you can pause the membership under Subscription Status, change the Billing Frequency, change the Billing Day, set a Renewal Duration, and view Billing History.
Change the billing frequency
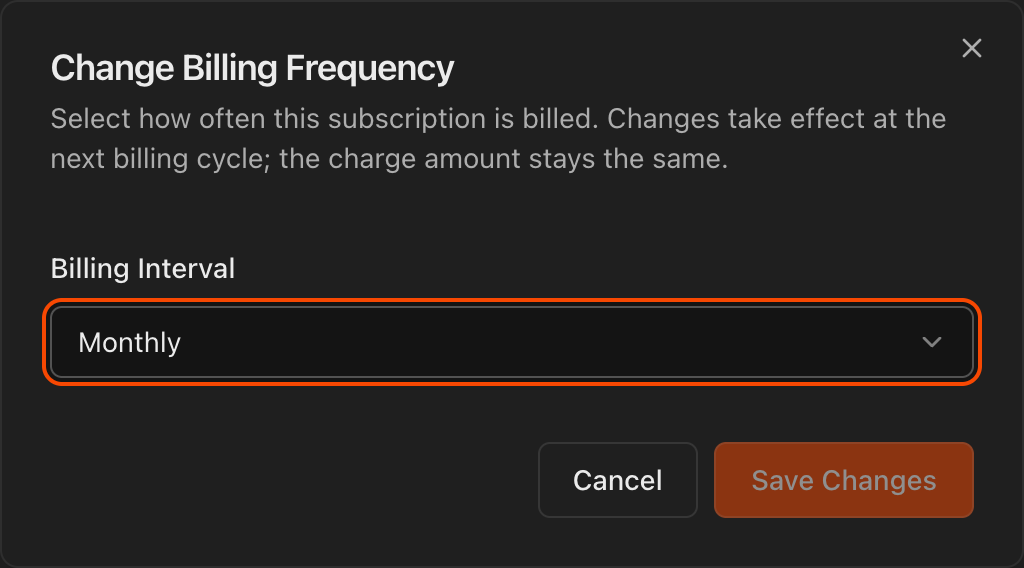
In Billing Settings, find the Billing Frequency row and click Change.
In the Change Billing Frequency dialog, pick a new Billing Interval: Weekly, Bi-Weekly, Monthly, Every 3 months, Every 6 months, Yearly, or Every 2 years.
Click Save Changes.
Note
The change takes effect at the next billing cycle, and the charge amount stays the same.
Change the billing day
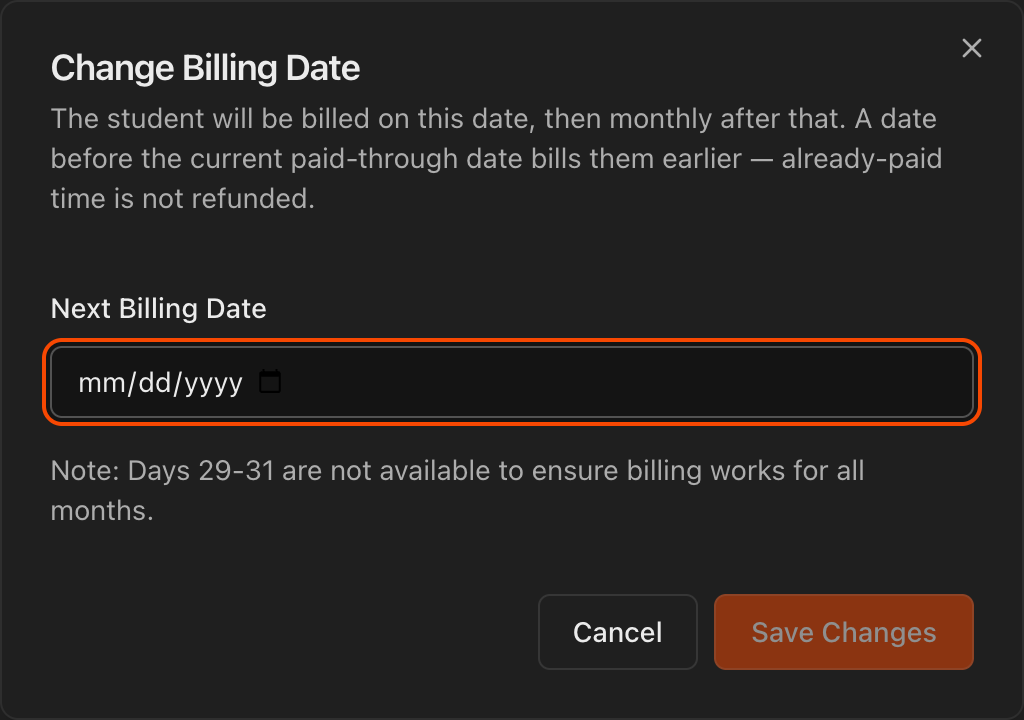
In Billing Settings, find the Billing Day row and click Change.
In the Change Billing Date dialog, set the Next Billing Date. The student is billed on that date, then on the same day each cycle after that.
Click Save Changes.
Caution
Choosing a date before the student's current paid-through date bills them earlier, and already-paid time is not refunded. Days 29 to 31 cannot be selected so billing works in every month.
Pause the membership
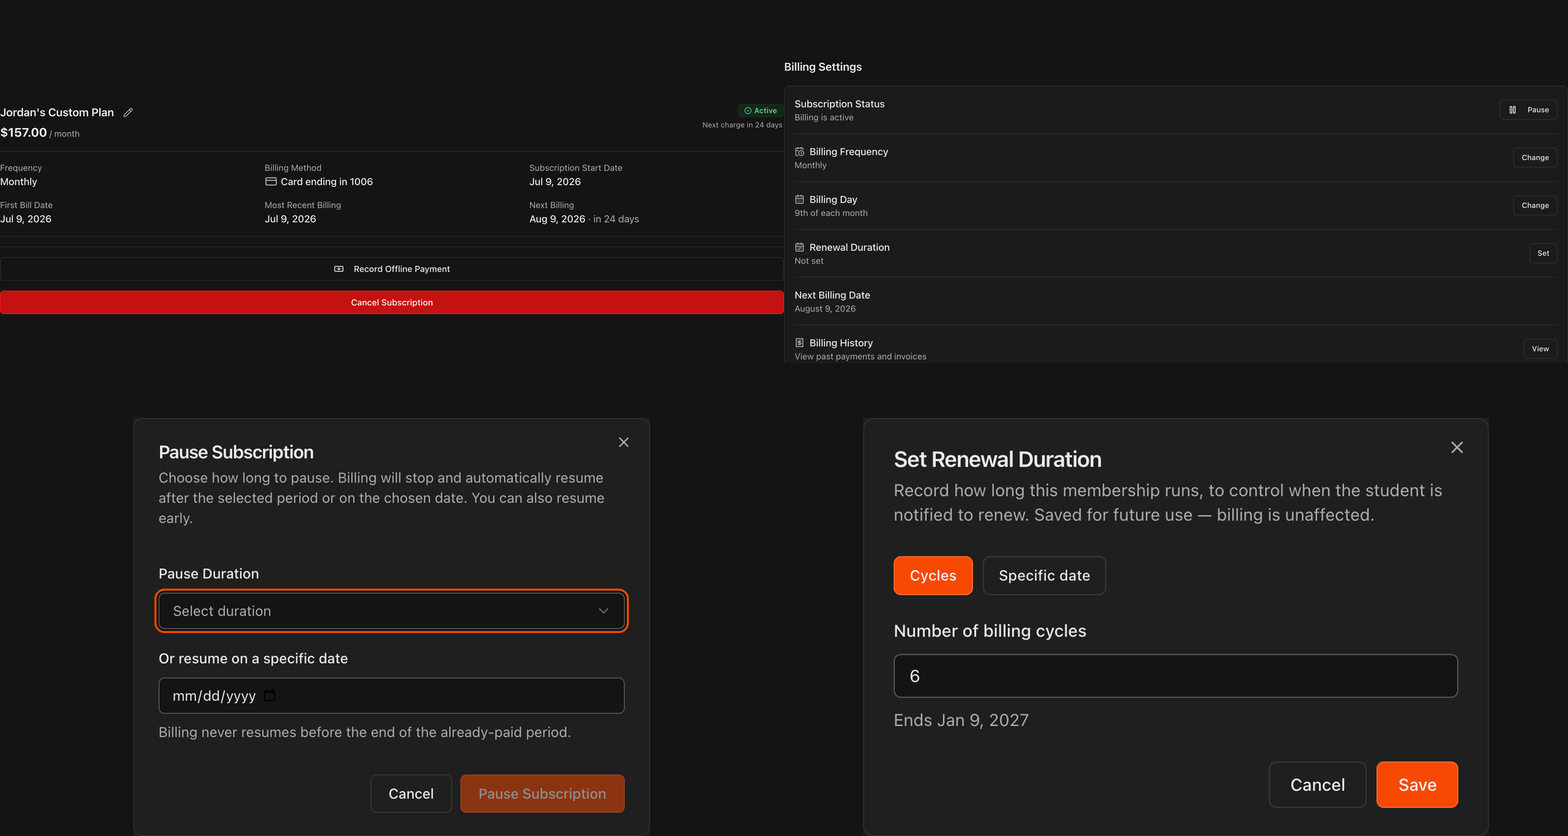
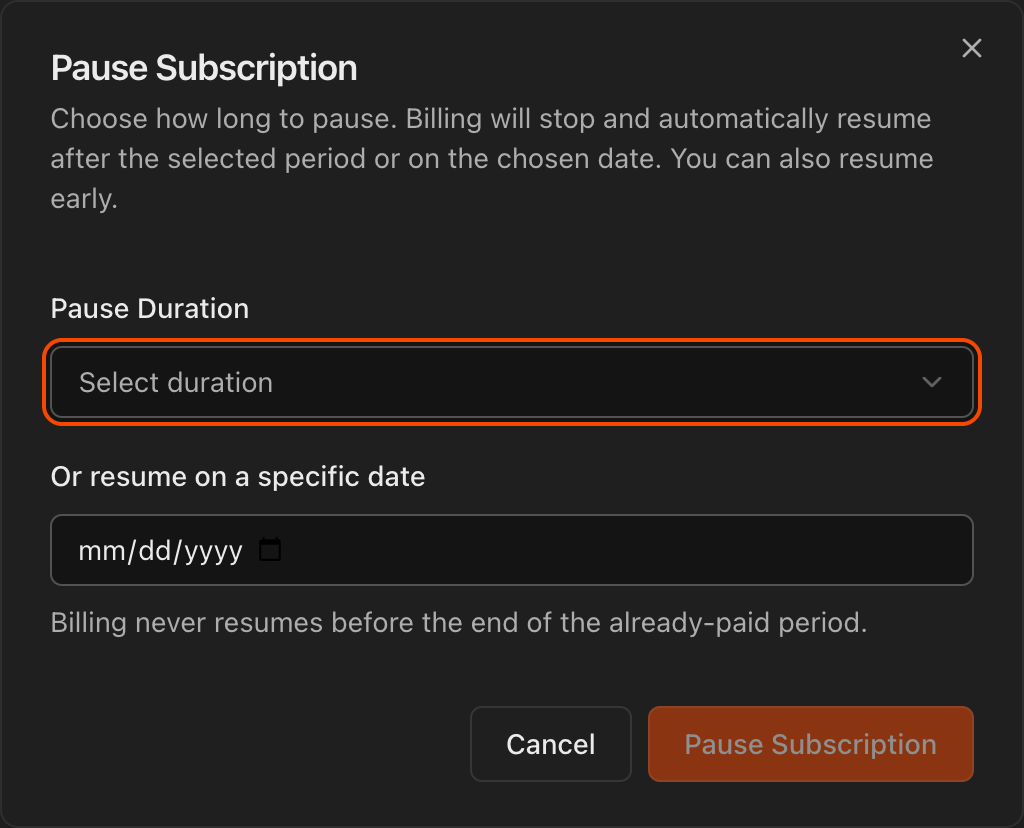
Under Subscription Status, click Pause.
Choose a Pause Duration, or pick a date under Or resume on a specific date to automatically resume billing on that date.
Click Pause Subscription to confirm. You can also resume early at any time.
Note
Billing never resumes before the end of the period the student has already paid for.
Set a renewal duration and auto-renewal
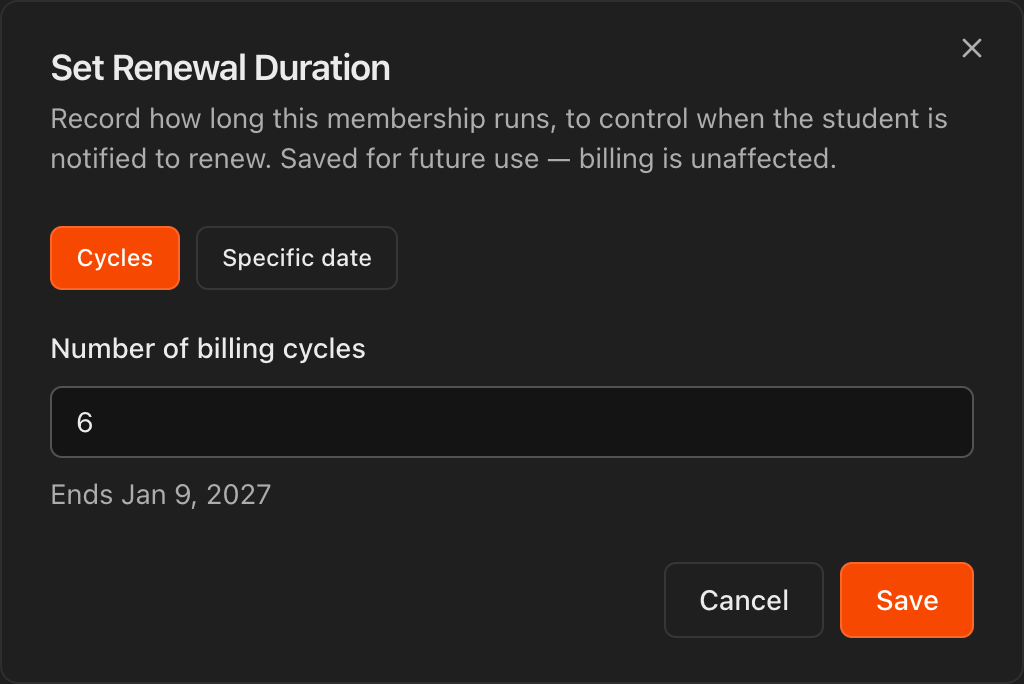
Next to Renewal Duration, click Set.
Choose Cycles and enter a number of billing cycles, or choose Specific date. The end date is shown before you save.
Click Save to record how long the membership runs, which controls when the student is notified to renew.
Once a renewal duration is set, an Auto Renew toggle appears in Billing Settings. It controls whether billing resumes automatically after the renewal date, or not.
Review expiring and expired memberships
Go to Financials and click Expiring Memberships in the row of section buttons.
Use the Expiring and Expired buttons with the 1W and 1M range buttons.
Expiring shows memberships with a renewal date within the next week or month and auto-renewal set to off. Expired shows memberships whose renewal dates have passed with auto-renewal set to off.
Memberships expiring within 30 days also appear in Financial Alerts on the Overview page.
Caution
Kmura's billing for monthly, quarterly, bi-annual, and annual plans is calendar-anchored. A monthly plan billed on the 5th bills on the 5th of each following month, not every 30 days. We recommend against billing dates on the 29th, 30th, or 31st, since not every month has those dates.

Cancel a student's membership
Scroll to the bottom of Billing Settings on the Billing tab and click the red Cancel Membership button.
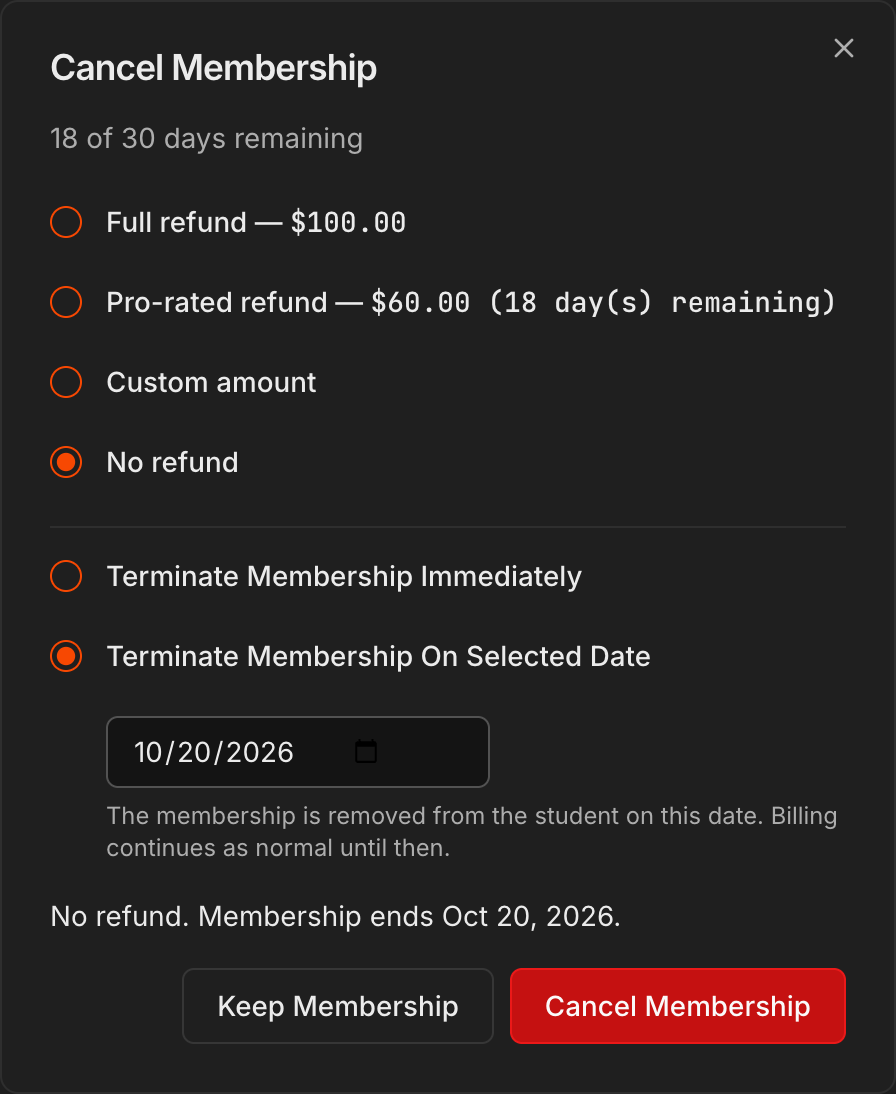
Choose what to refund: Full refund, Pro-rated refund (Kmura calculates the amount for the unused days), Custom amount, or No refund. Any refund is issued when you confirm.
Then choose when it ends. Terminate Membership On Selected Date is selected by default with the end of the current billing period filled in. Pick any later date if you like, and billing continues as normal until then.
Choose Terminate Membership Immediately to end it right away.
The line above the buttons spells out what will happen, for example "No refund. Membership ends Oct 20, 2026." Click Cancel Membership (it reads Cancel & Refund when a refund is selected) to confirm, or Keep Membership to back out.
Note
Ended and cancelled memberships are listed under **Canceled/Previous subscriptions** at the bottom of the **Billing** tab.
Caution
Cancelling ends that membership. If the student only needs a break, use **Pause** (Step 5) instead so their plan, price, and billing day are preserved.
Note
Cancelling does not move the student to Alumni by itself. Turn on **Alumni Conversion** under **Settings** > **Student Portal** to do that automatically on the day the plan ends, or convert them from their **Details** tab. See Converting Students To Alumni.
Rescind a scheduled cancellation
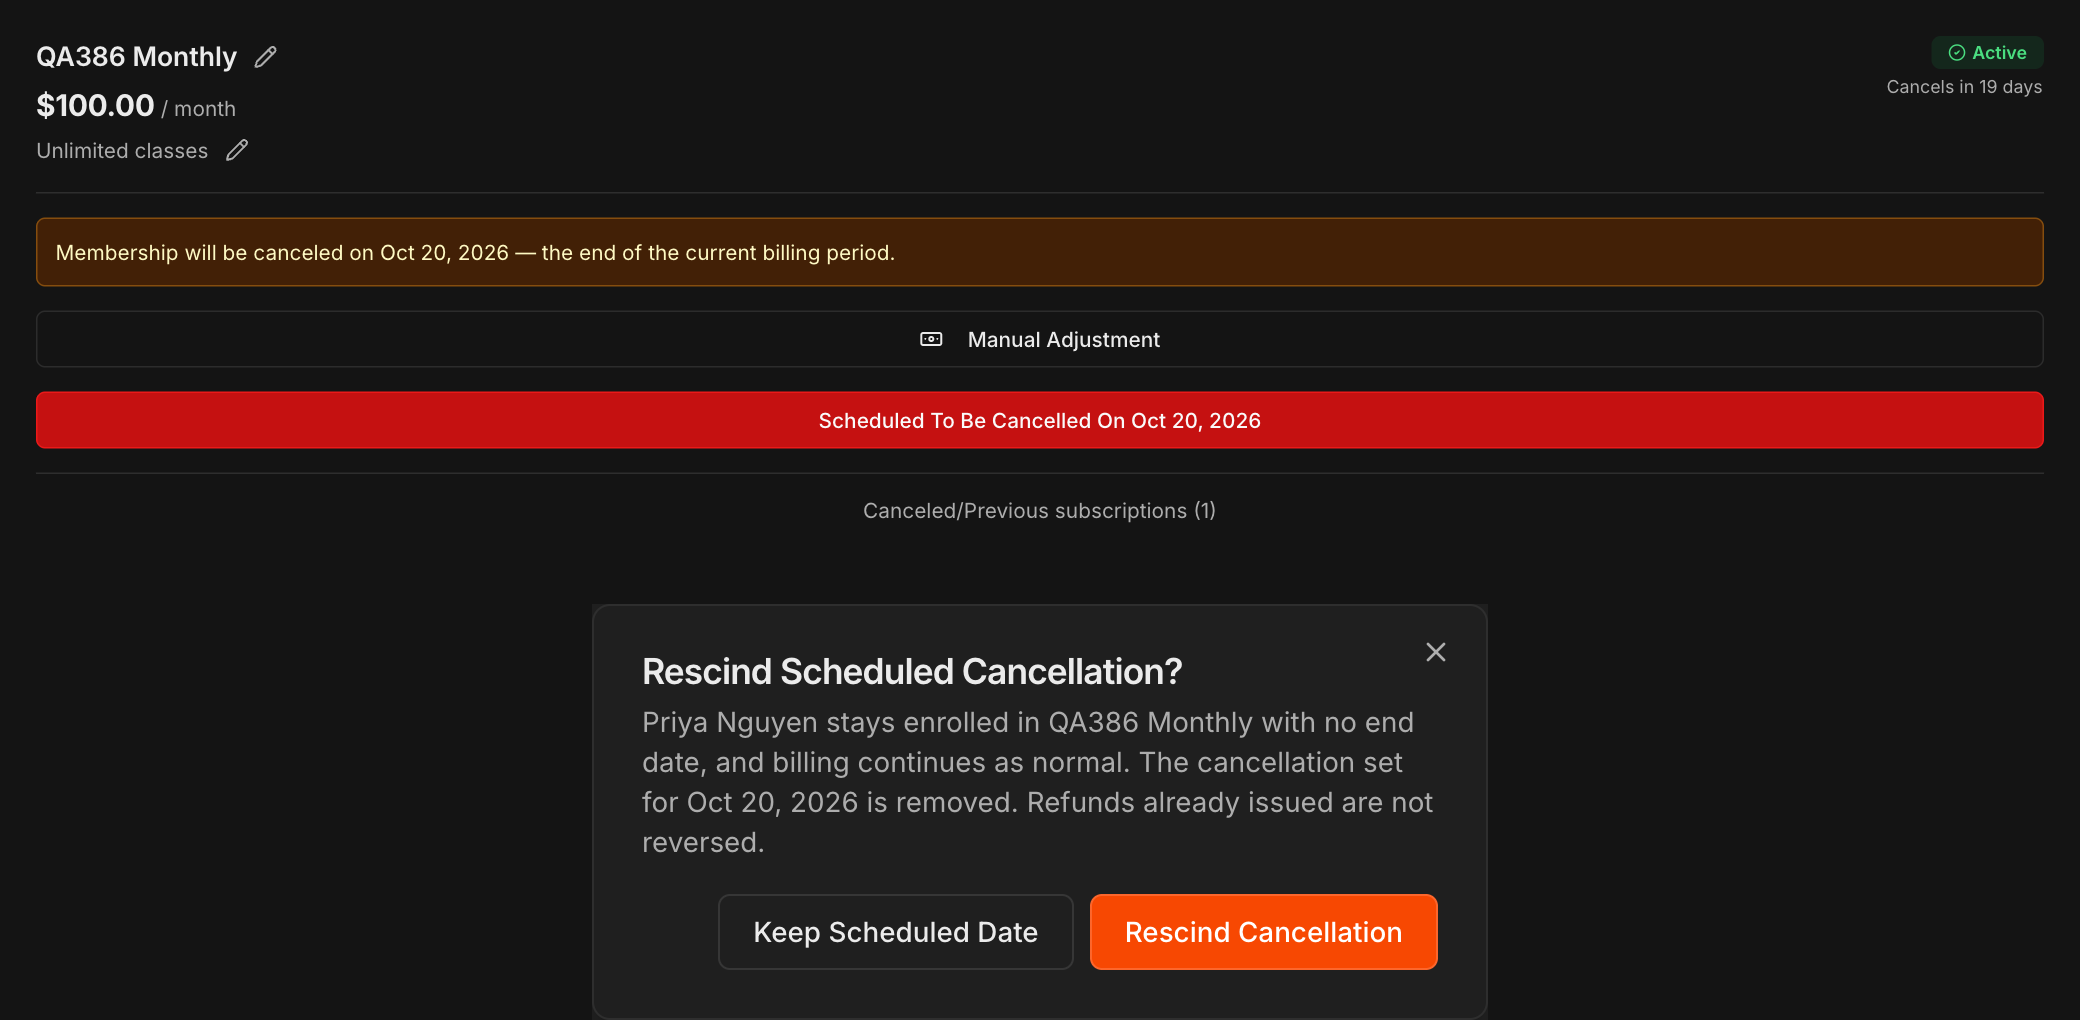
Once a cancellation date is set, the membership shows Cancels in N days, a notice with the end date, and the red button reads Scheduled To Be Cancelled On followed by that date.
To keep the student enrolled, click that button, then Rescind Cancellation. They stay in their current plan with no end date, and billing continues as normal.
To change the date, rescind the cancellation and then cancel again with the new date.
Note
Rescinding never reverses a refund that was already issued.
Issue a refund
Scroll to Charge History on the Billing tab. Every payment the student has made is listed with its status.
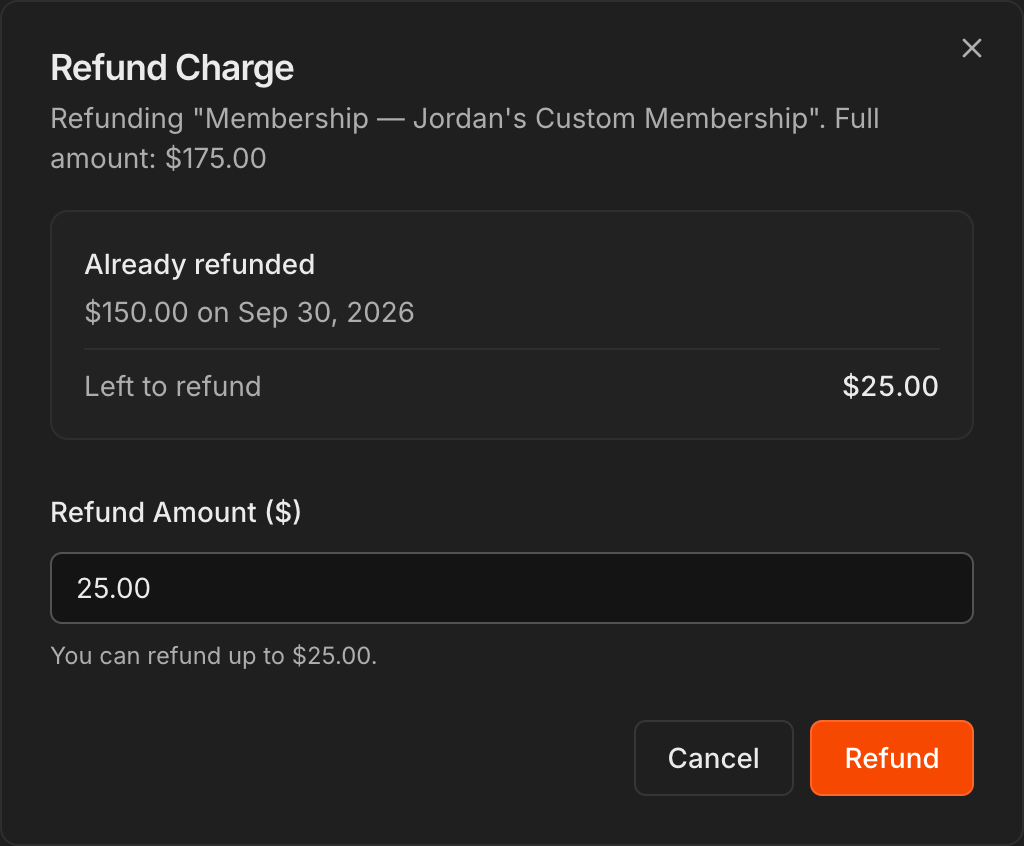
Click Refund on the charge you want to return. The Refund Charge dialog names the charge and shows its full amount.
The Refund Amount ($) field is filled in with the amount left to refund. Leave it for a full refund, or lower it to refund only part of the charge.
Click Refund to confirm. The money goes back to the card that was charged, and the row shows how much was refunded and when.
A partially refunded charge keeps its Refund button, so you can refund the rest later. The dialog then lists what was Already refunded and what is Left to refund.
Note
Refunds are returned to the original card through Kmura's payment processor and can take several business days to appear on the student's statement.
Note
Offline payments recorded as cash or check have no **Refund** button, because no card was charged.
Tip
This works for any card charge in the list, including one-time charges and merchandise. To refund as part of a cancellation instead, use the refund options in Step 8.
Update a student's payment method
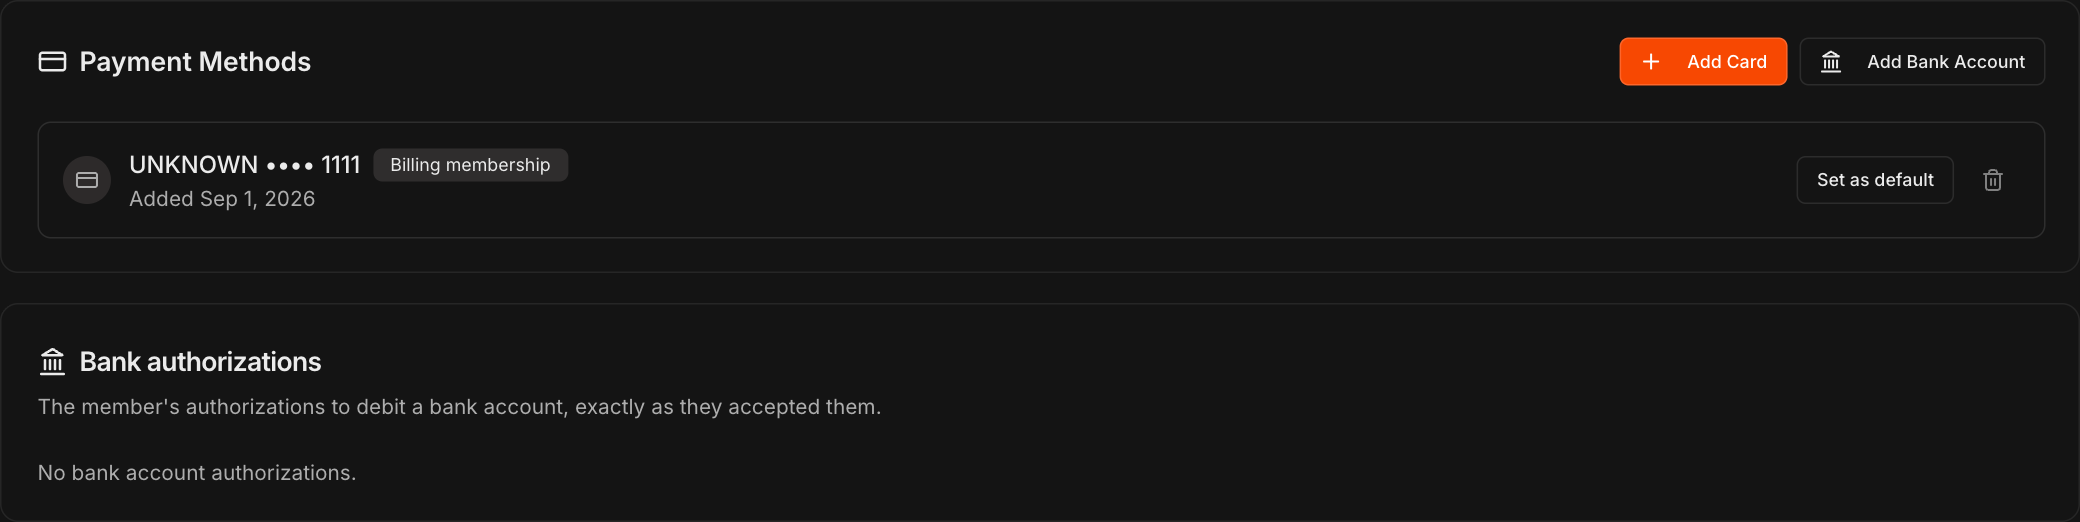
Scroll to Payment Methods on the Billing tab. It lists every card and bank account the student has saved, with the date each one was added.
Click Add Card or Add Bank Account to save a new one on the student's behalf. Students can also update their card themselves from their Kmura student portal.
The Billing membership tag shows which card or bank account pays for the student's membership.
Click Set as default to make a different method the student's default, or click the trash icon to remove one.
Below it, Bank authorizations shows each authorization a member accepted to debit a bank account, exactly as they accepted it.
Note
The student's default payment method can't be removed. Set another method as default first.
Note
When a member moves a membership onto a bank account, they accept a bank (ACH) authorization naming the account, plan, amount, and first debit date, and they receive a copy by email. Members can view or revoke their authorizations from their student portal.
Resume a past due membership
As soon as a membership's automatic charge fails, the membership is marked Past Due: the Subscription Status badge turns red, the student's header shows Past Due, and the Membership column on the Students page shows the same.
Kmura keeps retrying the payment method on file automatically, 4 more times over the following days, for 5 attempts in total. If every attempt fails, automatic billing stops.
A Billing assistant card appears on the membership with the decline reason (for example Insufficient funds), a plain-language suggestion written for that student, the date of the next automatic attempt (for example "attempt 2 of 5") and the date billing stops if every retry fails.
Click Charge now to charge the full amount owed right away. If it succeeds, the membership resumes as normal and the remaining automatic retries are cancelled.
If the card expired or was replaced, use Update card on file first, or send the student a link to do it themselves (Step 14).
Note
The same card and buttons appear on the **Financials** page under **Past Due Memberships**, and the membership shows as **Membership past due** in **Financial Alerts** on **Overview**.
Tip
Read the assistant's reason before you click **Charge now**. Charging the same card again on an insufficient-funds decline usually just adds another failed attempt.
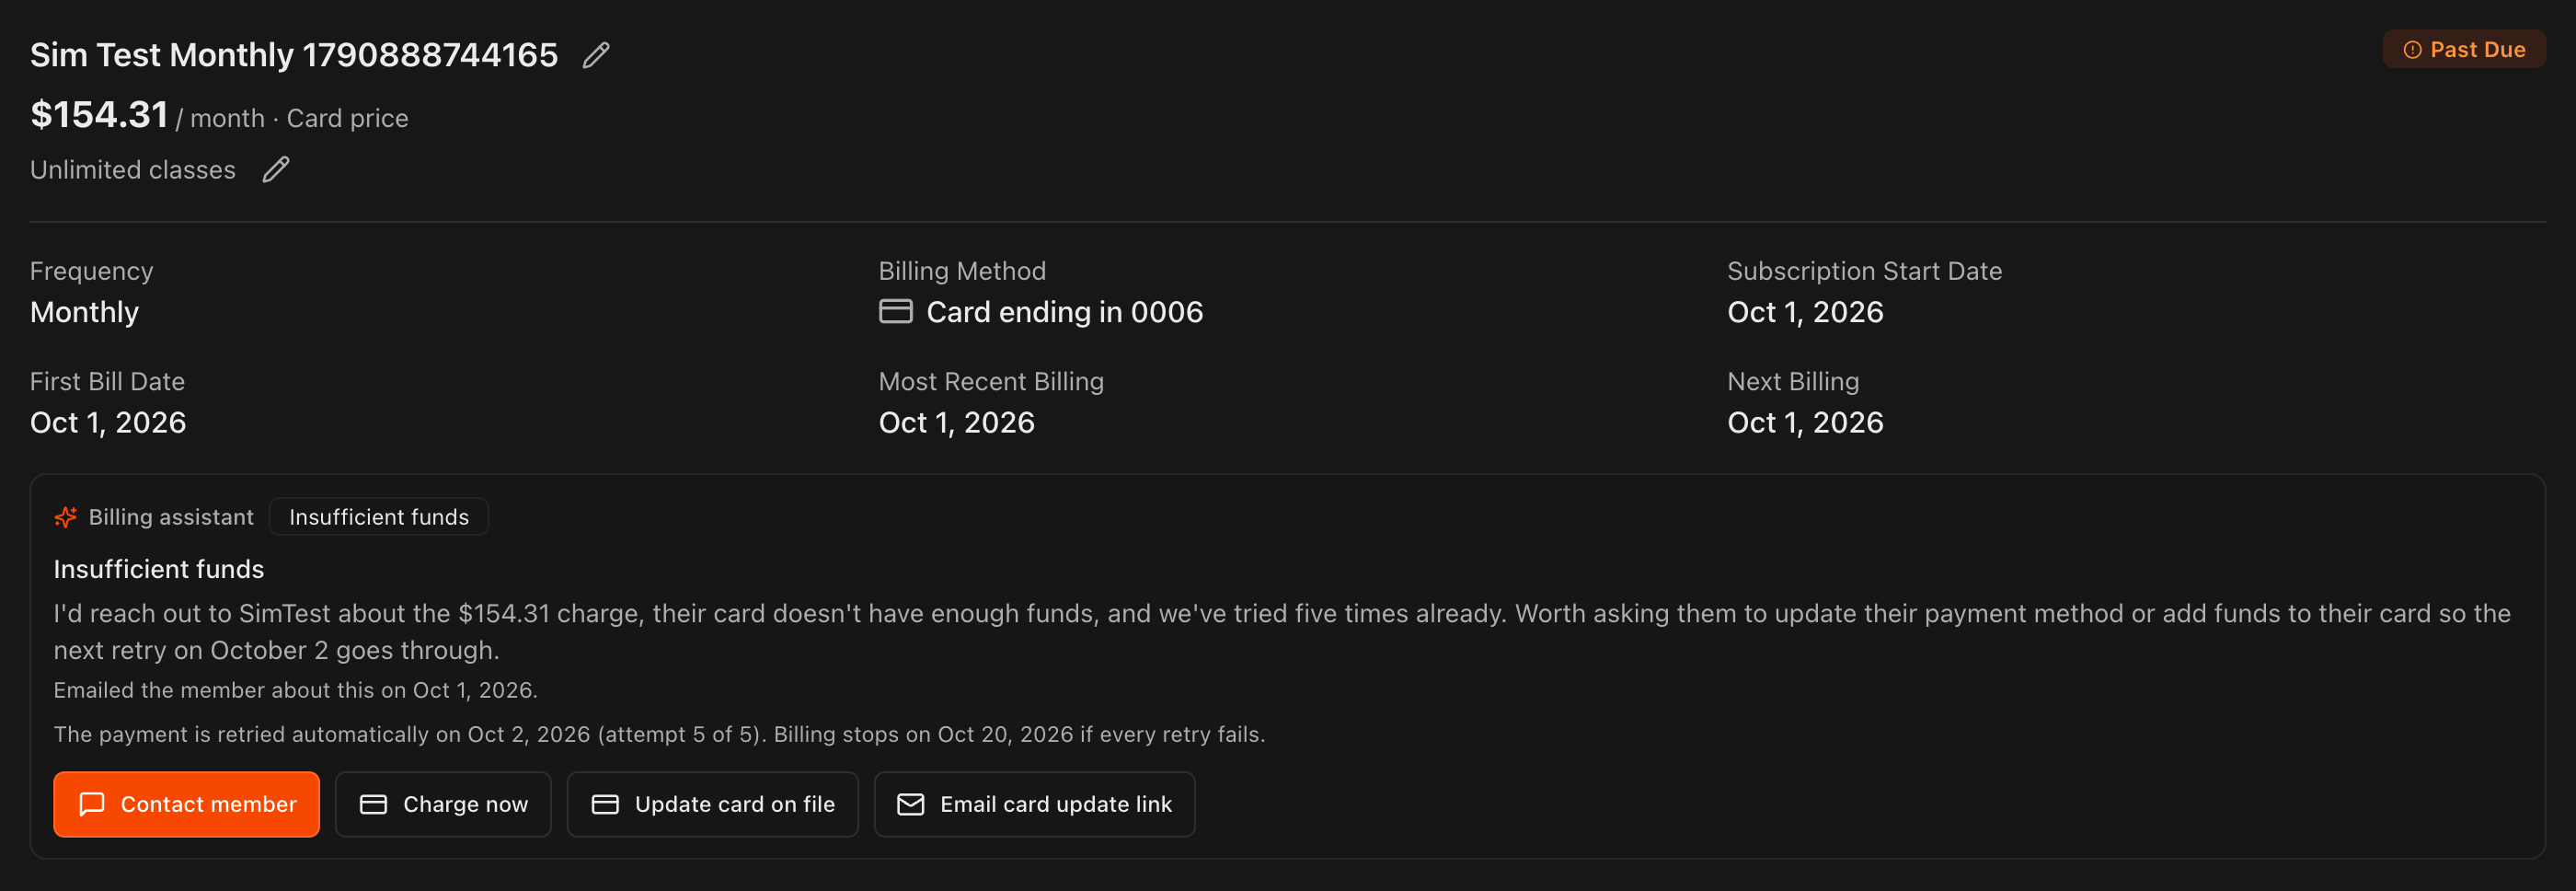
Contact the student from the Billing assistant
Click Contact member on the Billing assistant card.
Kmura's AI drafts an email for that exact situation, with To, Subject and Message filled in and a link the student can use to update their card.
Edit anything you like, then click Send Email. The card records when the student was last emailed about this charge.
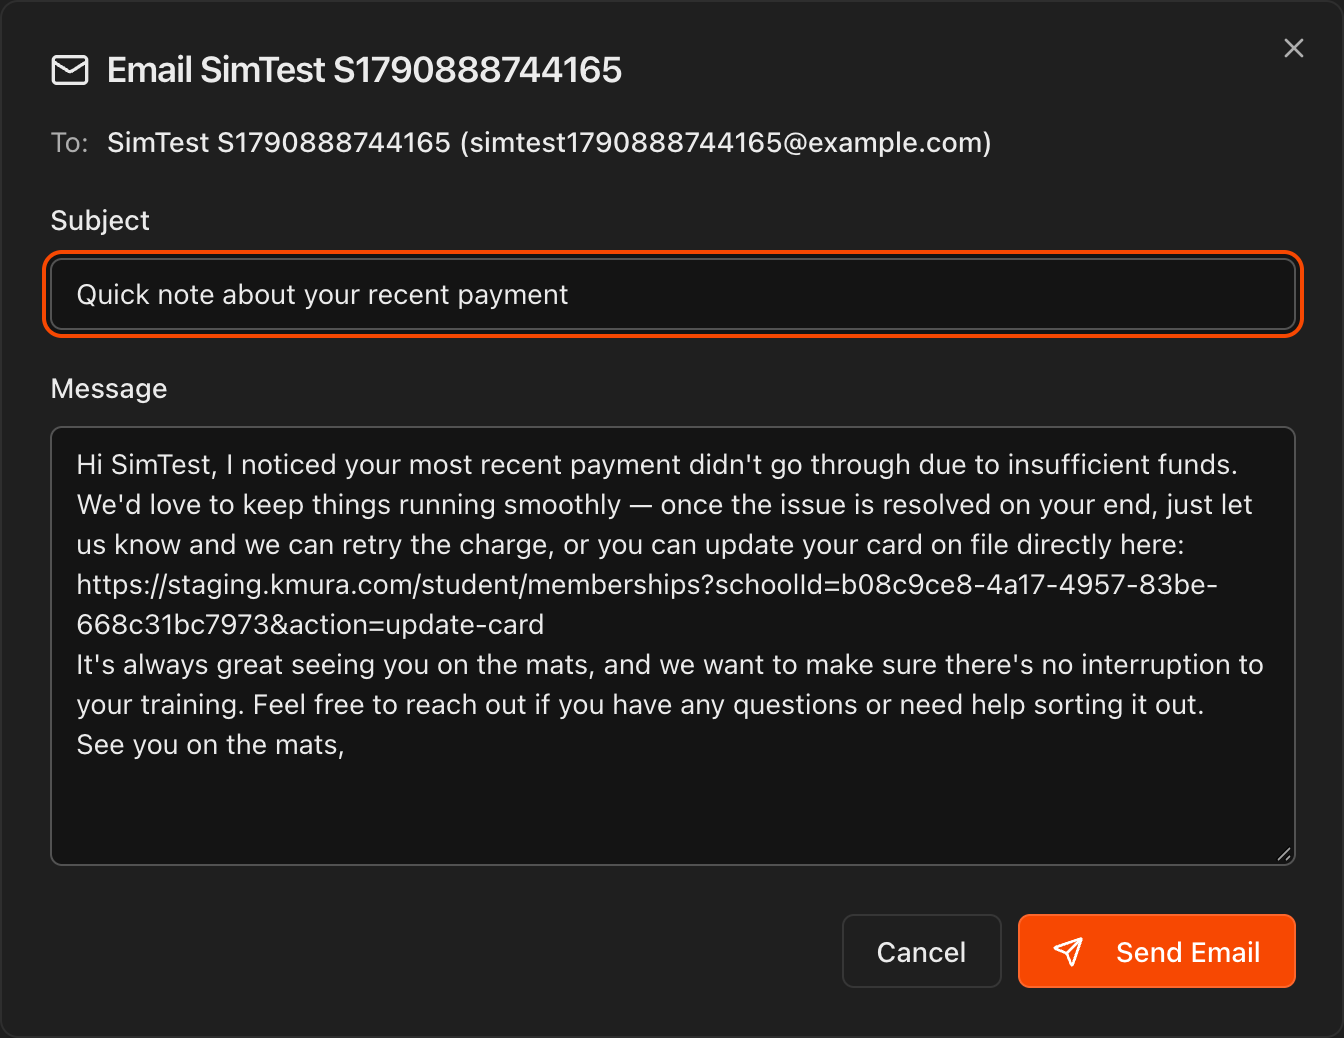
Email the student a card update link
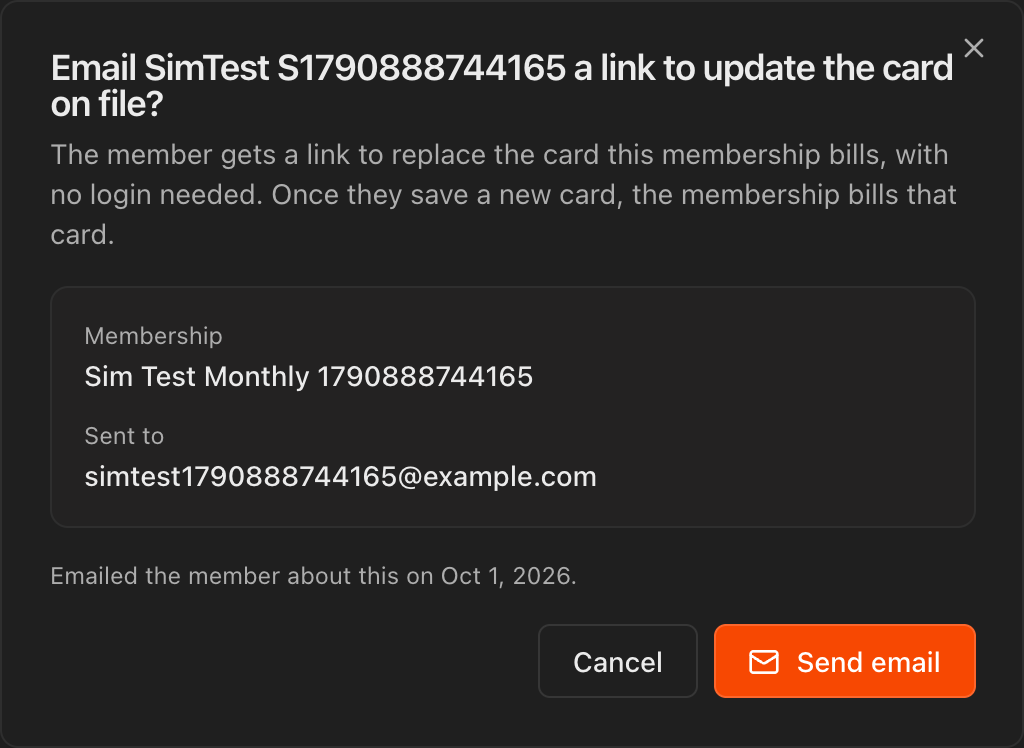
Click Email card update link on the Billing assistant card and confirm with Send email.
The student gets a link to replace the card this membership bills, with no login needed. Once they save a new card, the membership bills that card from then on.
Note
The link only updates the card. You still need **Charge now** to collect the amount owed, unless the next automatic attempt collects it first.